If you have ever tried to add a second Facebook Pixel in your Shopify preferences, you’ve hit the wall. Shopify is built for simplicity, and their native integration assumes a straightforward “one business, one pixel” model.
However, modern ecommerce strategies often require more flexibility. Perhaps you are a dropshipper managing multiple niches on one storefront. Maybe you have hired a marketing agency that wants to track performance on their own ad account pixel. or perhaps you simply want a “backup pixel” collecting data in case your primary ad account faces a ban—a common fear for many Meta advertisers.
The inability to track via multiple pixels can leave you with data gaps or force you to share sensitive account access with third parties.
This guide covers exactly how to add multiple Facebook pixels on Shopify correctly, ensuring you capture accurate data without slowing down your site or duplicating events.
Can I have multiple Pixels on Shopify?
Yes — but not natively. Shopify’s default Facebook & Instagram sales channel allows you to connect only one Meta (Facebook) pixel. To install multiple pixels, you must use a third-party solution such as Pixee – Multi Pixel & Meta Ads, which supports multiple pixel setups with seamless server-side event tracking.
Summary
- The Constraint: Native Shopify integration only allows one Facebook Pixel per store.
- The Solution: You can bypass this using third-party apps (safest) or editing theme.liquid code (risky).
- The Benefit: Running multiple pixels allows for backup data, separate agency accounts, and segmented audience targeting.
- The Warning: Incorrect installation leads to “double-counting” conversions and inflated ad costs.
Why Smart Brands Run Multiple Facebook Pixels on One Store
Before we get into the “how-to,” it is vital to understand the strategic value of this setup. Experienced merchants do not just add pixels for fun; they do it for data security and segmentation.
1. Creating a Data Backup (The “Insurance” Pixel)
Meta’s ad policies can be volatile. If your primary ad account gets restricted, you lose access to the pixel data associated with it. By running a second, passive pixel on a separate Business Manager, you ensure that your audience data (PageViews, AddToCarts, Purchases) is still being collected. If you ever need to switch accounts, your new pixel is already seasoned.
2. Niche and Collection Segmentation
General stores often sell vastly different products (e.g., pet supplies and kitchen gadgets). Using a single pixel aggregates this data, which can confuse Meta’s algorithm. Advanced users may install specific pixels that only fire on certain product collections, allowing for cleaner audience signals.
3. Agency vs. In-House Tracking
If you hire a performance marketing agency, they often prefer to run ads using their own pixel to prove their ROAS (Return on Ad Spend). This keeps their data separate from your organic or in-house retargeting efforts.
Recommended Blogs for You:
👉 Event Match Quality Explained
👉 Dynamic Product Ads on Facebook
👉 Diagnose Your Facebook Ads Campaign in Shopify
👉 How to Write Facebook Ad Copy for Shopify Products
How to Add Multiple Facebook Pixels on Shopify
Method 1: Using a Third-Party App (Recommended for Accuracy)
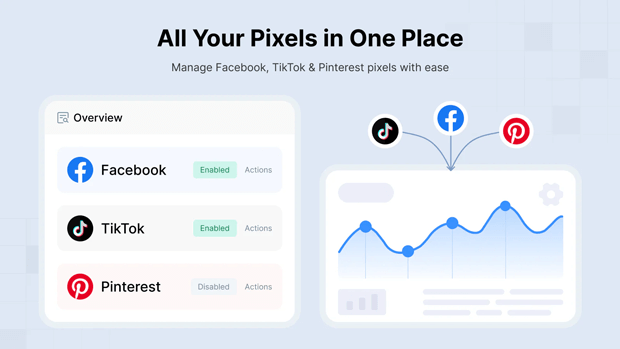
Using a dedicated app like Pixee ‑ Multi Pixel & Meta Ads is the most reliable way to bypass Shopify’s single-pixel limit. It centralizes your Facebook, TikTok, and Pinterest tracking into one dashboard without requiring any manual theme liquid edits.
How to set this up:
Install Pixee ‑ Multi Pixel & Meta Ads to your Shopify store.
From the app dashboard, setup your first Pixel ID to establish your baseline tracking.
In the top-right corner of the pixel list, click the “Add New Pixel” button.
Add your second Meta Pixel ID. You can also define specific firing rules here if you only want this pixel to track specific pages or collections.
To ensure data accuracy against iOS 14+ restrictions, toggle the Conversion API setting to “On.” Paste your Meta Access Token (found in your Facebook Events Manager settings) to authorize the server-side connection.
Click the Save button.
⚠️ Critical Configuration Note: To avoid the “double-counting” error, ensure that each unique Pixel ID is managed only through Pixee. If you have the same Pixel ID active in both the native Shopify Facebook channel and Pixee, Meta will record duplicate conversions, inflating your reported revenue and confusing the ad algorithm. For best results, use Pixee as your primary hub for all multi-pixel management.
Why this wins: It prevents the “double-counting” error. If you manually paste code while the native integration is running, you often get duplicate events. Apps like Pixee are built to recognize the native pixel and ensure the secondary pixel fires cleanly alongside it.
How to Verify Your Multi-Pixel Setup
Once you have set up your second (or third) pixel, do not launch ads immediately. Verify the data.
Install the Meta Pixel Helper: This is a free Chrome extension.
Browse Your Store: Go to a product page. Click the extension icon. You should see two distinct Pixel IDs.
Check for Errors: Look for yellow warnings. If you see “Duplicate Event,” check if you have accidentally installed the same pixel twice.
Method 2: Hardcoding into theme.liquid (For Developers)
If you are comfortable with HTML/Liquid and do not want to use an app, you can manually install the base code. However, be warned: manual code often fails to track the “Purchase” event reliably because Shopify protects the checkout order-status page.
Step 1: Get Your Base Code
Go to your Facebook Events Manager > Data Sources > Add New Integration > Manually add code to website. Copy the base script.
Step 2: Edit Theme Code
- Go to Shopify Admin > Online Store > Themes.
- Click the three dots next to your active theme and select Edit code.
- Locate the theme.liquid file.
- Paste your Facebook Pixel base code immediately before the closing </head> tag.
Step 3: Add Standard Events (The Hard Part)
Just pasting the base code only tracks “PageViews.” You must now write custom Javascript to trigger AddToCart when a button is clicked, and Purchase when a thank-you page loads.
Critical Note: Since Shopify moved to “Checkout Extensibility,” getting manual pixels to fire on the Thank You page is increasingly difficult without an app pixel extension. For most merchants, manual coding is no longer a sustainable strategy for conversion tracking.
Method 3: Google Tag Manager (The Enterprise Route)
Google Tag Manager (GTM) is a powerful container that holds all your tracking scripts. You can use GTM to fire multiple Facebook Pixels based on complex triggers.
- Install GTM: Add the GTM container code to your theme.liquid.
- Create Tags: Create a “Custom HTML” tag for each Facebook Pixel base code.
- Set Triggers: Map Shopify events (like clicking “Add to Cart”) to GTM triggers.
The Downside: GTM on Shopify requires a deep understanding of the “Data Layer.” If your Data Layer isn’t set up to pass product IDs and prices dynamically, your pixel will fire, but it won’t know what was bought. This ruins your Dynamic Product Ads (DPA).
Common Multi-Pixel Mistakes That Hurt Data Quality
Installing the pixel is easy; installing it correctly is hard. Here are the pitfalls to avoid.
1. The “Double-Counting” Disaster
If you have the native Shopify integration active AND you paste the same pixel code into your theme.liquid, every visitor will count as two visitors. Your conversion rate will look artificially low, and your ad reporting will be wrong. Always check that you aren’t duplicating the same ID.
2. Missing Server-Side Tracking (CAPI)
Browser-side pixels (the kind you paste into code) are losing effectiveness. Experts estimate that 15-30% of events are lost due to browser restrictions. If your secondary pixel doesn’t support CAPI, it is an inferior backup.
- Solution: Ensure your multi-pixel method supports server-side sync. Tools like Pixee include CAPI support for secondary pixels, ensuring the data quality matches your primary pixel.
3. Ignoring GDPR and Consent
Adding more pixels means more tracking cookies. You must ensure your Cookie Consent banner controls all pixels, not just the native one. If a user declines tracking, your secondary manually-coded pixel might still fire illegal cookies unless you wrap it in consent logic.
What To Do Next in Your Shopify Optimization Journey
Now that you have secured your data pipeline with multiple pixels, your next focus should be Conversion Rate Optimization (CRO) . Accurate data is only useful if you can act on it.
Start analyzing the discrepancy between your ViewContent and AddToCart events in your secondary pixel’s Events Manager. If there is a massive drop-off, verify your pricing strategy or page load speed.
If you are looking to streamline this setup and want AI-powered insights on your ad performance, this is where tools like Pixee ‑ Multi Pixel & Meta Ads shine. Beyond just installing pixels, it offers diagnostics to help you understand why ads might be underperforming—turning your new data into revenue.
Frequently Asked Questions
Does adding multiple pixels slow down my Shopify store?
Technically, yes, every script adds load time. However, Facebook pixels load asynchronously, meaning they don’t stop the page from displaying. Using a streamlined app or GTM is faster than messy manual code.
Can I use different pixels for different collections?
Yes. This is called “Collection-Specific Pixel Tracking.” It usually requires Google Tag Manager or a specialized app that supports conditional firing rules.
Will Shopify ban me for using multiple pixels?
No. Shopify does not ban stores for this. The limitation is simply a UI constraint of the channel, not a violation of Terms of Service.
Does the iOS 14 update affect my secondary pixel?
Yes. That is why enabling Conversions API (Server-Side Tracking) for your secondary pixel is just as important as it is for your primary one.
Conclusion
Data is your store’s most valuable asset. Relying on a single Facebook Pixel creates a dangerous single point of failure—if that ad account goes down, your audience data disappears with it. Installing multiple pixels is the only way to create a secure backup and unlock precise audience segmentation.
While manual coding is an option, it is prone to errors like double-counting and missing server-side events. For most merchants, using a dedicated tool like Pixee is the safer, faster route to ensure every conversion is tracked accurately. Don’t wait for a tracking issue to stall your growth—secure your data pipeline today.