If you are running TikTok ads without a properly configured tracking setup, you are essentially flying blind. TikTok’s algorithm thrives on data. To find high-intent shoppers, the platform needs continuous feedback on what happens after a user clicks your ad.
Many merchants struggle with fragmented tracking, missing conversion events, or dealing with duplicate data that artificially inflates performance metrics. When your pixel setup is broken, your ad spend is wasted on audiences that will never convert.
This guide will demystify the installation process. We will walk through exactly how to set up your TikTok Pixel on Shopify, ensuring your tracking is accurate, reliable, and primed to fuel your ad campaigns for maximum return on ad spend (ROAS).
Summary
- The Main Benefit: Installing the TikTok Pixel allows you to accurately measure ad performance, optimize campaigns, and build highly targeted retargeting audiences.
- Who It Helps: Shopify merchants and DTC brands running—or planning to run—TikTok ad campaigns to drive traffic and sales.
- What You Will Learn: A clear, step-by-step process for generating your TikTok Pixel ID, installing it on your Shopify store, configuring standard events, and verifying that your data is tracking correctly.
To track TikTok ads on Shopify, generate your Pixel ID in the TikTok Ads Manager. Then, connect it to your store using Pixee ‑ Multi Pixel & Meta Ads app to capture essential e-commerce conversion events like Add to Cart and Complete Payment.
What You Need Before Adding the TikTok Pixel to Shopify
Before diving into the installation, ensure you have the foundational elements in place. Gathering these prerequisites beforehand will make the setup seamless.
- You must have an active Shopify store ready for visitors.
- You need a registered TikTok Ads account to generate your pixel.
- If you plan to manage tracking through a dedicated application, ensure you have access to your Shopify admin dashboard to install the necessary app extensions.
Step-by-Step Instructions: Installing the TikTok Pixel on Shopify
Setting up your pixel involves generating the ID on TikTok and then connecting it to your Shopify environment. Here is the exact workflow.
Step 1: Locate Your TikTok Pixel ID
First, you need to generate and locate your unique identifier within TikTok’s ecosystem.
- Log into your account and navigate to the TikTok Ads Manager.
- Go to the Assets menu and select Events.
- Click on Pixel details to find your specific TikTok Pixel ID.
- The ID will look like an alphanumeric string, for example, “C1234567890”.
Step 2: Connect the Pixel to Your Shopify Store
While you can edit your theme code manually, using a multi-pixel app streamlines the process and reduces the risk of breaking your site’s functionality.
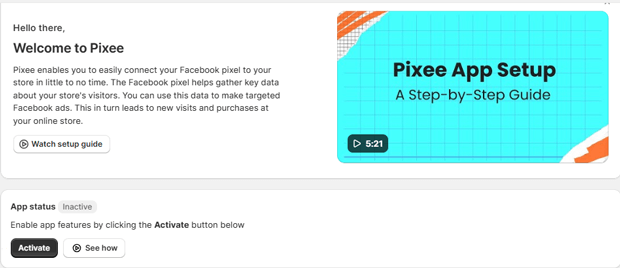
For this tutorial, we will reference the workflow used by the Pixee app.
Install the app from the Shopify App Store and Activate it.
Navigate to the TikTok Pixel section in the app’s sidebar.
Click the button to Add new pixel.
Enter a friendly name for your tracking setup and paste the TikTok Pixel ID you copied from the Ads Manager.
Click Save to finalize the connection.
Recommended Blogs for You:
👉 Facebook Events Manager for Shopify: Pixels & CAPI Explained
👉 How to Add Multiple Facebook Pixels on Shopify (The Correct Way)
👉 How to Audit Facebook Ads with AI: The Shopify Merchant’s Guide
👉 Pinterest Tag for Shopify: The Step-by-Step Implementation Guide
Step 3: Managing Multiple Tracking Pixels
As your store scales, you might need more complex tracking architectures.
- Some tracking solutions, like Pixee’s Basic or Advanced plans, allow you to manage multiple pixels simultaneously.
- Using multiple pixels is highly useful if you need different tracking for separate product categories.
- It is also beneficial for maintaining separate tracking data for different marketing teams.
- Agencies can use this feature to manage client-specific pixels effectively.
Standard Events to Track for TikTok E-commerce Campaigns
Event tracking monitors specific visitor actions on your store, sending this data back to TikTok to optimize ad delivery and build retargeting audiences. A healthy Shopify setup should track a specific funnel of standard events.
Here are the essential standard events you need to track for TikTok:
- PageView: This event triggers on every page load to capture general site traffic.
- ViewContent: This fires when a user views a specific product page, capturing details like the product ID, title, and price.
- Search: This event triggers when a user submits a query on your search results page.
- AddToCart: This crucial event fires when a product is added to the cart, sending data about the item and cart value.
- InitiateCheckout: Because Shopify restricts third-party scripts on the checkout page, this event is tracked when a customer clicks the checkout button.
- CompletePayment: This represents a successful purchase and is tracked on the thank you page using Shopify’s Web Pixel API.
Note: In some standard setups, standard events like ViewCategory or Lead are not tracked by default for TikTok.
How to Verify Your TikTok Pixel is Firing Correctly
Installation is only half the battle; verification ensures your data is accurate. Never launch a campaign without testing your events.
- Visit your store’s live website and browse a few pages.
- Add an item to your cart to trigger deeper funnel events.
- Use the TikTok Pixel Helper browser extension to see if the pixel detects your actions.
- Alternatively, you can verify the incoming data directly in the TikTok Ads Manager under Assets, then Events.
Next Steps: Fueling TikTok Dynamic Ads with a Product Feed
Once your pixel is tracking standard events accurately, the next logical step for a scaling Shopify brand is launching dynamic product ads. These ads automatically show specific products to users who have previously expressed interest in them.
To run these campaigns, you need a product feed. A product feed is a structured file containing your product information—like titles, prices, and images—that advertising platforms use to build their catalogs.
- Apps like Pixee can generate an automated XML product feed URL.
- To connect this to TikTok, navigate to the Ads Manager and open the Assets menu.
- Select Catalog, then click Create catalog.
- Choose Add data source and enter your generated feed URL.
- This ensures your TikTok ads always display the most up-to-date pricing and inventory from your Shopify store.
How to Troubleshoot Missing TikTok Events on Shopify
Even with a careful setup, technical glitches can happen. If your TikTok events are missing or reporting inaccurately, run through this troubleshooting checklist.
- Is the pixel actually firing? If the TikTok Pixel Helper shows zero events, check if your tracking app is fully activated.
- Is the theme embed enabled? Go to your Shopify Online Store, select Themes, click Customize, navigate to App embeds, and ensure your pixel app is toggled on.
- Are events missing data? If events like ViewContent or AddToCart are firing but lack values, ensure your Shopify products have their prices, titles, images, and availability properly set up in the admin.
- Are you dealing with duplicate events? If metrics seem artificially inflated, check your theme code manually to ensure you haven’t pasted duplicate pixel scripts, and verify you haven’t added the same Pixel ID twice in your tracking app.
Privacy Compliance and the GDPR Consent Banner
Modern e-commerce requires strict adherence to privacy regulations. If you sell to customers in regions like the EU, UK, or California, you must manage cookie consent before firing your TikTok pixel.
- A GDPR Consent Banner displays a cookie consent notice to visitors, allowing them to accept or decline tracking.
- When integrated properly with Shopify’s Customer Privacy API, the TikTok pixel will respect these consent settings.
- If a visitor accepts, pixel tracking is enabled, cookies are set, and their choice is remembered.
- If a visitor declines, pixel tracking is disabled, and only essential cookies are deployed.
Freequently Asked Questions
How do I find my TikTok Pixel ID?
You can find your TikTok Pixel ID in the TikTok Ads Manager. Navigate to the Assets menu, select Events, and click on Pixel details to reveal your alphanumeric ID.
Does the TikTok Pixel track Shopify purchases?
Yes, but due to Shopify checkout restrictions, the purchase event (CompletePayment) is tracked on the final order confirmation or “thank you” page via Shopify’s Web Pixel API.
Why isn’t my TikTok Pixel Helper detecting events?
If events aren’t detected, ensure your tracking app is activated, verify that the app embed is enabled in your Shopify theme customizer, and test your site in an incognito window to bypass ad blockers.
Can I use multiple TikTok Pixels on one Shopify store?
Yes, advanced tracking setups often require multiple pixels. This is commonly used to separate tracking for different marketing teams, specific product categories, or agency management.
Do I need a product feed for TikTok Ads?
A structured product feed is required if you want to run dynamic product ads or shopping campaigns on TikTok, as it provides the platform with your up-to-date inventory and pricing data.
Conclusion
Installing the TikTok Pixel on your Shopify store is a non-negotiable step if you want to run profitable ad campaigns.
By carefully generating your ID, mapping the correct standard events from PageView to CompletePayment, and verifying the setup with the Pixel Helper, you ensure your ad budget is guided by accurate data.
Take the time to verify your tracking today. Once your data flow is secure, you can confidently scale your campaigns, build a dynamic product feed, and start capturing high-intent audiences across the platform.