When a customer changes their mind, an e-commerce order shifts from a simple transaction into an accounting puzzle. If you run a store on Shopify, you already know that while the platform makes processing payments effortless, managing post-purchase changes is an entirely different story.
When you issue a partial refund, replace a broken item, or swap a product size, Shopify updates the order’s history and timeline. However, it does not automatically build a new, legally compliant invoice or issue a separate credit note.
For merchants selling globally—especially to B2B buyers or within regions with strict tax rules like the UK and EU—this missing paperwork causes major headaches. It leads to unbalanced books, confused accountants, and manual work entry. This guide explores how to handle partial refunds, credit notes, and exchanges in Shopify without breaking your financial tracking or your customer experience.
Summary
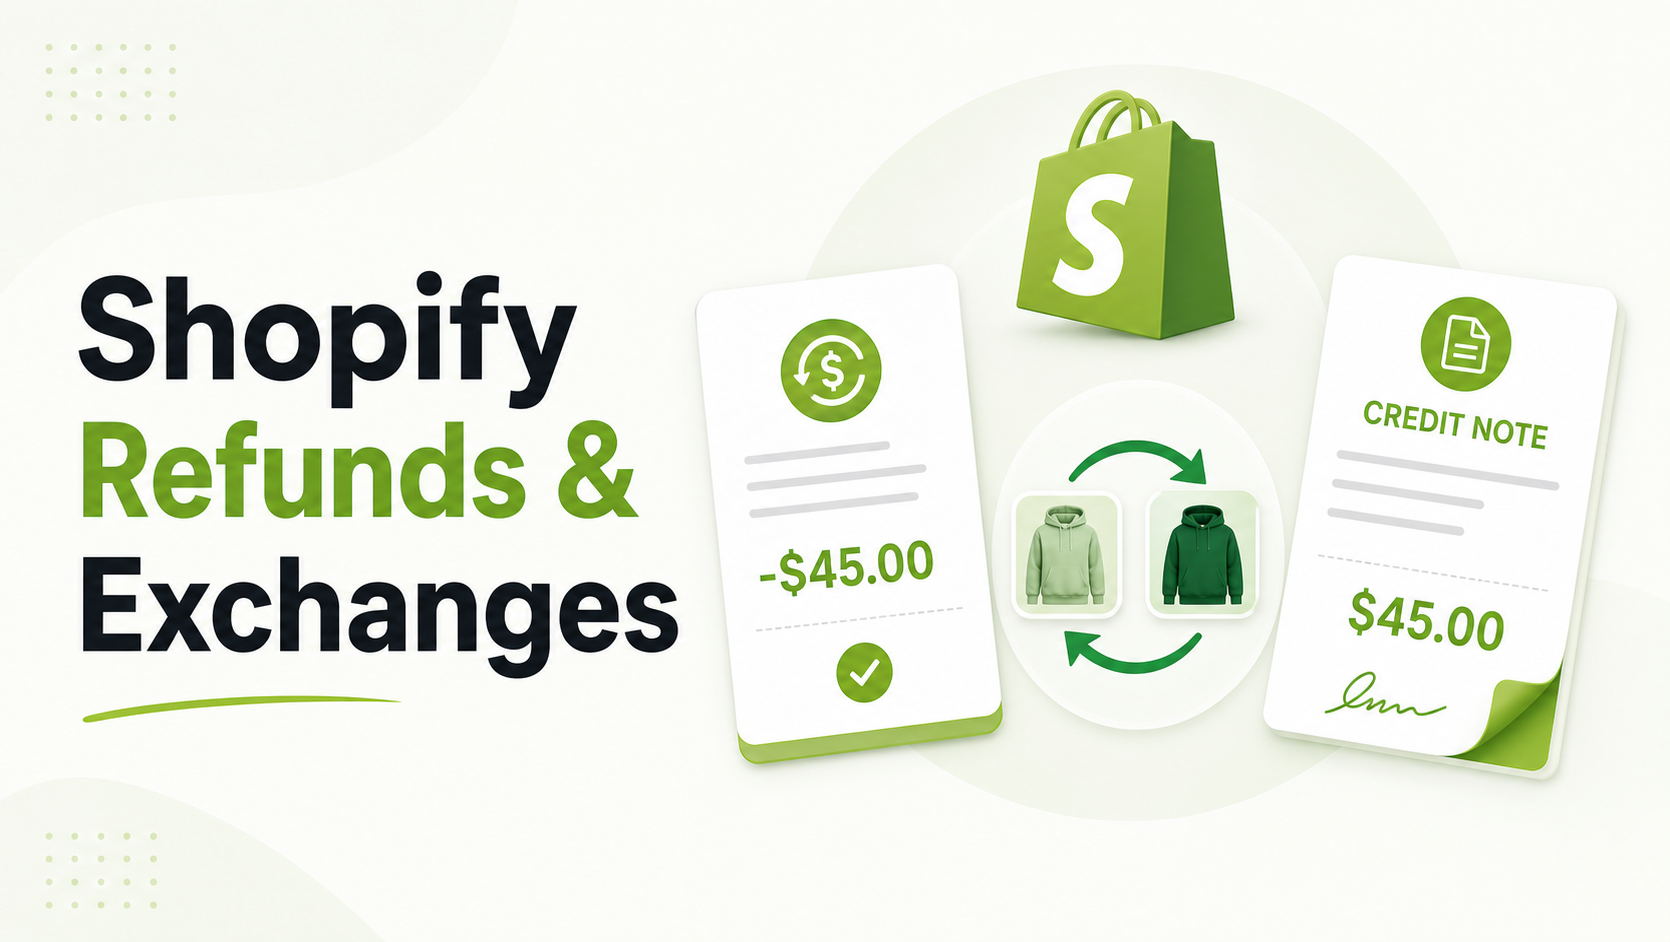
- The Main Takeaway: Shopify updates order data upon refunds or exchanges but does not natively generate standalone credit notes or revised PDF invoices, causing significant accounting gaps.
- Who It’s For: Shopify store owners, e-commerce operations managers, and accountants handling cross-border DTC or B2B sales.
- What You’ll Learn: How to process partial refunds cleanly, document exchanges without doubling your tax liabilities, and issue compliant credit notes.
- Practical Outcome: Balanced financial books, localized tax compliance (including EU VAT), and automated self-service documentation for your buyers.
Quick Answer
Shopify does not natively generate standalone credit notes or revised tax invoices for partial refunds and exchanges. To remain compliant, merchants must manually calculate order adjustments using custom draft orders or use an integrated app like GP PDF Invoice Generator to automate document creation.
Why Post-Purchase Order Changes Break Traditional Shopify Invoicing
When a customer buys something from your store, a financial contract is created. An invoice is issued, taxes are logged based on that specific transaction, and your inventory drops.
If that order changes later, you cannot simply alter or delete the original invoice. In many jurisdictions, changing an issued invoice is illegal. Instead, you must issue an updated accounting document to show the change.
There are three main scenarios where your standard Shopify invoice stops matching reality:
- The Partial Refund: A customer purchases three items but cancels one before it ships, or requests a partial refund because one item arrived damaged. The total amount paid drops, changing your net sales tax obligations.
- The Product Exchange: A customer swaps a Medium shirt for a Large shirt. While the price might be identical, the physical inventory must be adjusted in your system. If they exchange it for a more expensive item, you need to collect additional funds cleanly.
- The Store Credit / Return Adjustment: Instead of returning money to a card, you give store credit or charge a restocking fee. This means the money stays in your business ecosystem but shifts lines on your balance sheet.
Shopify’s core system updates the total order amount on the original order page. It does not, however, generate a unique, sequentially numbered Credit Note to neutralize the original tax liability. Without this document, your accounting software may show that you owe taxes on money you have already returned to the customer.
Recommended Blogs for You:
👉 Shopify World Cup Retention Guide: Maximize Customer LTV
👉 Multi Language Shopify Invoices: The Cross-Border Selling Guide
👉 How to Create Custom PDF Invoices for Shopify: A Branding Guide
👉 How to Add a Request a Quote Button in Shopify (Step-by-Step)
How to Handle Partial Refunds in Shopify Step-by-Step
When you return only a portion of an order’s value to a customer, your documentation must clearly state what was refunded, the tax amounts returned, and the remaining balance of the order.
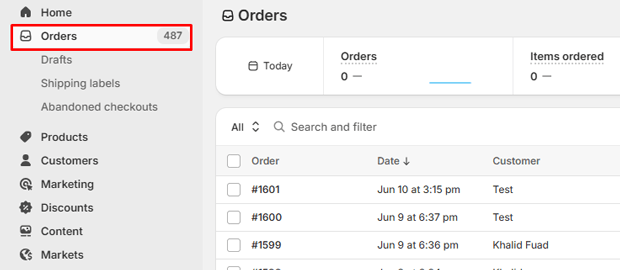
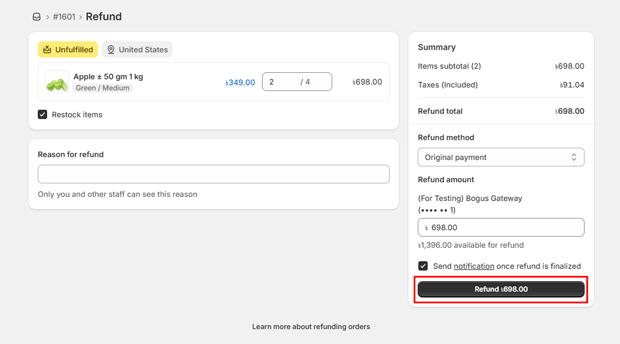
Step 1: Process the Refund in Shopify Admin
Navigate to Orders inside your Shopify admin dashboard and select the specific order.
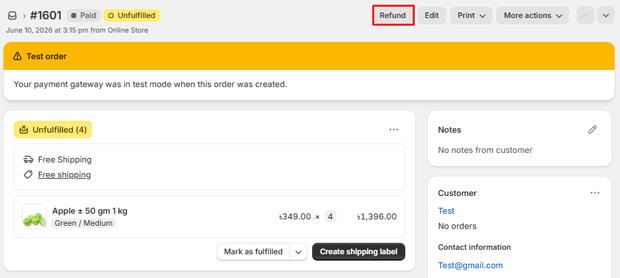
Click the Refund button at the top of the screen.
Select the exact quantities of the individual items being sent back or canceled.
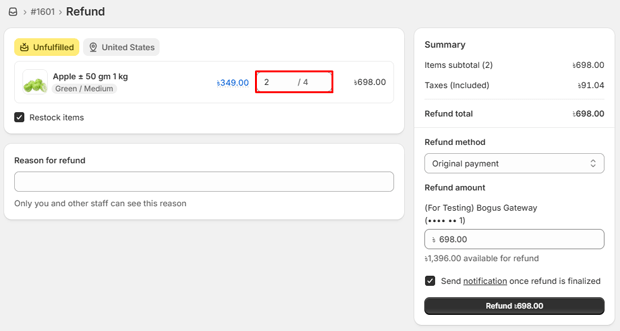
If you are charging a restocking fee or issuing a goodwill gesture without restocking the item, use the Refund total field to enter a manual custom dollar amount.
Review the tax line adjustments generated by Shopify to make sure your local tax rules are applied properly.
Click Refund to process the return to the customer’s original payment method.
Step 2: The Document Gap (and How to Fix It Manually)
Once you process the refund, Shopify updates the order timeline to show “Partially Refunded.” However, if your customer needs a formal receipt for their accounting department, sending them a screenshot of the Shopify timeline will not suffice.
To handle this paperwork loop manually without an automated app:
- You must duplicate your original invoice template into a word processor or text editor.
- Manually change the document header title to Credit Note.
- Assign a new sequential number to it (e.g., if your last invoice was #INV-1001, your credit note series might run as #CN-1001).
- List the specific items refunded as negative line balances, showing the exact portion of tax returned.
- Email this file manually to the client and archive a copy for your accountant.
Managing Shopify Product Exchanges Without Doubling Tax Liability
Handling product exchanges manually in Shopify can easily lead to accounting errors. A common mistake is creating an entirely new order for the replacement item while leaving the old item on the original order. This practice can make it look like you sold two items instead of one, which artificially inflates your reported revenue and your tax liabilities.
The Correct Exchange Workflow
To exchange an item cleanly without breaking your reporting, you can use Shopify’s native order editing tools or create a structured transition:
- Open the original order in your Shopify admin.
- Click Edit.
- Remove the item the customer wants to exchange.
- Add the new replacement product to the order.
- If there is a price difference, Shopify will display a balance due or an amount to be refunded. Collect the balance via a Shopify payment link or refund the difference immediately on this screen.
- Save the changes.
The Invoicing Problem with Edits
While this native feature keeps your inventory accurate, Shopify does not automatically send a revised invoice that reflects these line-item edits. The customer’s initial order confirmation email remains unchanged in their inbox.
If they try to download their invoice from their account page, they will often find the original document rather than the updated version reflecting the exchange.
Manual vs. Automated Document Workflows
For small stores handling only a handful of returns each month, creating credit notes manually can keep things accurate without added expenses. However, as your store grows or starts handling B2B transactions, manual data entry can quickly become a bottleneck.
| Operational Feature | Manual Workarounds | Automated Apps (e.g., GP PDF Invoice Generator) |
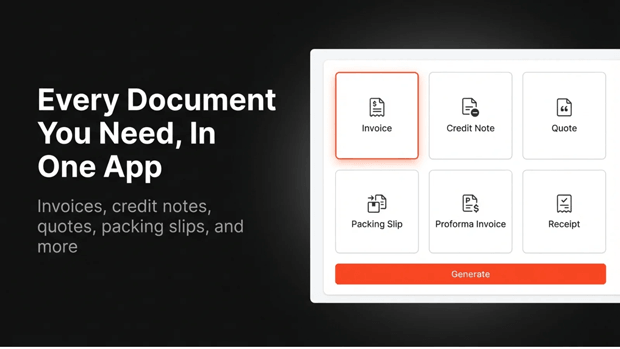
| Document Types | Manual creation of simple invoices and receipts. | Automatic generation of 14 document types, including Credit Notes, Proformas, and Packing Slips. |
| Tax Compliance | High risk of manual calculation errors with VAT and sales tax. | Automatic calculations based on Shopify tax settings, with support for EU ZUGFeRD e-invoicing. |
| Sequential Numbering | Requires tracking numbers manually in a separate spreadsheet. | Independent, guaranteed unique sequential numbering per document type. |
| Customer Access | Requires manually emailing PDFs to customers upon request. | Self-service downloads directly from the Thank You page and Customer Accounts. |
| B2B / Wholesale Capabilities | Requires manually rewriting business names, tax IDs, and payment net terms. | Automatic importing of Shopify B2B company data, PO numbers, and payment terms. |
Troubleshooting Common Shopify Refund Sync and Balance Errors
When you alter orders inside Shopify, apps that sync your data to accounting tools like QuickBooks, Xero, or A2X can sometimes run into matching issues. Below are some of the most common issues merchants encounter, along with tips on how to solve them.
Missing Return Document Errors
- The Root Cause: Your accounting platform expects a matching transaction document for every single line entry. When Shopify pushes a raw refund value without a supporting credit note document, the sync can fail or stall out.
- The Solution: Ensure your invoicing tool is configured to instantly generate a distinct, standalone Credit Note the moment an orders/edited or orders/refunded webhook triggers from Shopify’s servers.
Unbalanced Tax Ledgers
- The Root Cause: Manual partial refunds can bypass the original tax logic if you simply input a flat dollar amount in Shopify without allocating it to specific items. This leaves your tax accounts showing that you owe full tax on the original sale price.
- The Solution: When processing refunds, always adjust item quantities first instead of entering a random flat-rate amount. This ensures Shopify calculates the proper tax breakdown automatically.
Overstated Revenue Figures
- The Root Cause: Creating a new, separate order for product exchanges while failing to mark the returned items as refunded or deleted on the original order. This makes it look like you completed two distinct sales.
- The Solution: Use Shopify’s built-in order editing features to modify line items within the original order whenever possible, rather than creating completely new transactions for straightforward product swaps.
Automating Your Post-Purchase Paperwork
If managing manual spreadsheets, fixing accounting sync errors, and drafting custom credit notes is taking up too much of your time, automating the process with a dedicated app can streamline your workflow.
Using an app like GP PDF Invoice Generator helps you handle these post-purchase updates automatically. The app monitors your Shopify store for any order edits, partial refunds, or exchanges.
The moment a transaction changes, it automatically generates the required documentation—whether that is an updated tax invoice or a standalone credit note—ensuring your records stay balanced without extra manual effort.
Frequently Asked Questions
Does Shopify automatically create credit notes for partial refunds?
No. Shopify updates the order timeline status and changes the raw numerical balance of the order, but it does not generate a separate, legal PDF credit note document for your customer or your accountant.
What is the difference between a refund and a credit note on Shopify?
A refund is the actual moving of money back to a customer’s credit card or bank account. A credit note is the formal legal accounting document that explains why that money was returned and records the corresponding reduction in your tax obligations.
How do I send an updated invoice after a product exchange?
If you edit an order manually, Shopify doesn’t automatically resend an updated invoice sheet. You will need to either manually build an updated receipt or use an invoicing app like GP PDF Invoice Generator to automatically regenerate and email the revised PDF layout to your customer.
Can I issue a credit note for store credit rather than cash?
Yes. If you issue store credit or a gift card instead of a cash refund, your credit note should reflect this by listing the balance under an alternate payment allocation line, while still balancing the product inventory out of your active ledger.