Dreaming of launching your own online store and becoming your own boss? That Shopify “Start Free Trial” button is calling your name, but the thought of actually setting everything up feels…
overwhelming, right?
You’re definitely not alone. Many aspiring entrepreneurs get stuck in the initial setup phase, feeling lost in a sea of settings and options.
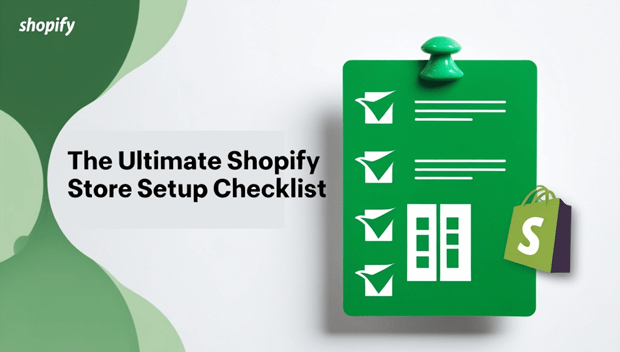
But what if you had a clear, step-by-step guide to navigate the entire process, from absolute zero to a fully launched, customer-ready Shopify store? Consider this The Ultimate Shopify Store Setup Checklist.
We’ve meticulously crafted this guide to break down the seemingly daunting task of launching your dream store into manageable, actionable steps.
Why a checklist? Because it’s your secret weapon against overwhelm. It ensures you don’t miss crucial steps, keeps you organized, and dramatically increases your chances of a smooth, successful launch.
Think of it as your personal Shopify launch roadmap.
This Shopify store setup checklist is designed for beginners, guiding you through every stage, from pre-planning essentials to those crucial pre-launch checks and finally, your grand opening announcement!
Let’s dive in and turn that dream store into a reality, step by step.
Phase 1: Pre-Shopify Foundation Laying the Groundwork for Success
Define Your Niche and Target Audience
Before you even think about themes or products, you must know who you’re selling to and what you’re selling.
Your niche is your focused area within a larger market. Think “sustainable baby clothing” instead of just “clothing.”
A defined niche helps you focus your marketing, select the right products, and attract a loyal customer base.
What do you need to do in this step?
- Brainstorm Niche Ideas: What are you passionate about? What problems can you solve? What are your skills?
- Research Market Demand: Is there actually a market for your niche? Use tools like Google Keyword Planner or even just Google Trends to see if people are searching for products in your area.
- Analyze Competitors: Who else is in your niche? What are they doing well? What could you do differently or better? Tools like Semrush or Ahrefs (optional, for deeper dives) can help analyze competitor websites.
- Define Your Ideal Customer: Create a detailed profile of your perfect customer. Age, interests, income, pain points – the more specific, the better. This “customer persona” will guide your marketing and product decisions.
Pro Tips: Choosing a niche for your Shopify store is the very first, and perhaps most crucial step. Understanding your target audience will inform every decision you make for your online store.
Conduct Thorough Product Research
Don’t just assume your product will sell. You need to validate demand! Product research ensures you’re offering items people actually want to buy.
Consider your sourcing options: dropshipping (no inventory), print-on-demand (custom designs on demand), manufacturing your own, or wholesale (buying in bulk).
What do you need to do in this step?
- Keyword Research for Products: Use keyword tools (Semrush, Google Keyword Planner, Ubersuggest) to see what product-related keywords people are searching for. High search volume + lower competition is a sweet spot.
- Trend Research: Explore Google Trends, social media trends, and platforms like Etsy Trend Tool to spot emerging product trends.
- Competitor Product Analysis: What products are your competitors selling successfully? Analyze their bestsellers, pricing, and customer reviews.
- Validate Product-Market Fit: Does your product solve a problem, fulfill a need, or offer something unique? Consider surveys, feedback from potential customers, or even small-scale pre-sales to gauge interest.
Pro Tips: In-depth, product research for your Shopify store is essential to identify the best products to sell on Shopify. Don’t skip validating your product ideas online!
Choose Your Brand Name and Domain Name
Your brand name is your online identity.
Make it memorable, relevant to your niche, and easy to pronounce and spell.
Your domain name (yourwebsite.com) should ideally match your brand name and be easy for customers to find and remember.
What do you need to do in this step?
- Brainstorm Brand Names: Get creative! Use name generators, word associations, or even just good old brainstorming sessions.
- Check Domain Name Availability: Use domain registrars like Namecheap or Hostinger to see if your desired domain name is available (ideally a .com).
- Brand Name Alignment: Ensure your brand name resonates with your niche, target audience, and the overall vibe you want to create for your store.
Pro Tips: Coming up with catchy Shopify store name ideas and securing the best domain name for your online store are crucial branding steps. Think about branding for your Shopify from the start.
Plan Your Business Structure and Legalities (Basic)
While you don’t need to become a legal expert overnight, understanding the basics is important.
Decide on your business structure (sole proprietorship, LLC, etc. – consult with a legal/tax advisor for your specific situation!) and understand basic legal requirements for online businesses, like having privacy policies and terms of service.
What do you need to do in this step?
- Research Business Structures: Understand the different business structures in your country/region and which one is most suitable for your online business.
- Understand Basic Legal Requirements: Familiarize yourself with essential legal aspects like data privacy, consumer rights, and online selling regulations in your target markets.
Pro Tips: Understanding the legal requirements for a Shopify store and choosing the right business structure for your online business are important steps when starting an online business legally.
Phase 2: Setting Up Your Shopify Account and Store Foundation
Sign Up for a Shopify Free Trial
Time to take the plunge! Head over to Shopify and sign up for their free trial.
This gives you time to explore the platform, build your store, and test everything out before committing to a paid plan.
Visit Shopify Website: Go to Shopify.com.
Sign Up for a Free Trial: Click the prominent “Start Free Trial” (or similar) button.
Enter Email and Store Name: Provide your email address and a temporary store name (you can change this later).
Pro Tips: Take advantage of the Shopify free trial to sign up for Shopify and begin your journey to start a Shopify store.
Navigate the Shopify Admin Dashboard
The Shopify admin dashboard is your command center.
Take some time to explore it! It’s where you manage everything: orders, products, customers, store design, marketing, and analytics.
- Explore Each Section: Click through each main section on the left-hand menu: Orders, Products, Customers, Analytics, Marketing, Discounts, Apps, Sales Channels, Online Store, and Settings.
- Familiarize Yourself with Layout: Get a feel for where things are located.
- Watch Shopify Tutorials (Optional): Shopify’s Help Center and YouTube channel are goldmines! Search for “Shopify admin dashboard tutorial” to get visual walkthroughs.
Pro Tips: Get comfortable with the Shopify admin dashboard tutorial and learn your way around the Shopify backend guide to fully understand the Shopify interface.
Set Up Store Settings (General, Store Details, Currencies, etc.)
Accuracy here is key! These settings establish the fundamental details of your store.
Double-check everything.
- Go to Settings > General: In your Shopify admin dashboard, click “Settings” in the bottom left corner, then select “General.”
- Fill in Store Details: Enter your store name (your official brand name now!), legal business name (if applicable), store address, contact email, and customer-facing email.
- Configure Currency and Timezone: Select your store’s primary currency and timezone. Crucial for accurate pricing and order timestamps.
- Units of Measurement: Choose your preferred units for weight and size.
Pro Tips: Properly configuring your Shopify store settings and accurately entering your Shopify store details including Shopify currency settings is essential for a functional store.
Phase 3: Designing and Branding Your Shopify Store – Making it Visually Appealing
Choose a Shopify Theme
Your theme dictates your store’s look and feel. Shopify’s Theme Store offers both free and paid themes.
Consider your industry, desired style (minimalist, bold, etc.), essential features (product filters, blog, etc.), and mobile responsiveness.
Paid themes often offer more features and customization, but free themes can be excellent starting points.
Recommendations: For a sleek, modern design with advanced features, try Mavon Shopify Theme! Perfect for any industry, it’s mobile-responsive, customizable, and boosts conversions.
What do you need to do in this step?
- Browse Shopify Theme Store: Go to Online Store > Themes > Visit Theme Store.
- Filter by Industry/Features: Use the filters to narrow down themes relevant to your niche and required functionalities.
- Demo Themes: Click “View Demo” to see themes in action with sample products and content.
- Consider Free vs. Paid: Evaluate your budget and feature needs.
- Check Theme Reviews & Mobile Responsiveness: Read theme reviews and ensure the theme is explicitly stated as “responsive” (mobile-friendly).
- Choose a Theme: Select the theme that best aligns with your brand and product presentation.
Pro Tips: Selecting the best Shopify themes, whether free Shopify themes or paid Shopify themes, is vital for creating a visually appealing store. Think carefully about choosing a Shopify theme that suits your brand.
Customize Your Theme (Homepage, Navigation, Product Pages, etc.)
Now, personalize your chosen theme to reflect your brand! This is where you inject your unique style and ensure a consistent brand experience across your store.
Access Theme Customizer: Go to Online Store > Themes > Customize.
Customize Logo, Colors, and Fonts: Upload your logo, define your brand color palette, and choose fonts that align with your brand identity.
Homepage Layout: Design an engaging homepage showcasing your best products, collections, or promotions.
Navigation Menus: Create clear and intuitive navigation menus so customers can easily find what they’re looking for (e.g., “Shop,” “Collections,” “About Us,” “Contact”).
Product Page Design: Optimize product pages for conversions – focus on high-quality images, compelling descriptions, clear pricing, and prominent “Add to Cart” buttons.
Collection Page Design: Customize how your product collections are displayed.
(Optional) Blog & Other Pages: If you plan to blog, customize your blog layout. Design your “About Us” and “Contact Us” pages (more on these next!).
Master Shopify theme customization to tailor your store. Customize your Shopify homepage, strategically design your Shopify product pages, and meticulously plan your Shopify navigation setup.
Create Essential Pages (About Us, Contact Us, Policies)
These pages build trust, and transparency, and are also important for SEO.
Customers want to know who they’re buying from and how to contact you. Legal policy pages are essential for compliance and customer protection.
About Us Page: Create a compelling “About Us” page telling your brand story, mission, and values. Connect with your customers on a personal level.
Contact Us Page: Set up a “Contact Us” page with a contact form (Shopify has a built-in form or use a contact form app), your email address, and optionally a phone number and physical address (if applicable).
Policy Pages: Generate and customize these crucial policy pages:
- Privacy Policy: Explains how you collect, use, and protect customer data. Use Shopify’s policy generator (Settings > Legal > Privacy Policy) as a starting point and customize it.
- Terms of Service/Use: Outlines the rules and regulations for using your store. Use Shopify’s generator (Settings > Legal > Terms of Service).
- Shipping Policy: Detail your shipping methods, costs, and estimated delivery times.
- Refund/Return Policy: Clearly state your return and refund policies to build customer confidence.
Crafting a strong Shopify About Us page and an accessible Shopify Contact Us page builds customer trust.
Ensure you have all necessary Shopify policy pages, including a privacy policy for your online store and a comprehensive terms of service template for Shopify.
Optimize for Mobile Responsiveness
In today’s mobile-first world, a mobile-unfriendly store is a conversion killer.
Google also prioritizes mobile-first indexing, meaning they primarily use the mobile version of your site for indexing and ranking.
Your store must look and function flawlessly on smartphones and tablets.
Test on Mobile Devices: Browse your store on your own smartphone and tablet (and ask friends to test on theirs too, with different devices if possible).
Use Theme’s Mobile Preview: Shopify’s theme customizer usually has a mobile preview mode. Utilize it!
Ensure Responsive Theme: Double-check that your chosen theme is explicitly stated as “responsive.”
Optimize Images for Mobile: Large, unoptimized images can drastically slow down mobile page load times. Optimize images (we’ll discuss image optimization more later).
Pro Tips: Shopify mobile optimization is non-negotiable. Create a mobile-friendly Shopify store by choosing a responsive Shopify theme and testing thoroughly.
Phase 4: Setting Up Your Products and Collections – Showcasing Your Offerings
Add Your Products (Detailed Product Pages)
Your product pages are your online sales representatives.
They need to be compelling, informative and conversion-focused. This is where you convince visitors to become customers!
- High-Quality Product Images: Invest in professional-looking product photos. Use multiple angles, and lifestyle shots (if applicable), and ensure zoom functionality.
- Compelling Product Descriptions: Don’t just list features! Focus on benefits. Tell a story. Use persuasive language. Address customer pain points.
- Accurate Pricing and Variants: Set competitive and profitable prices. Accurately set up product variants (sizes, colors, etc.) if applicable.
- SEO-Optimized Product Titles and Descriptions: Think about how people will search for your products. Incorporate relevant keywords (do some basic keyword research for product names).
- Inventory Management: Set initial inventory levels and enable inventory tracking (we’ll detail inventory management further below).
Pro Tips: Focus on Shopify product page optimization. Learn how to write product descriptions that sell and utilize high-quality Shopify product images. Remember basic SEO for Shopify product pages by optimizing titles and descriptions.
Organize Products into Collections (Categories)
Collections (or categories) are like aisles in a physical store. They help customers navigate your products and find what they’re looking for quickly.
Well-organized collections improve user experience and can boost sales.
- Create Logical Collections: Group similar products together based on type, category, theme, or any other logical criteria relevant to your products. Examples: “New Arrivals,” “Summer Dresses,” “Best Sellers.”
- Compelling Collection Titles and Descriptions: Just like product pages, collection pages can be SEO-optimized. Write clear and descriptive titles and descriptions for your collections, incorporating relevant keywords.
- (Optional) Feature Collections on Homepage: Consider showcasing key collections on your homepage for easy access.
Pro Tips: Effective Shopify collections setup is key to helping customers organize products in your Shopify store. Think about Shopify category pages and the best way to use Shopify collections to enhance navigation.
Set Up Product Inventory Management
Tracking your inventory is essential to avoid selling products you don’t have in stock and to manage your stock levels efficiently.
Shopify has built-in inventory management features to help you.
Enable Inventory Tracking: Go to your product settings in Shopify admin and enable “Track quantity.”
Set Initial Stock Quantities: Enter the initial stock levels for each product variant.
Learn to Adjust Inventory: Familiarize yourself with how to adjust inventory levels as you sell products and restock.
(Optional) Consider Inventory Management Apps (Later): For larger stores with complex inventory needs, explore Shopify App Store for dedicated inventory management apps.
Pro Tips: Implement Shopify inventory management to effectively track inventory in Shopify and maintain Shopify stock control. For advanced needs, explore Shopify inventory apps.
Phase 5: Essential Apps and Integrations – Supercharging Your Store
Install Essential Shopify Apps
The Shopify App Store is like an extension pack for your store. Apps add powerful functionalities you might not have out-of-the-box.
Think of them as plugins to enhance your store’s capabilities.
Browse Shopify App Store: Go to “Apps” in your Shopify admin.
Research Essential App Categories: Consider apps in these categories for a new store:
- (SEO): To improve your store’s visibility in search engines (e.g., SEO Optimizer, Yoast SEO).
- (Email Marketing): To build an email list and send marketing emails (e.g., Klaviyo, Mailchimp).
- (Social Proof & Reviews): To build trust with customer reviews and social proof (e.g., Judge.me, Loox).
- (Customer Service): For live chat or help desk functionalities (e.g., Shopify Chat, Gorgias).
- (Optional initially): Social Media Marketing, Upselling/Cross-selling, etc.
Install Essential Apps: Choose and install apps that address your most pressing needs for launch.
Configure App Settings: Follow the app’s setup instructions to configure it correctly.
Pro Tips: Explore the best Shopify apps and identify essential Shopify apps for new stores. Consider apps for Shopify SEO apps and Shopify email marketing apps.
Set Up Email Marketing Integration
Email marketing is crucial for nurturing customer relationships, promoting products, recovering abandoned carts, and driving repeat sales.
Integrating an email marketing platform with Shopify allows you to automate email campaigns and build your email list.
Choose an Email Marketing Platform: Select a platform like Klaviyo, Mailchimp, or Omnisend that integrates well with Shopify.
Integrate with Shopify: Install the platform’s Shopify app to connect your store.
Set Up Basic Email Automation: At a minimum, set up:
- Welcome Email: Automatically sent to new email subscribers.
- Abandoned Cart Recovery: Reminds customers who added items to their cart but didn’t complete checkout.
Build an Email List: Add email signup forms to your website (often built into themes or email marketing apps).
Pro Tips: Prioritize Shopify email marketing to boost sales. Implement email marketing for e-commerce on Shopify, and definitely set up abandoned cart recovery on Shopify.
Explore the best email marketing platforms for Shopify to find the right fit.
Consider Social Media Integrations
While not strictly essential before launch, connecting your social media accounts sets the stage for future social selling and marketing.
Connect Social Media Accounts: Go to Settings > Sales Channels > Add sales channel and connect your Facebook, Instagram, Pinterest, etc., accounts.
(Optional) Social Sharing Buttons: Add social sharing buttons to your product pages (often theme-dependent or via apps) to make it easy for customers to share your products on social media.
(Consider Social Selling Apps Later): Explore apps that facilitate social selling (e.g., Instagram Shopping, Facebook Shop) after your initial launch.
Pro Tips: Start thinking about Shopify social media integration and how you can eventually sell on social media with Shopify. Consider Shopify Facebook integration and Shopify Instagram integration for future marketing efforts.
Phase 6: Setting Up Legal and Payment Information – The Business Essentials
Finalize Legal Pages and Policies (Detailed Policies)
We briefly touched on policies earlier, but now it’s time to finalize them with detailed content. These aren’t just formalities; they protect you and your customers and are often legally required.
What do you need to do in this step?
Privacy Policy (GDPR/CCPA Compliance): Customize Shopify’s generated policy to be even more specific to your data collection and usage practices.
If you’re selling internationally, research GDPR (European) and CCPA (California, USA) compliance if applicable to your customer base.
Terms of Service/Use: Customize the generated terms to clearly outline the rules for using your store, liability limitations, and intellectual property rights.
Shipping Policy (Detailed): Provide comprehensive shipping information: processing times, shipping methods, estimated delivery times for different regions, shipping costs (or free shipping thresholds), and any shipping restrictions.
Refund/Return Policy (Clear and Concise): Make your return and refund policy crystal clear. State the timeframe for returns, conditions for returns, how refunds are processed, and who pays for return shipping.
Cookie Policy (If Applicable): If you use cookies (most Shopify stores do, for analytics and functionality), create a cookie policy outlining what cookies you use and why, and how users can manage their cookie preferences.
Consult Legal Counsel (Recommended): While Shopify’s generators are helpful starting points, for truly robust policies, consult with a legal professional specializing in e-commerce law to ensure full compliance and protection tailored to your specific business and location.
Display Policy Links: Place links to all your policy pages prominently in your store’s footer (usually in the theme settings).
Pro Tips: Prioritize your Shopify legal policies. Utilize a privacy policy generator for Shopify as a starting point, but ensure it’s comprehensive. Use a robust terms of service template for your online store. Understand eCommerce legal requirements to ensure compliance.
Set Up Payment Gateways
How will you get paid? Payment gateways are services that securely process online payments.
Shopify integrates with numerous gateways, including Shopify Payments (Shopify’s own gateway), PayPal, Stripe, and many others.
Consider transaction fees and payment options offered by each.
Choose Payment Gateways: Select payment gateways that are popular and trusted in your target markets and offer the payment methods your customers expect (credit cards, debit cards, PayPal, etc.). Shopify Payments is often a convenient and competitive option if available in your region.
Set Up in Shopify Settings: Go to Settings > Payments and set up your chosen payment gateways. Follow the setup instructions for each, which usually involves providing business and bank account details.
Test Payment Gateway Setup: After setup, thoroughly test your payment gateways with test transactions (Shopify provides a “test mode” for payment gateways) to ensure everything is working correctly before going live.
Pro Tips: Proper Shopify payment gateway setup is crucial. Research the best payment gateway for Shopify, and decide whether to set up Shopify Payments or accept PayPal on Shopify, or a combination.
Configure Shipping Settings
Shipping is a critical part of the customer experience. Clear and accurate shipping settings are essential for smooth order fulfillment and happy customers.
Define Shipping Zones: Set up shipping zones (e.g., domestic, international, specific countries/regions) based on where you plan to ship. Go to Settings > Shipping and delivery > Shipping zones.
Set Up Shipping Rates: Decide on your shipping rates strategy. Options include:
- Flat Rate Shipping: Charge a fixed rate for all orders within a zone.
- Weight-Based Shipping: Shipping cost is calculated based on the weight of the order.
- Carrier-Calculated Shipping: Integrate with carriers like USPS, FedEx, UPS to get real-time shipping rates.
Choose Shipping Carriers: Select the carriers you’ll use to ship your products.
(Optional) Set Up Free Shipping: Consider offering free shipping above a certain order value as a marketing incentive (configure this in shipping settings).
Packaging Considerations: Factor in packaging costs when setting shipping rates.
Pro Tips: Master Shopify shipping settings to accurately set up shipping rates in Shopify for different Shopify shipping zones. Explore the best shipping carriers for Shopify and consider a free shipping strategy for Shopify to attract customers.
Set Up Tax Settings (If Applicable)
Sales tax obligations vary significantly by location. Depending on where you sell and your business location, you may need to collect and remit sales tax.
Shopify can help automate some tax calculations.
Research Tax Laws: Understand the tax laws in the regions where you’ll be selling. Consult with a tax professional for specific advice.
Configure Tax Settings in Shopify: Go to Settings > Taxes and Duties. Configure tax settings based on your location and tax obligations. Shopify can often automatically calculate taxes based on location settings.
Consult with a Tax Advisor (Recommended): Tax compliance can be complex. It’s highly recommended to consult with a tax advisor to ensure you’re setting up your tax settings correctly and complying with all applicable regulations.
Pro Tips: Properly configure Shopify tax settings to handle sales tax for online stores on Shopify. Ensure eCommerce tax compliance and seek professional advice when needed.
Phase 7: Pre-Launch Testing and Optimization – The Final Polish
Thoroughly Test Your Store (User Experience Testing)
Before you open your doors, rigorous testing is non-negotiable. Think like a customer! Experience your store from their perspective to catch any glitches or usability issues.
- Navigate Store on Different Devices: Test your store on various browsers (Chrome, Firefox, Safari, Edge) and devices (desktop, laptop, smartphone, tablet).
- Test Product Browsing and Search: Ensure product browsing, filtering, and search functions work flawlessly.
- Add Products to Cart and Checkout: Go through the entire checkout process as a customer would, testing different payment methods and shipping options (if you’ve set up test modes).
- Test Contact Form: Submit a test message through your contact form to ensure it’s working.
- Check Page Load Speed: Use tools like Google PageSpeed Insights to analyze your store’s page load speed. Slow pages kill conversions.
- Check for Broken Links: Use online broken link checkers to find and fix any broken links on your site.
- Proofread All Text: Carefully proofread every page for typos, grammatical errors, and clarity.
- Ask Others to Test: Get fresh eyes! Ask friends, family, or beta testers to browse your store and provide feedback on user experience, clarity, and any issues they encounter.
Pro Tips: Conduct comprehensive Shopify store testing with a focus on user experience testing for your Shopify store. Thoroughly test your Shopify checkout process and check your Shopify store speed.
Optimize Store Speed and Performance
Page speed is a critical ranking factor for Google and directly impacts user experience and conversions. Faster stores are better for everyone!
- Test Speed with Google PageSpeed Insights: Use Google PageSpeed Insights to get a performance score and actionable recommendations for improvement.
- Optimize Images: Compress all images without sacrificing too much quality. Use tools like TinyPNG or ImageOptim. Large images are major speed killers.
- Choose a Lightweight Theme: Some themes are inherently faster than others. Opt for a theme that prioritizes performance.
- Minimize App Usage: Only install truly essential apps. Too many apps can slow down your store.
- (Shopify CDN): Shopify uses a Content Delivery Network (CDN) which helps speed up content delivery globally – this is automatically handled by Shopify, but good to know it’s working for you behind the scenes.
Pro Tips: Focus on Shopify speed optimization to improve your Shopify store speed. Learn how to optimize images for Shopify and regularly check your Shopify page load speed.
Set Up Basic SEO (On-Page Optimization)
Basic Search Engine Optimization (SEO) helps Google (and other search engines) find and understand your store, improving your visibility in search results.
Optimize Page Titles and Meta Descriptions: For your homepage, collection pages, and product pages, write compelling and keyword-rich page titles and meta descriptions (these appear in search results). In Shopify admin, find the “Search engine listing preview” section on each page/product.
Use Header Tags (H1, H2, etc.): Use header tags (H1 for main page titles, H2 for subheadings, etc.) to structure your content and highlight important keywords.
Use Alt Text for Images: Add descriptive alt text to all your product images (and other relevant images). Alt text describes the image to search engines (and screen readers) and should include relevant keywords.
Create SEO-Friendly URLs: Customize your product and collection URLs to be short, descriptive, and include relevant keywords (Shopify usually does this automatically, but you can customize them).
Internal Linking: Link between relevant pages within your store. For example, link from a blog post about a product to the product page, or link between related product collections.
Implement basic Shopify SEO including on-page SEO for your Shopify store. Optimize your Shopify meta descriptions and utilize Shopify image alt text. Create SEO-friendly URLs for Shopify and focus on internal linking.
Set Up Google Analytics and Google Search Console
These free tools from Google are essential for tracking your store’s performance, understanding your audience, and monitoring your SEO efforts.
Create Google Analytics Account: Go to Google Analytics and create a free account if you don’t already have one.
Create Google Search Console Account: Go to Google Search Console and create a free account, adding your website property (your Shopify store URL).
Connect Google Analytics to Shopify: In Shopify admin, go to Online Store > Preferences and paste your Google Analytics tracking ID.
Connect Google Search Console to Shopify: Follow Google Search Console’s instructions to verify your website (often by adding a meta tag to your Shopify theme or using DNS verification).
Pro Tips: Integrate Google Analytics with Shopify and connect Google Search Console to Shopify to track website traffic on Shopify and effectively manage your Shopify analytics setup.
Phase 8: Launching Your Shopify Store! – Time to Open Your Doors
Choose a Shopify Plan and Go Live
You’ve built an amazing store – now it’s time to pick a paid Shopify plan and make it public!
Shopify offers different plans (Basic Shopify, Shopify, Advanced Shopify) with varying features and pricing.
Choose a plan that fits your current needs and budget. You can always upgrade as you grow.
Review Shopify Plans: Compare Shopify plans and pricing on the Shopify website to understand the features of each plan.
Choose a Plan: Select the plan that best meets your current business requirements and budget.
Remove Password Protection: In your Shopify admin, go to Online Store > Preferences and uncheck the “Password protection” box to make your store publicly accessible.
Go Live! Congratulations, your store is now officially launched!
Pro Tips: Compare Shopify plans comparison to understand Shopify pricing and choose the best Shopify plan for your needs before you officially launch your Shopify store.
Announce Your Launch and Promote Your Store!
Launch day is exciting, but it’s not the finish line – it’s the starting gun! Now you need to tell the world your store is open and start driving traffic and sales.
What do you need to do in this step?
Create a Launch Announcement Plan: Plan how you’ll announce your launch.
Social Media Announcement: Prepare engaging launch posts for all your social media platforms. Schedule them to go live on launch day!
Email Announcement: If you’ve already started building an email list, send a launch announcement email to your subscribers.
Paid Advertising: Consider a small initial budget for paid advertising on platforms like Facebook/Instagram Ads, TikTok Ads, or Google Ads to jumpstart traffic (this is optional for launch, but a common strategy for faster results).
Outreach to Media/Bloggers: If relevant to your niche, reach out to bloggers, influencers, or media outlets in your industry to announce your launch and potentially get featured.
Pro Tips: Plan a strategic Shopify store launch promotion to effectively promote your online store. Create a basic marketing plan for your Shopify store and consider social media marketing for Shopify to amplify your launch announcement.
Conclusion: The Ultimate Shopify Checklist: Your Store Awaits Customers!
Launching a Shopify store from scratch might seem like climbing a mountain, but with this Ultimate Shopify Store Setup Checklist, you have a clear path to the summit.
By methodically working through each phase, from pre-planning to pre-launch checks and finally, your grand opening, you’ll not only launch a functional store but one that’s strategically set up for success.
Now it’s your turn! Take this checklist, one step at a time, and start building your dream store.
Ready to launch your dream Shopify store? Start your free Shopify trial today and use this checklist to guide you every step of the way!
By meticulously following this ultimate Shopify store setup checklist, you’ll be well-equipped to launch a thriving online business and take your entrepreneurial dreams to new heights.
Good luck, and happy selling!