This document provides step-by-step instructions on how to activate and set up the Analyzely app using two different methods:
- From the Wizard
- From the Dashboard.
Activation and Setup from the Wizard
Follow these steps to activate and set up the Analyzely app from the Wizard page:
Activate
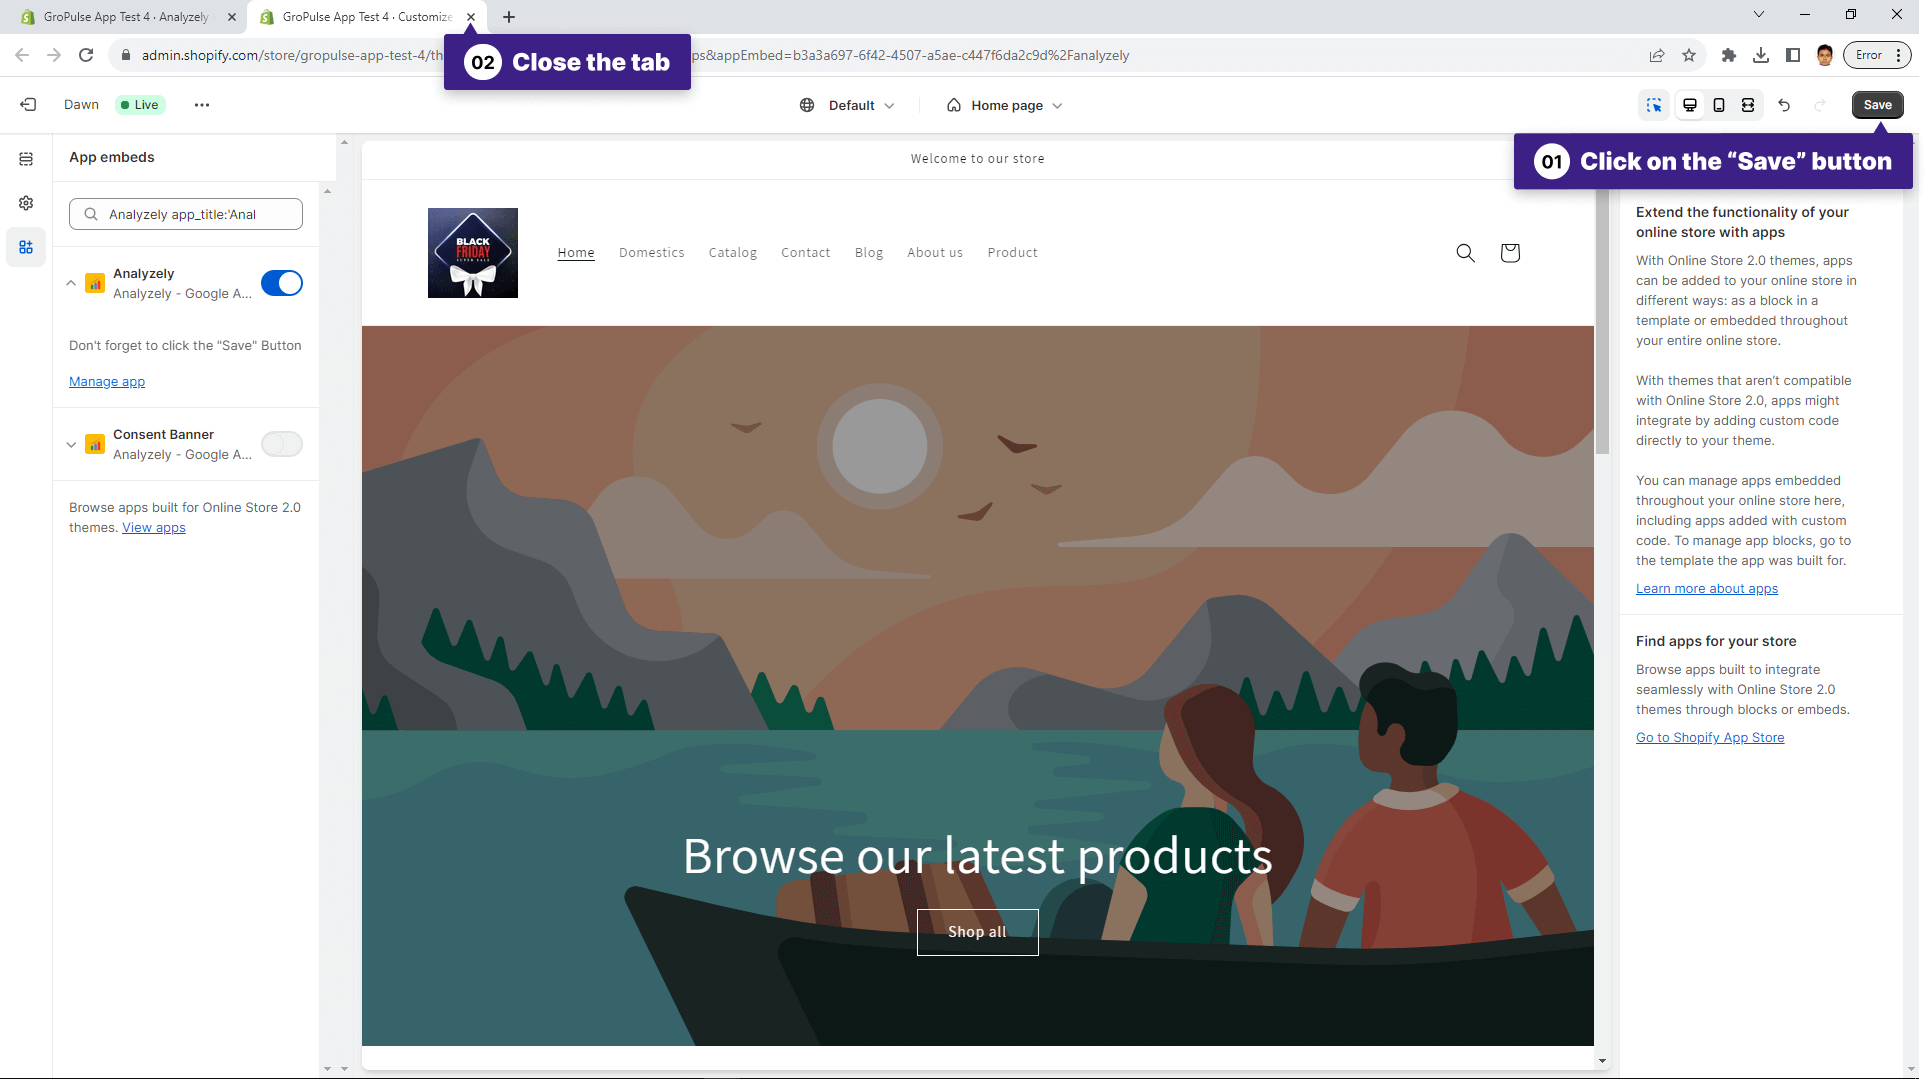
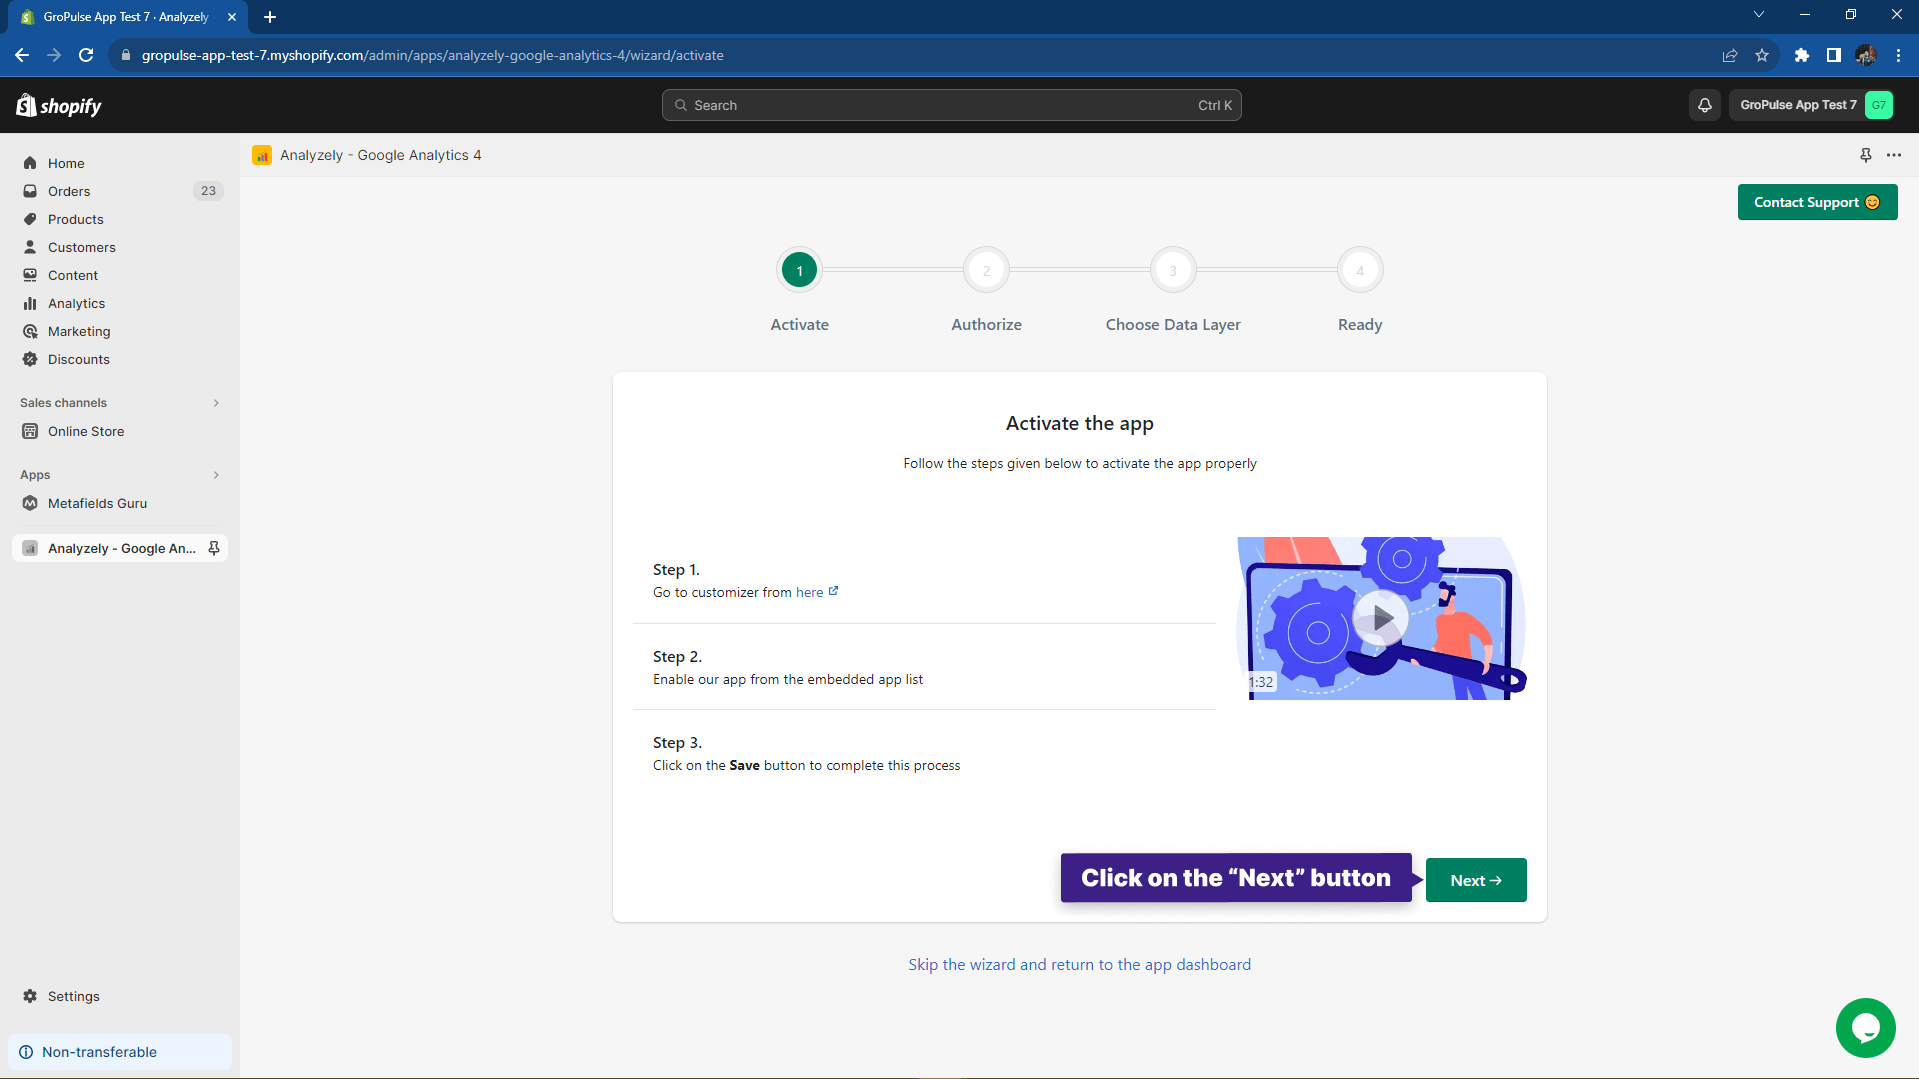
Click on the activation link provided. You will be redirected to the app embed page.
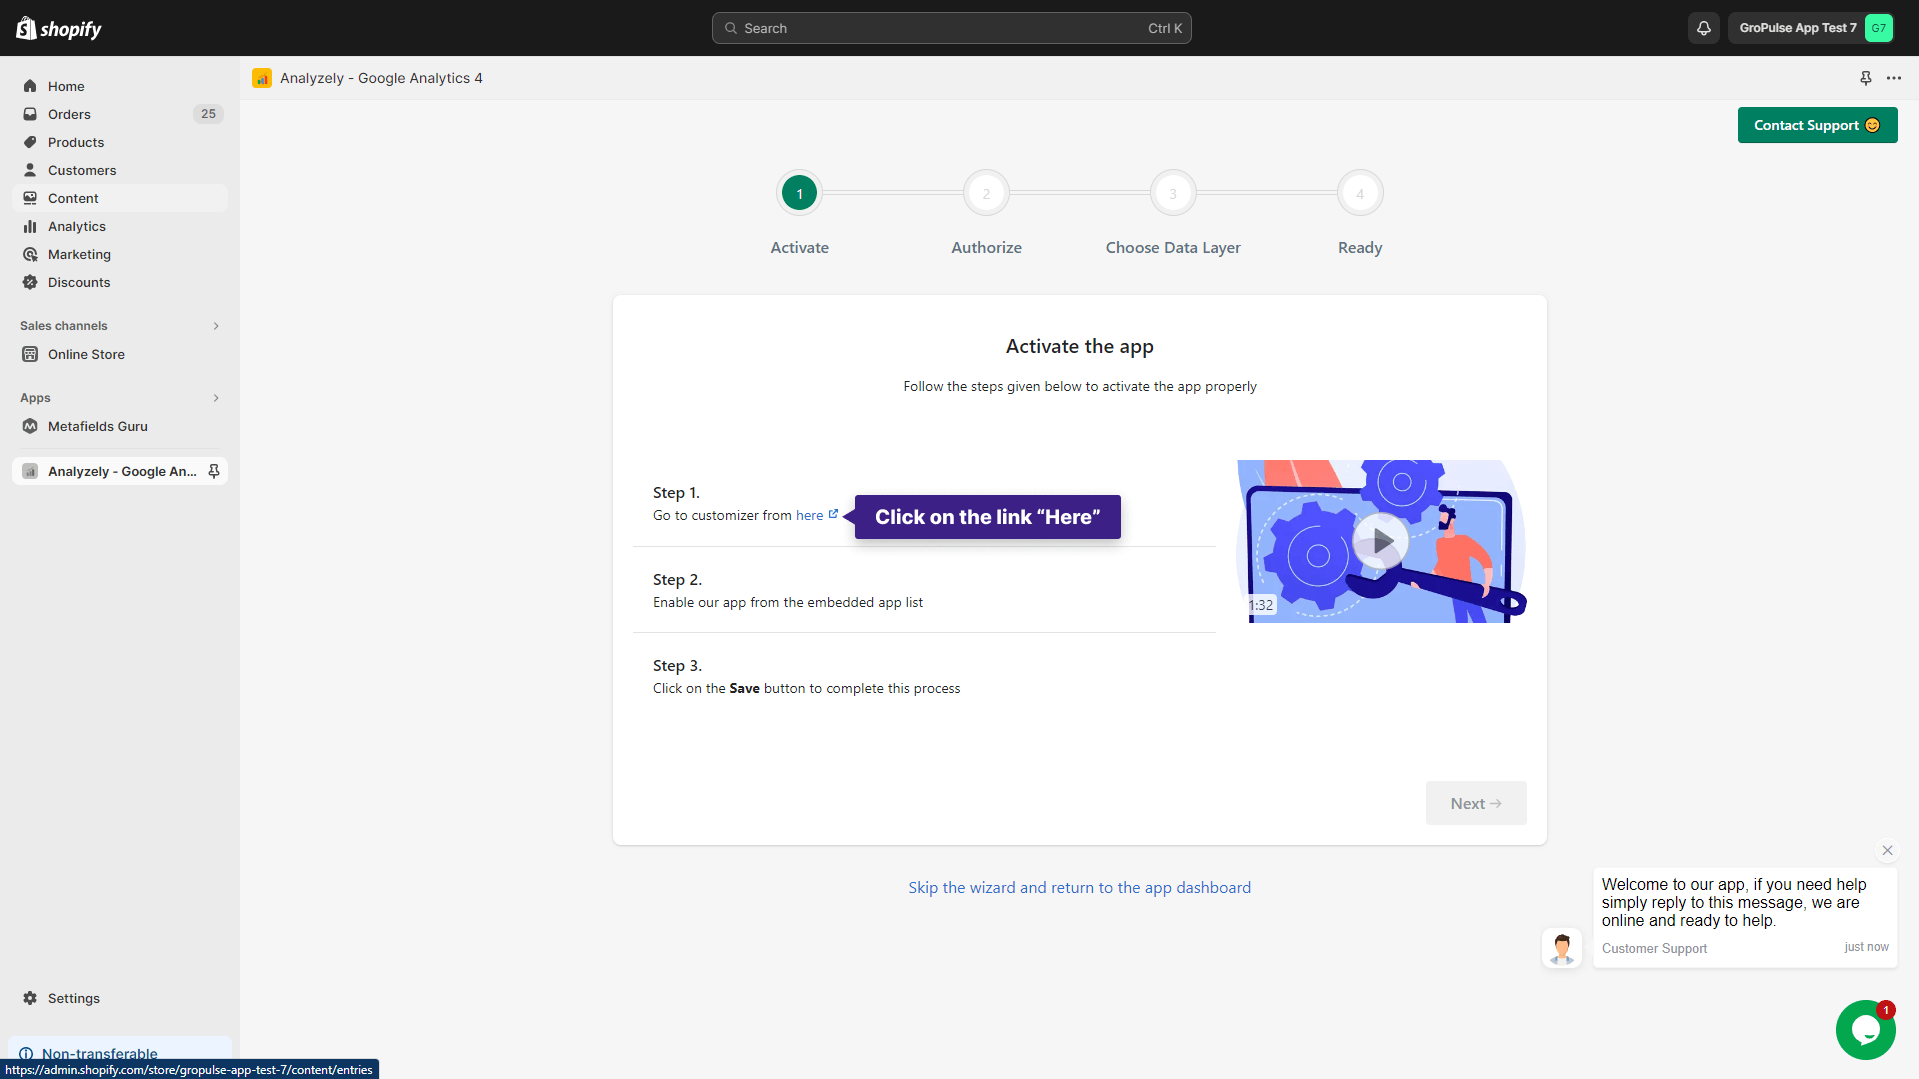
Click the “Save” button on the app embed page. Then close the tab and return to the app wizard page.
The Analyzely app is now activated. Click on the “Next” button to proceed.
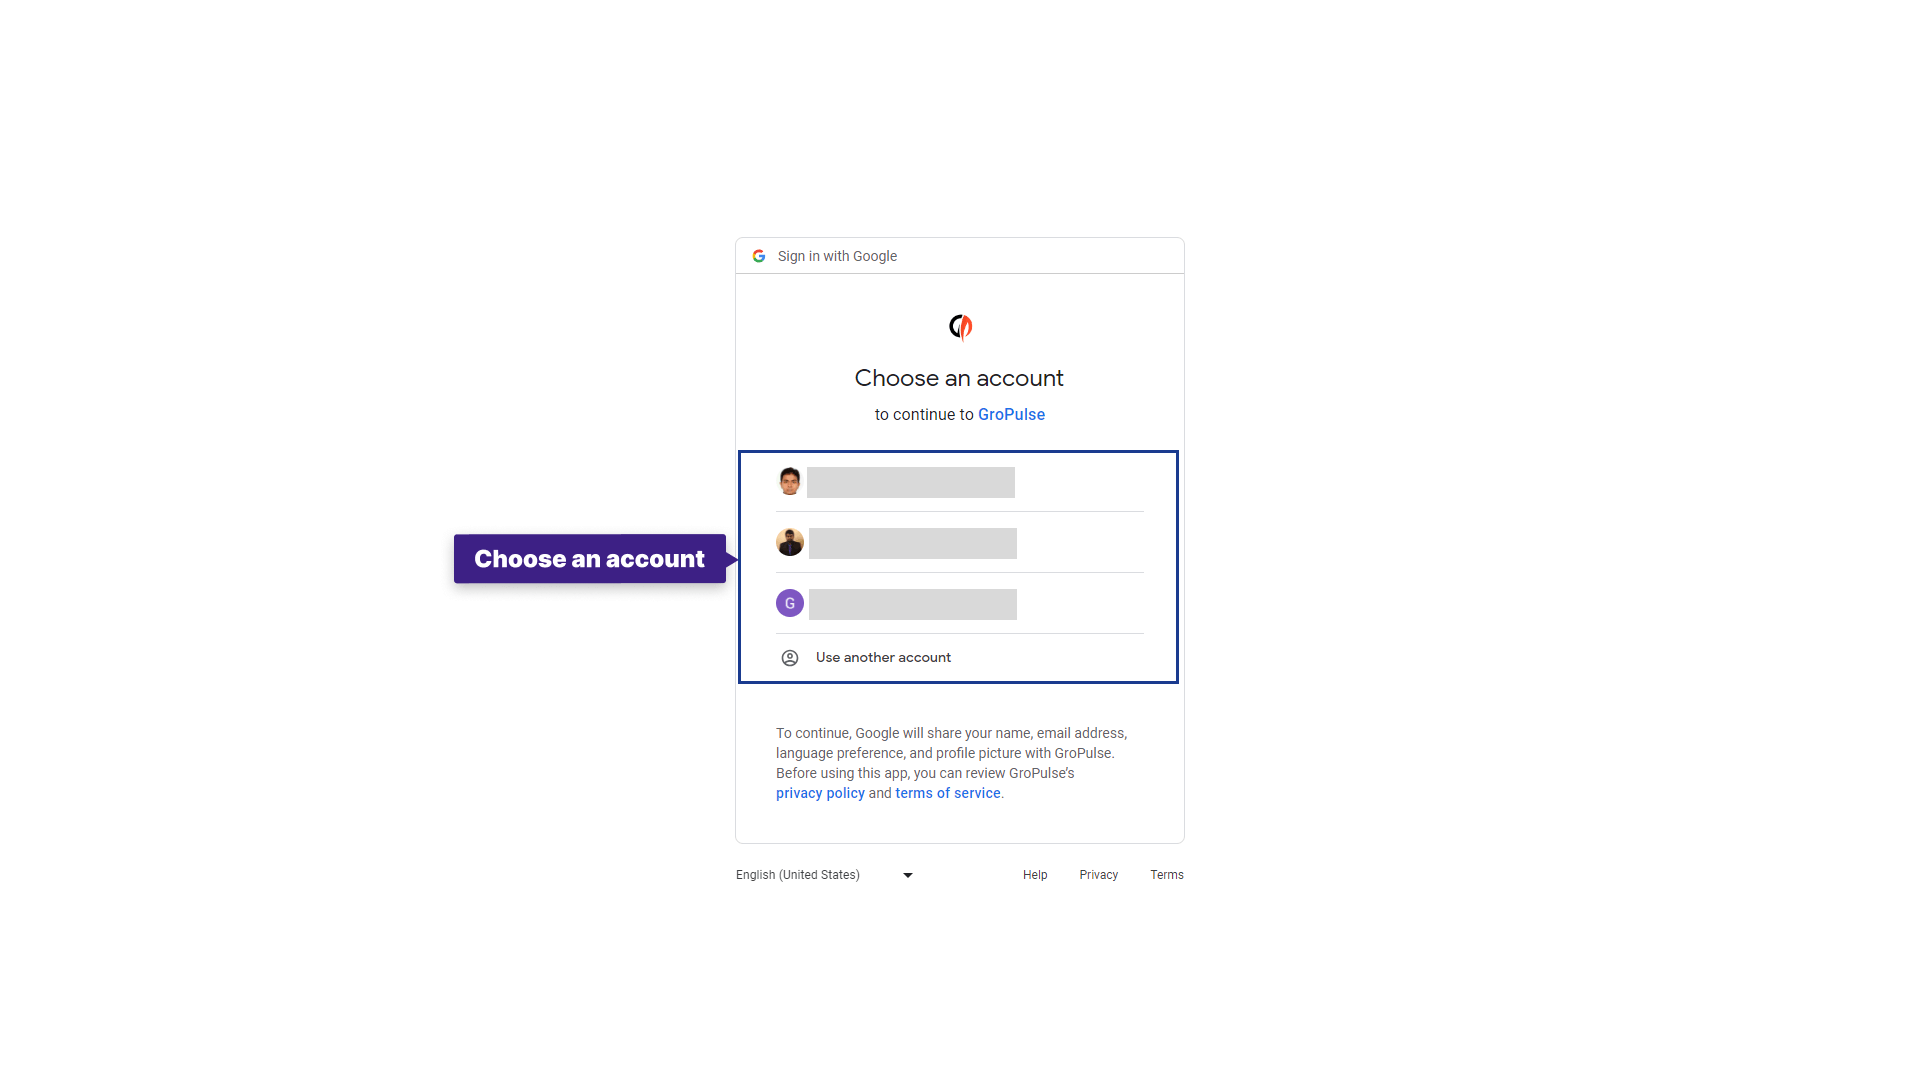
Authorize
Click on the “Sign In with Google” button.
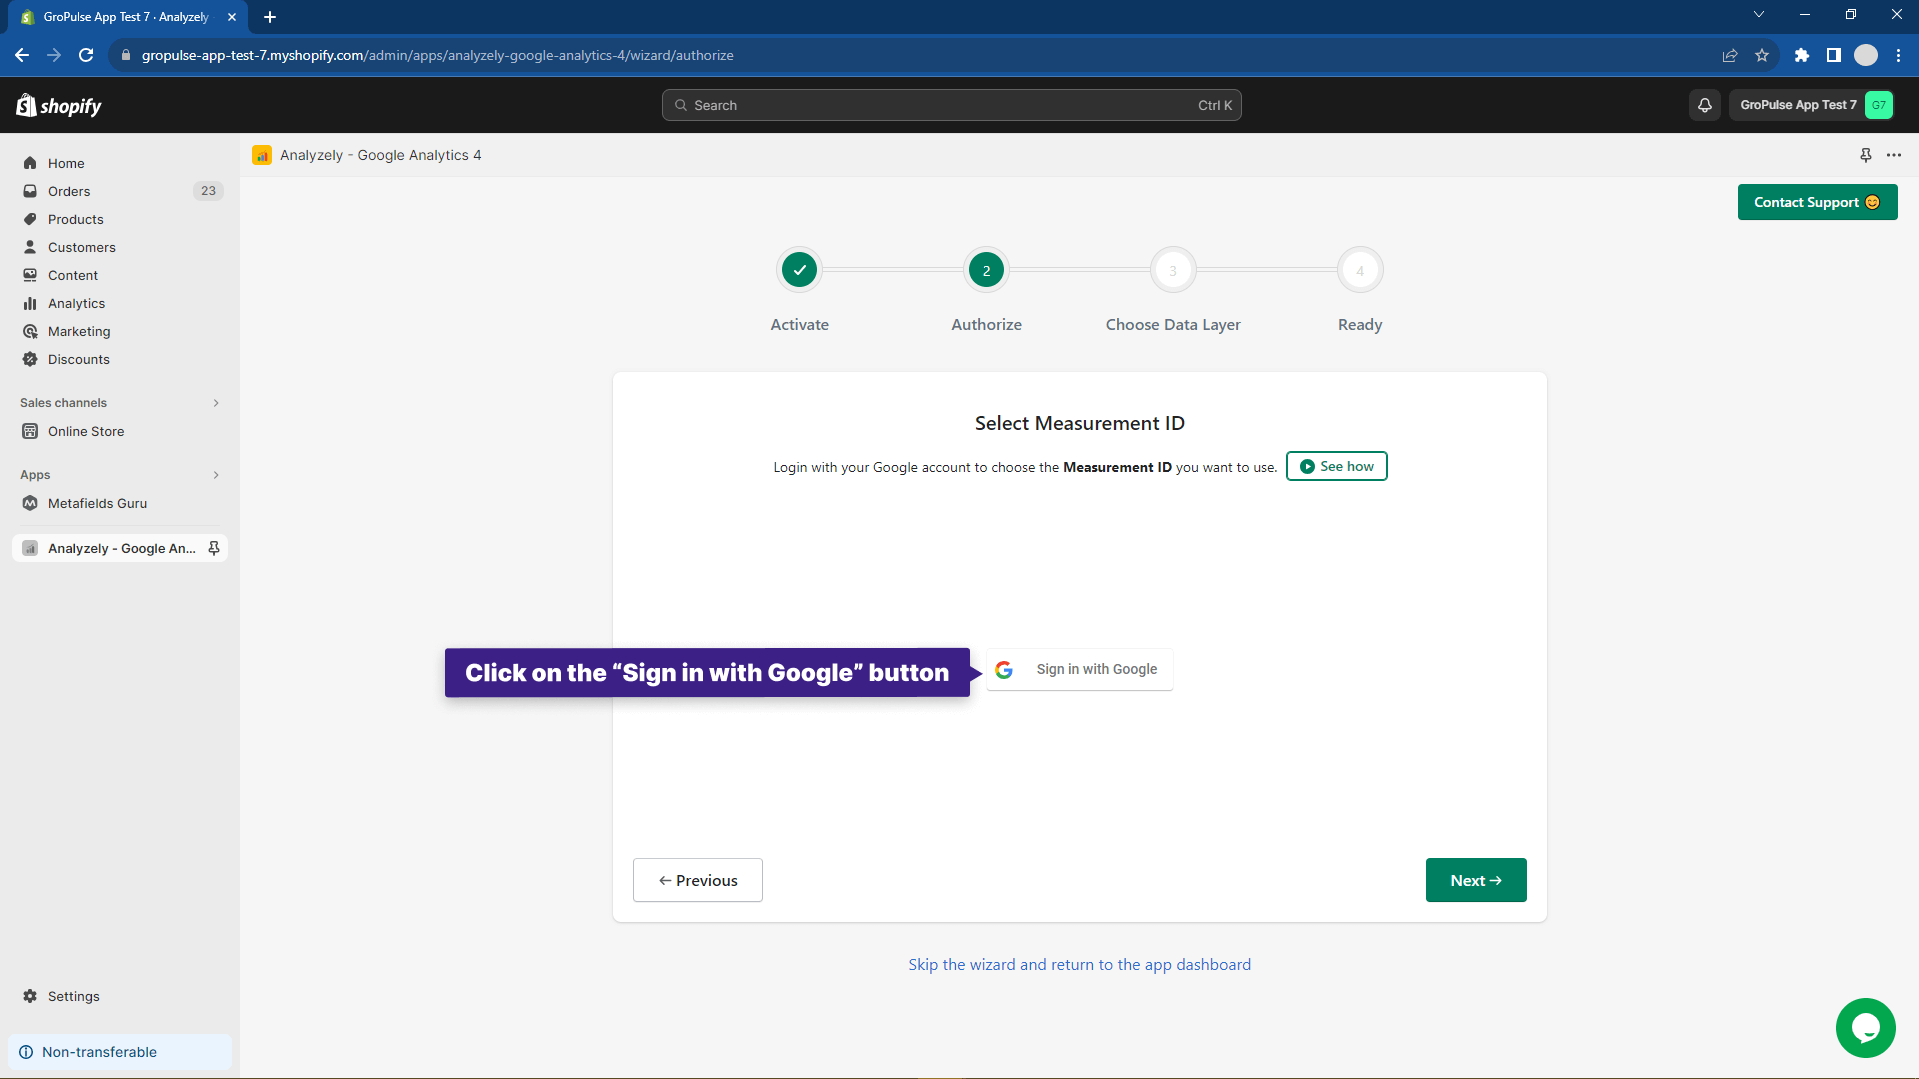
Select a Google account that is associated with your Google Analytics account.
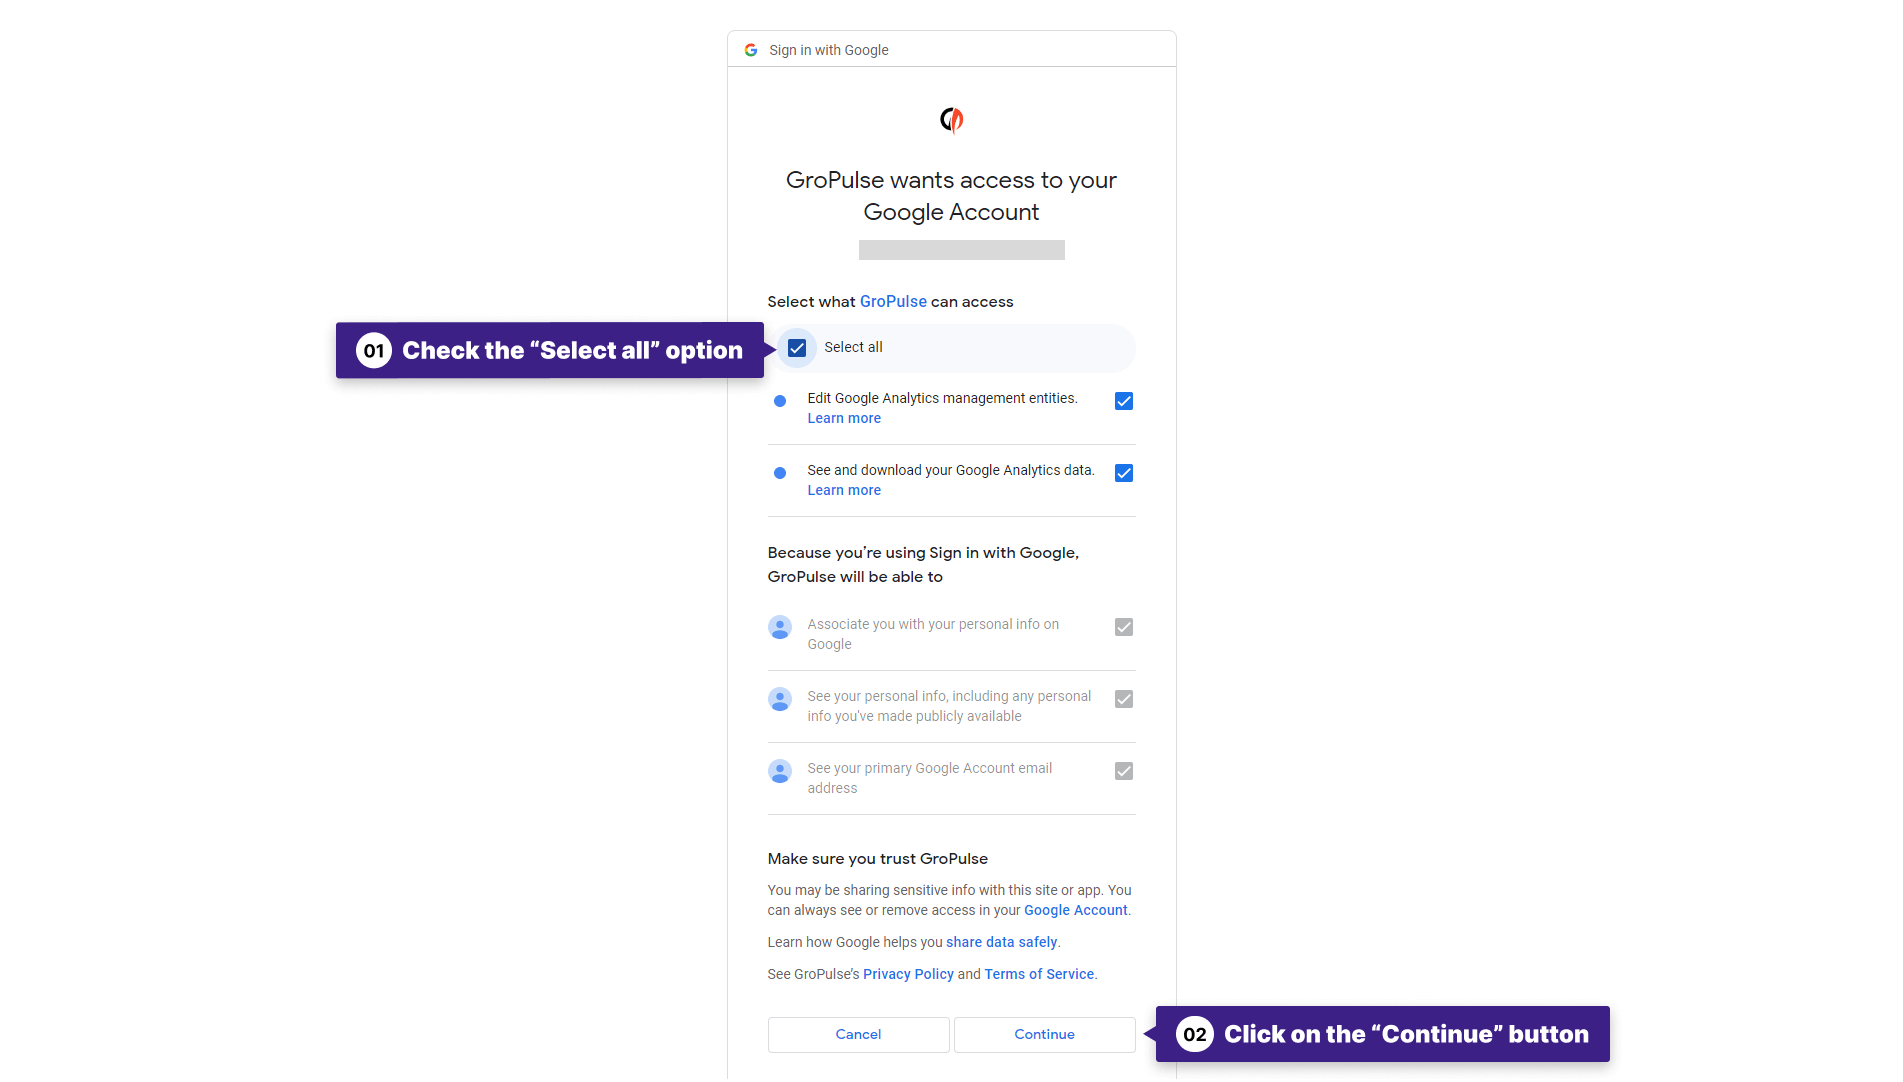
Grant all necessary permissions, then click “Continue.”
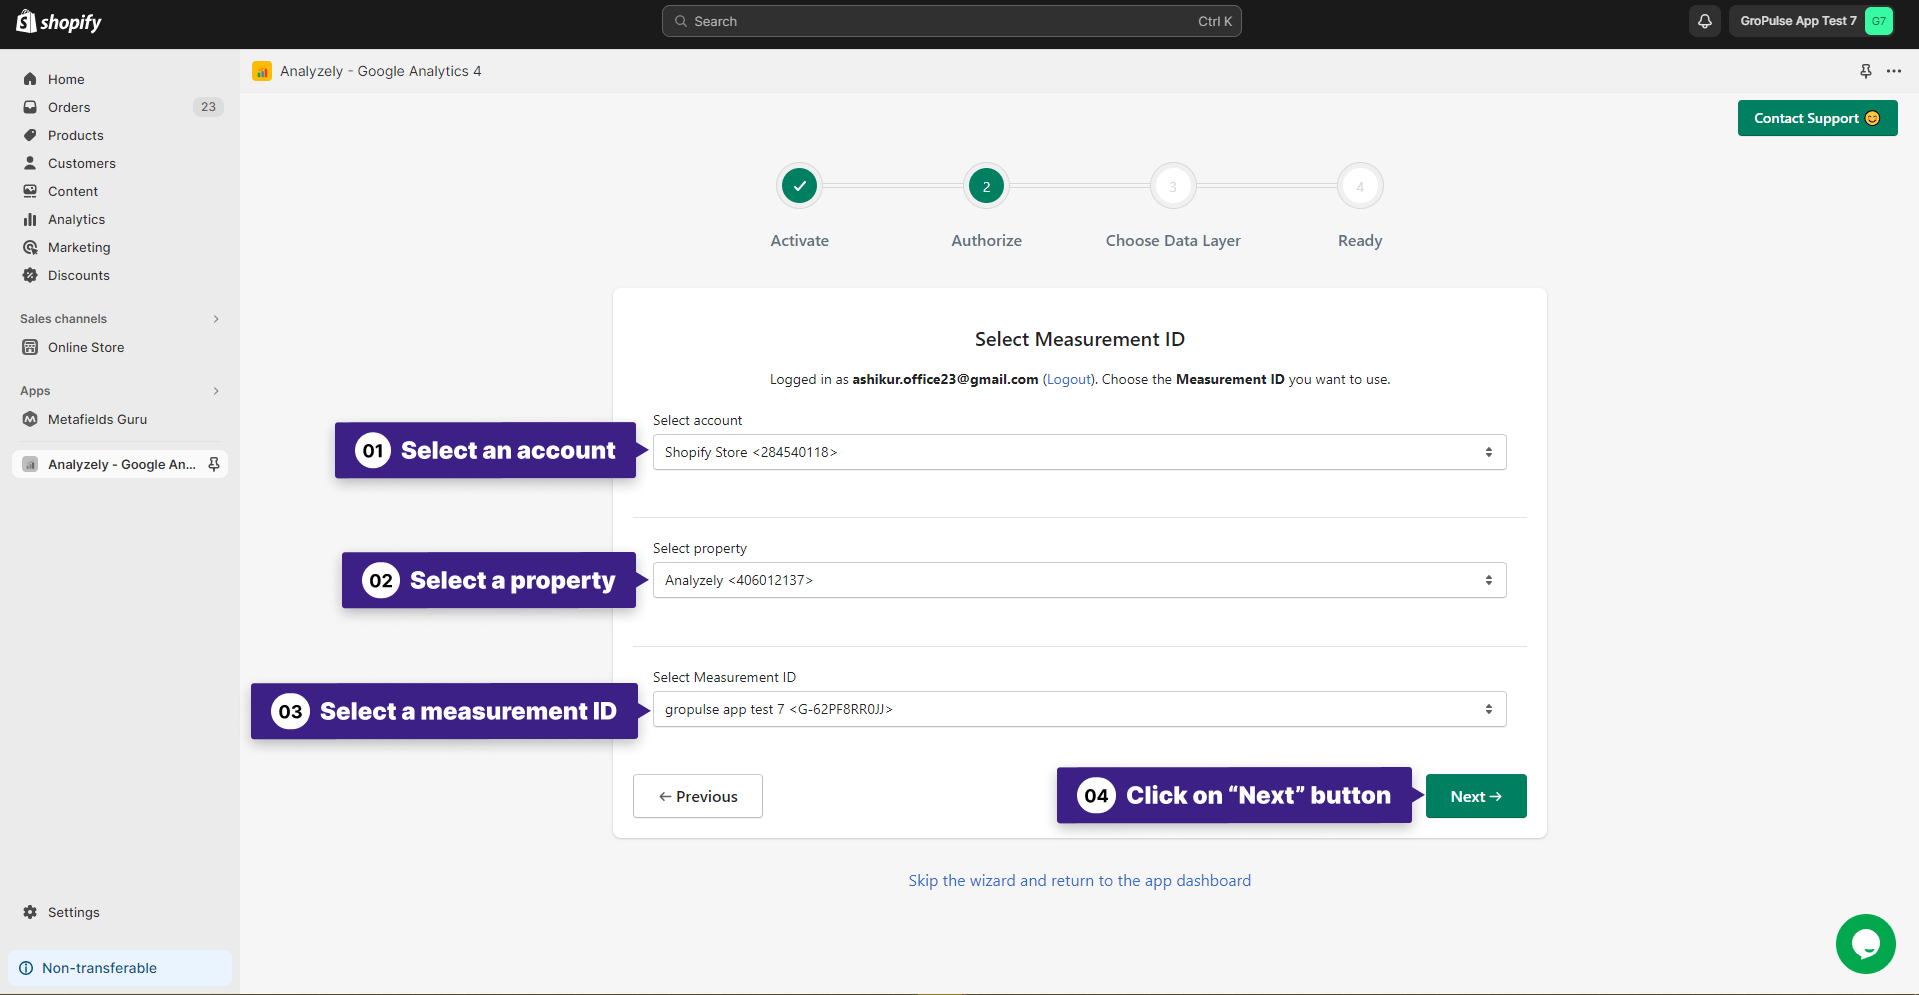
You will be prompted to authorize the page again. Now select an account, property, and measurement ID, then click “Next.”
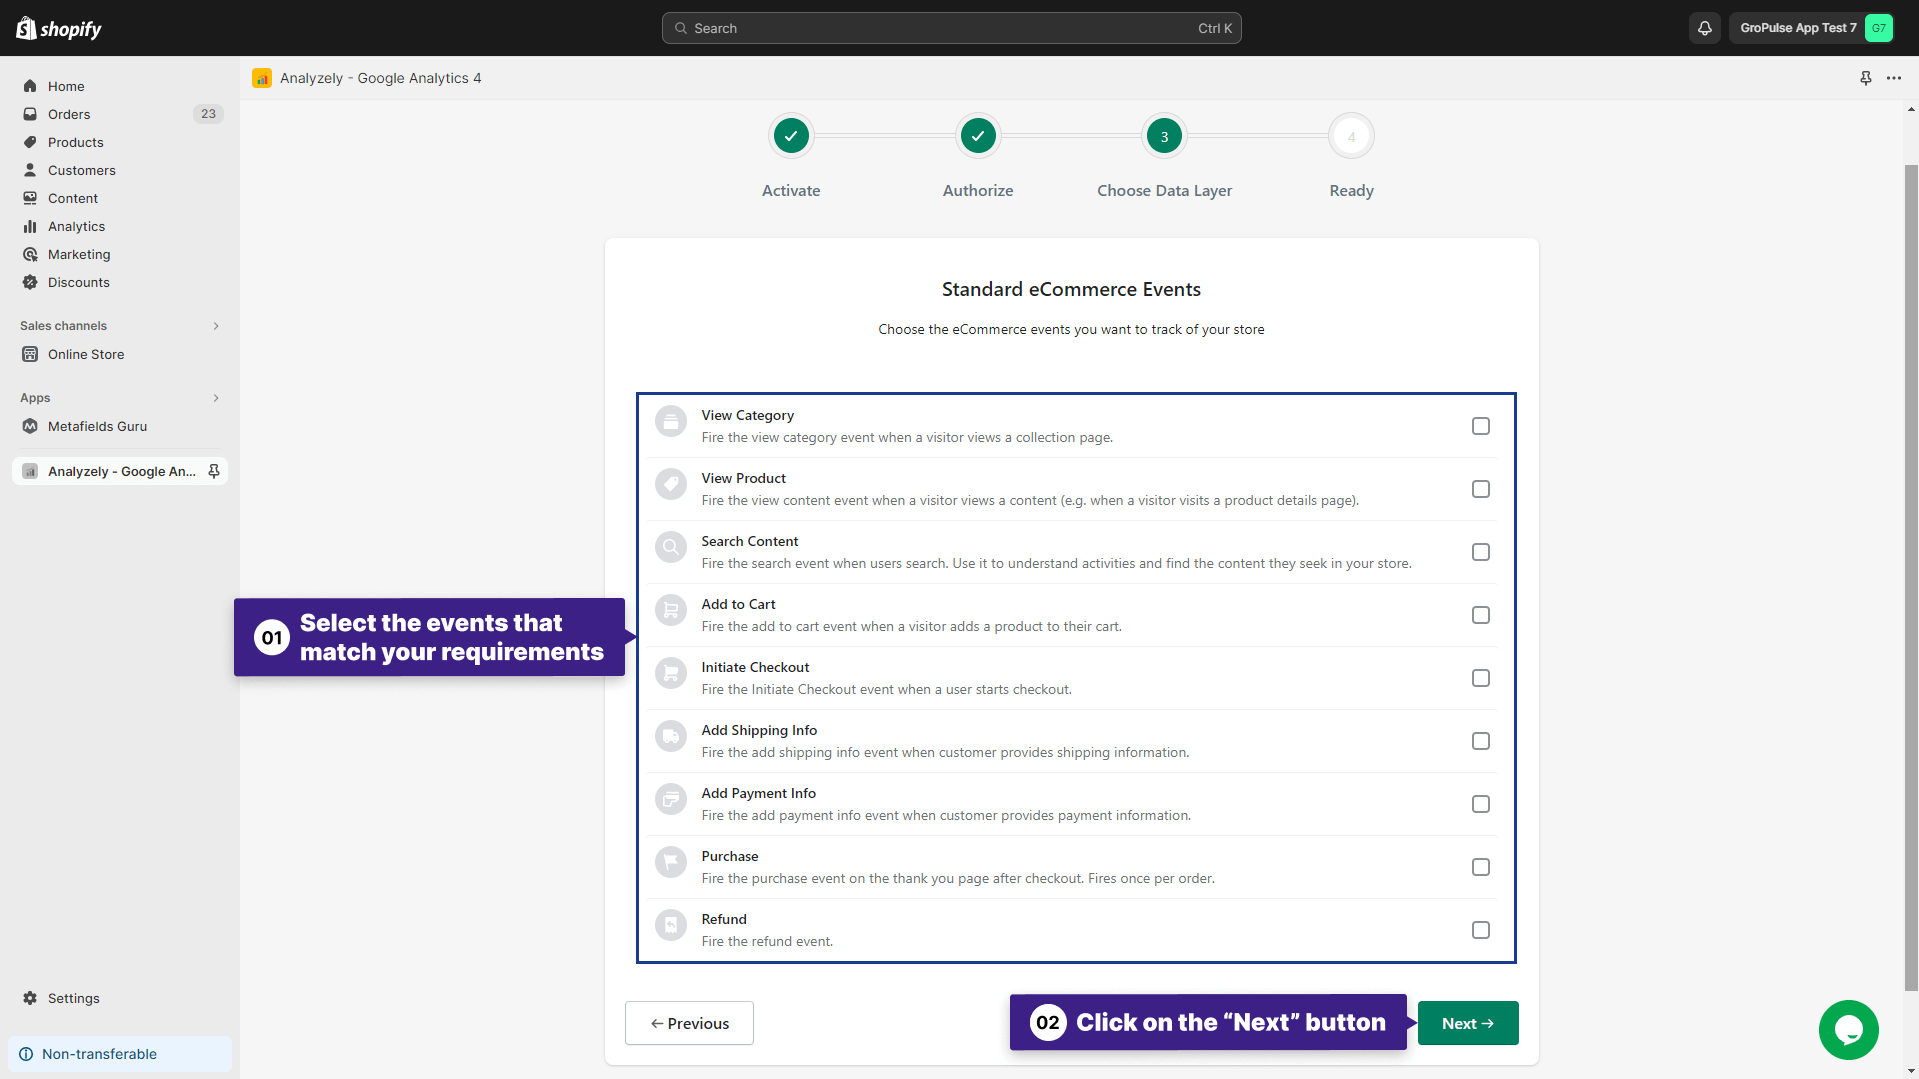
Choose the Data Layer
In this step, you will find a list of events. Select the events that match your requirements. Then, click “Next.”
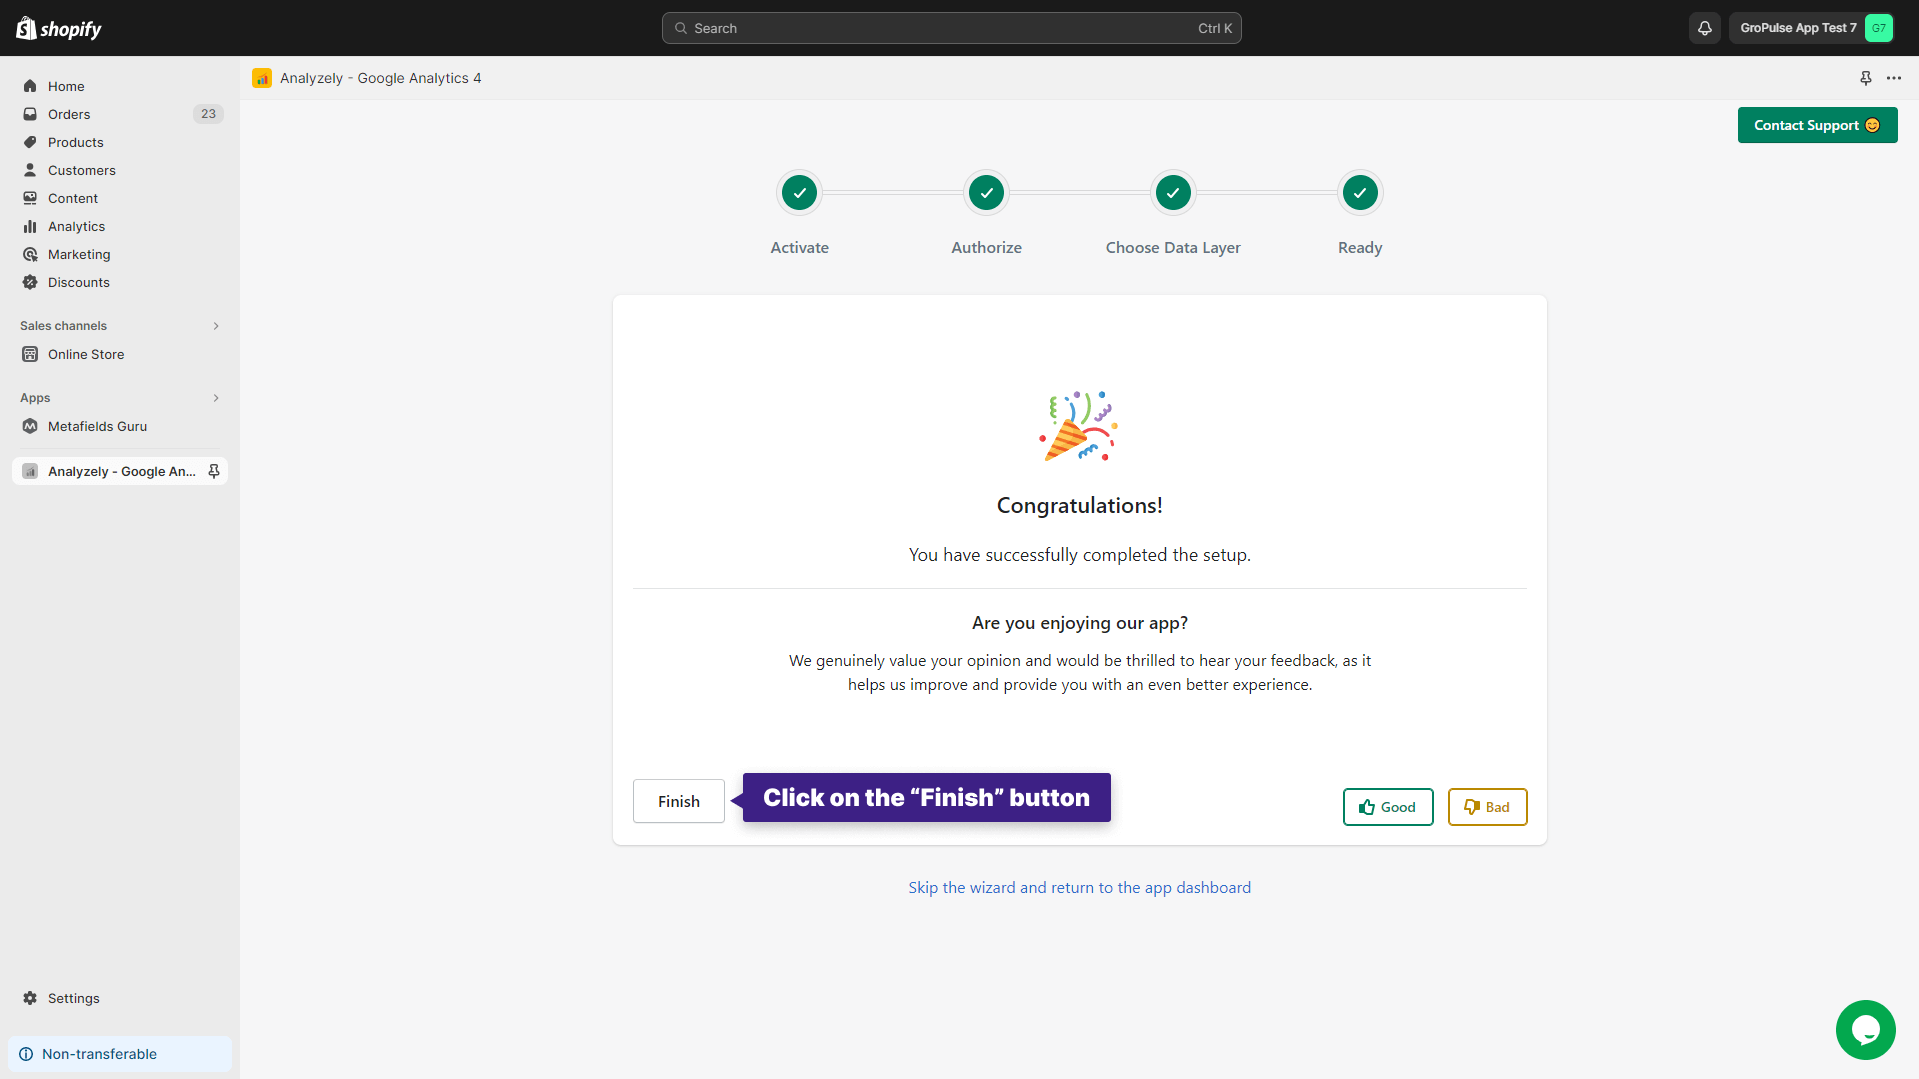
Finish
Click the “Finish” button to complete the process. Congratulations! You have successfully activated and set up the Analyzely app.
Activation and Setup from the Dashboard
Follow these steps to activate and set up the Analyzely app from the Dashboard:
Activation
Click on the “Activate” button. You will be redirected to the app embed page.
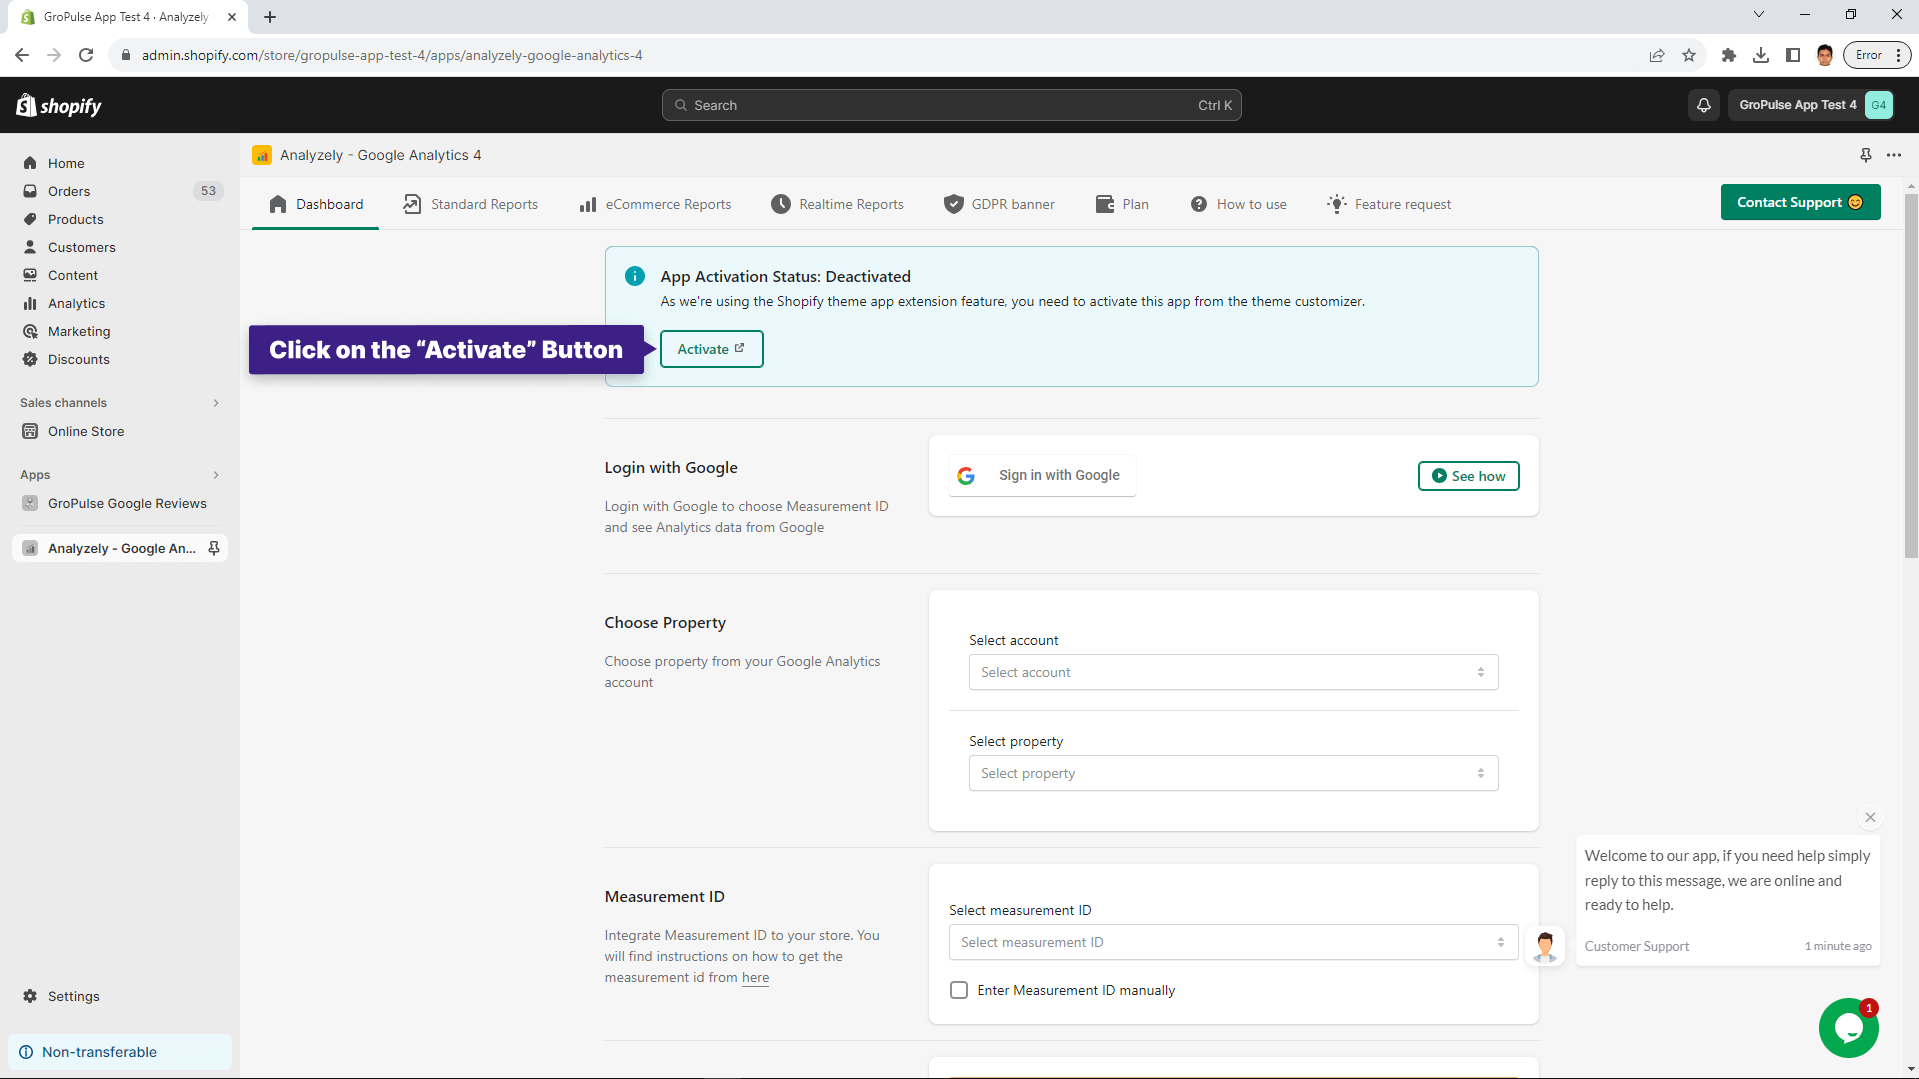
Click the “Save” button on the app embed page. Close the tab and return to the app dashboard. The Analyzely app is now activated.
Log in with Google
Click the “Sign In with Google” button.
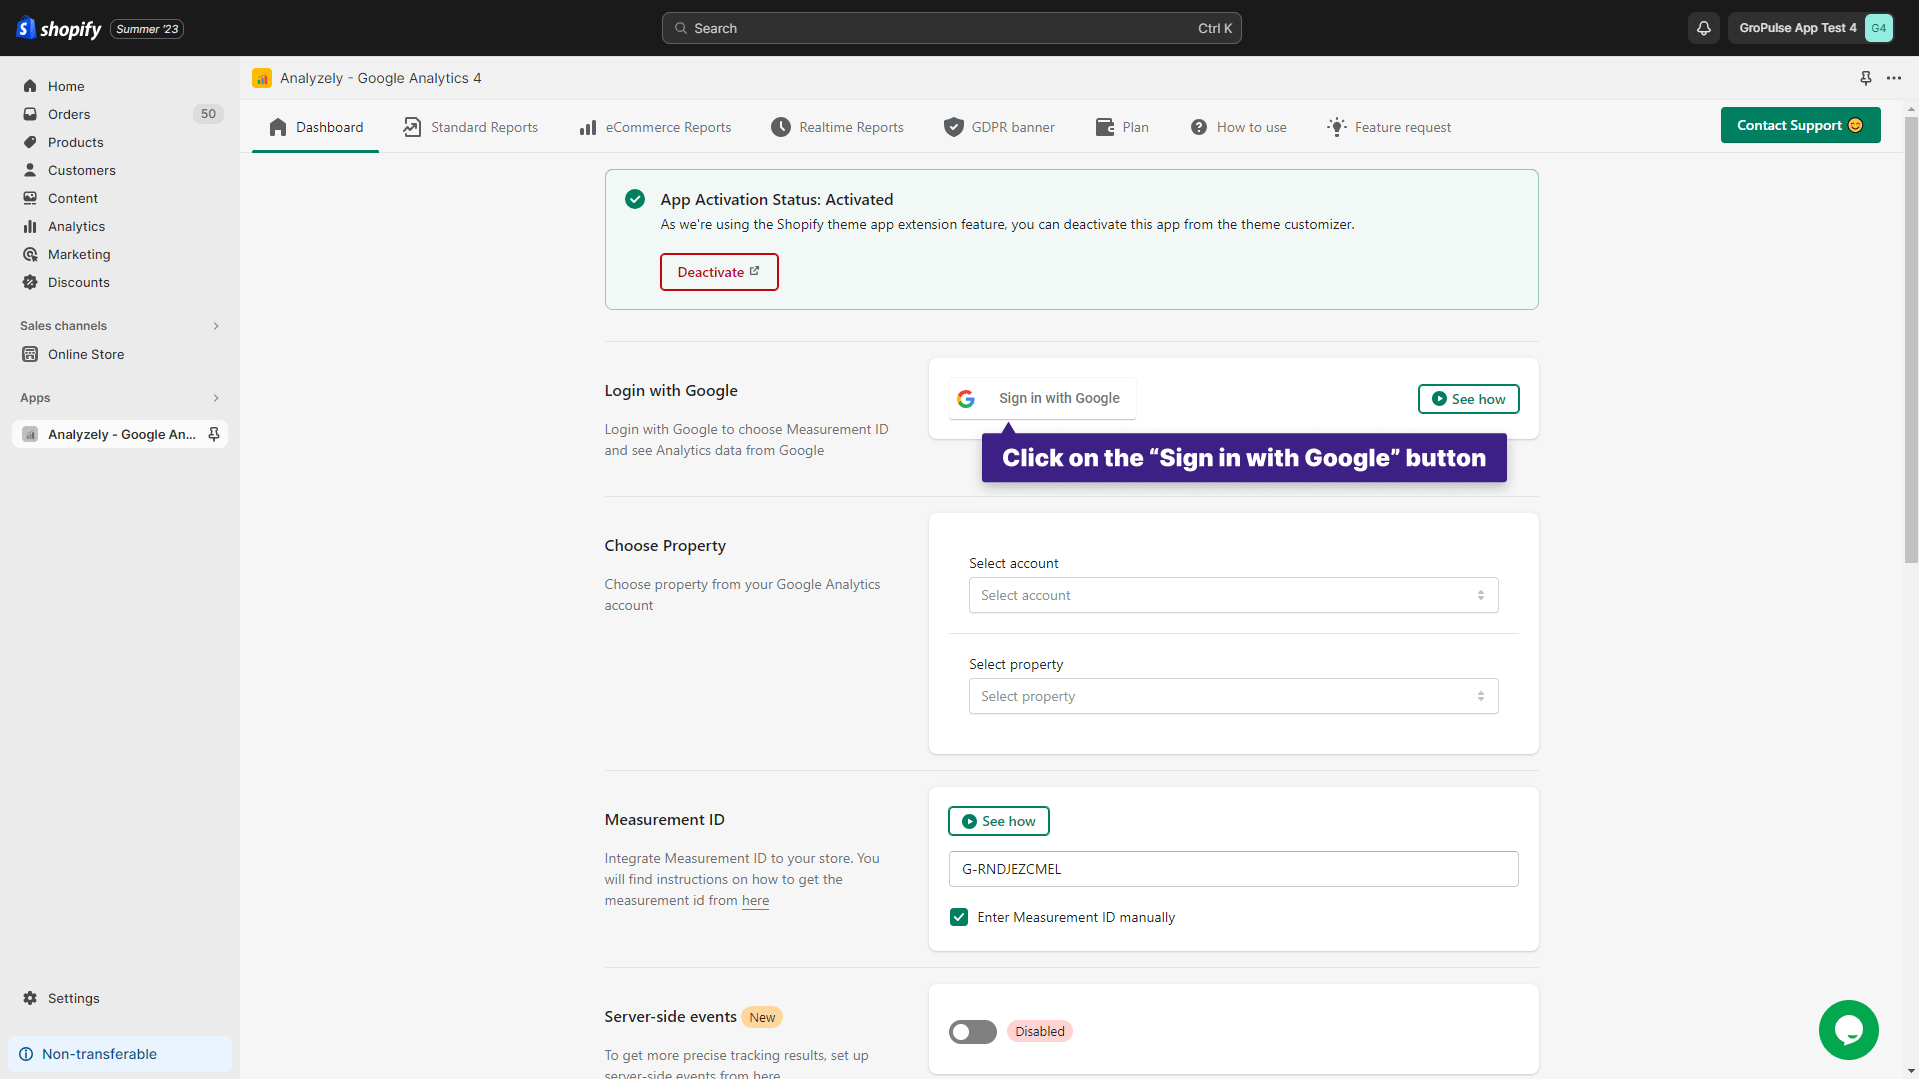
Choose a Google account associated with your Google Analytics account.
Grant all necessary permissions, then click “Continue.”
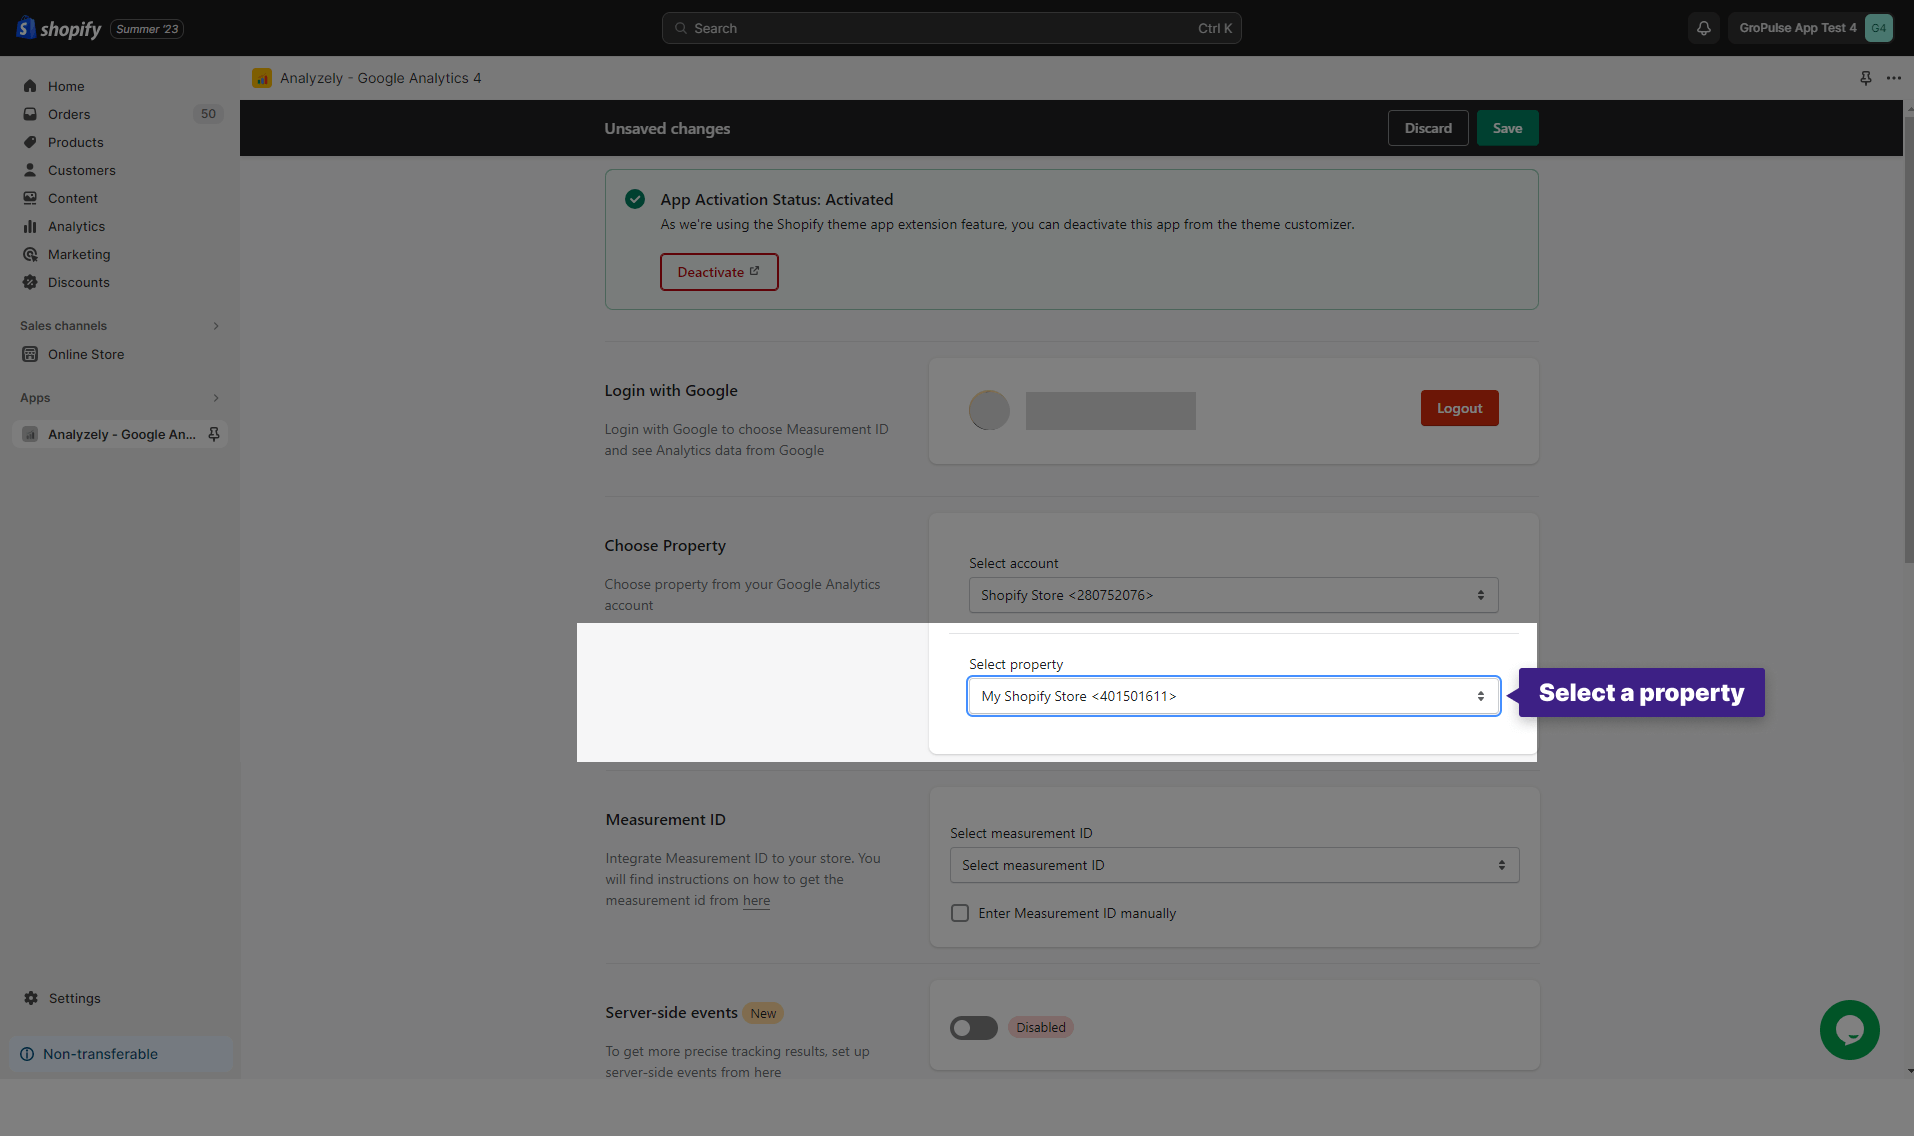
Choose Property
Select an account.
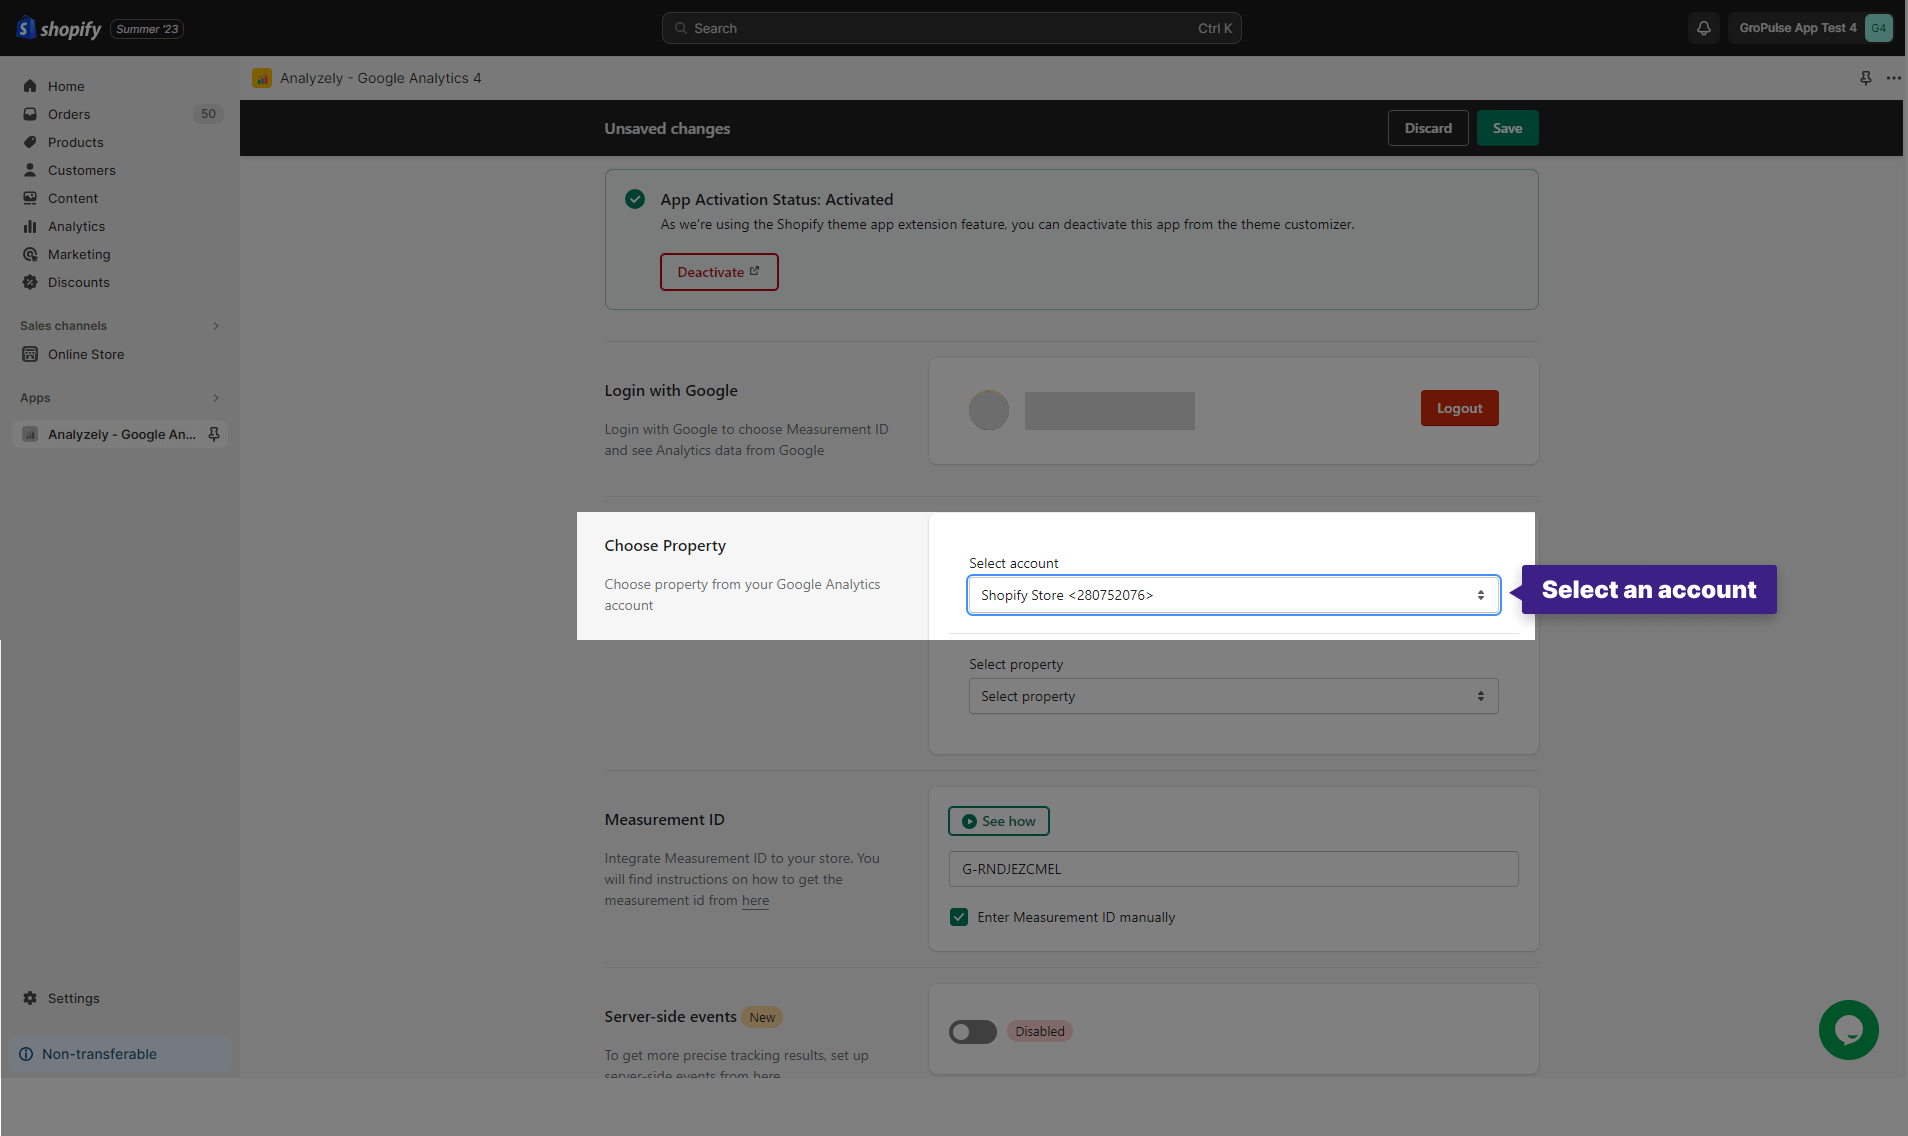
Select a Property
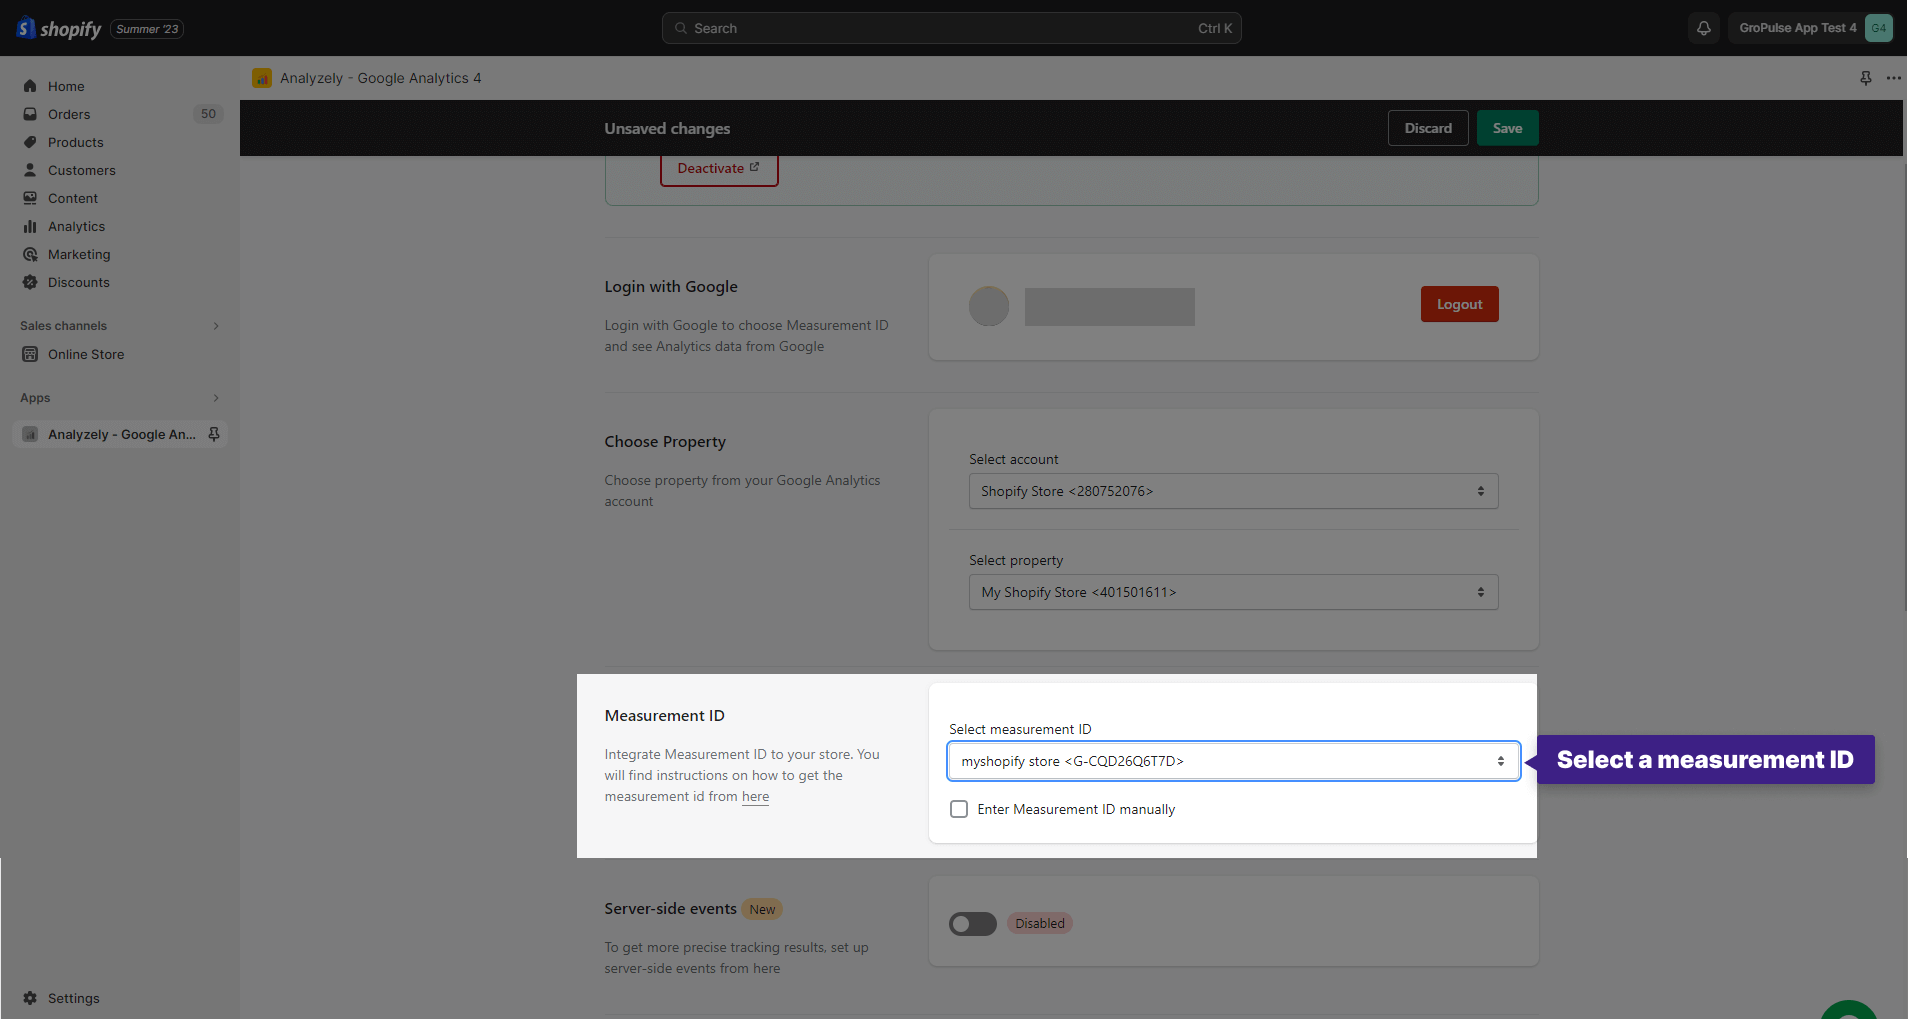
Select a Measurement ID
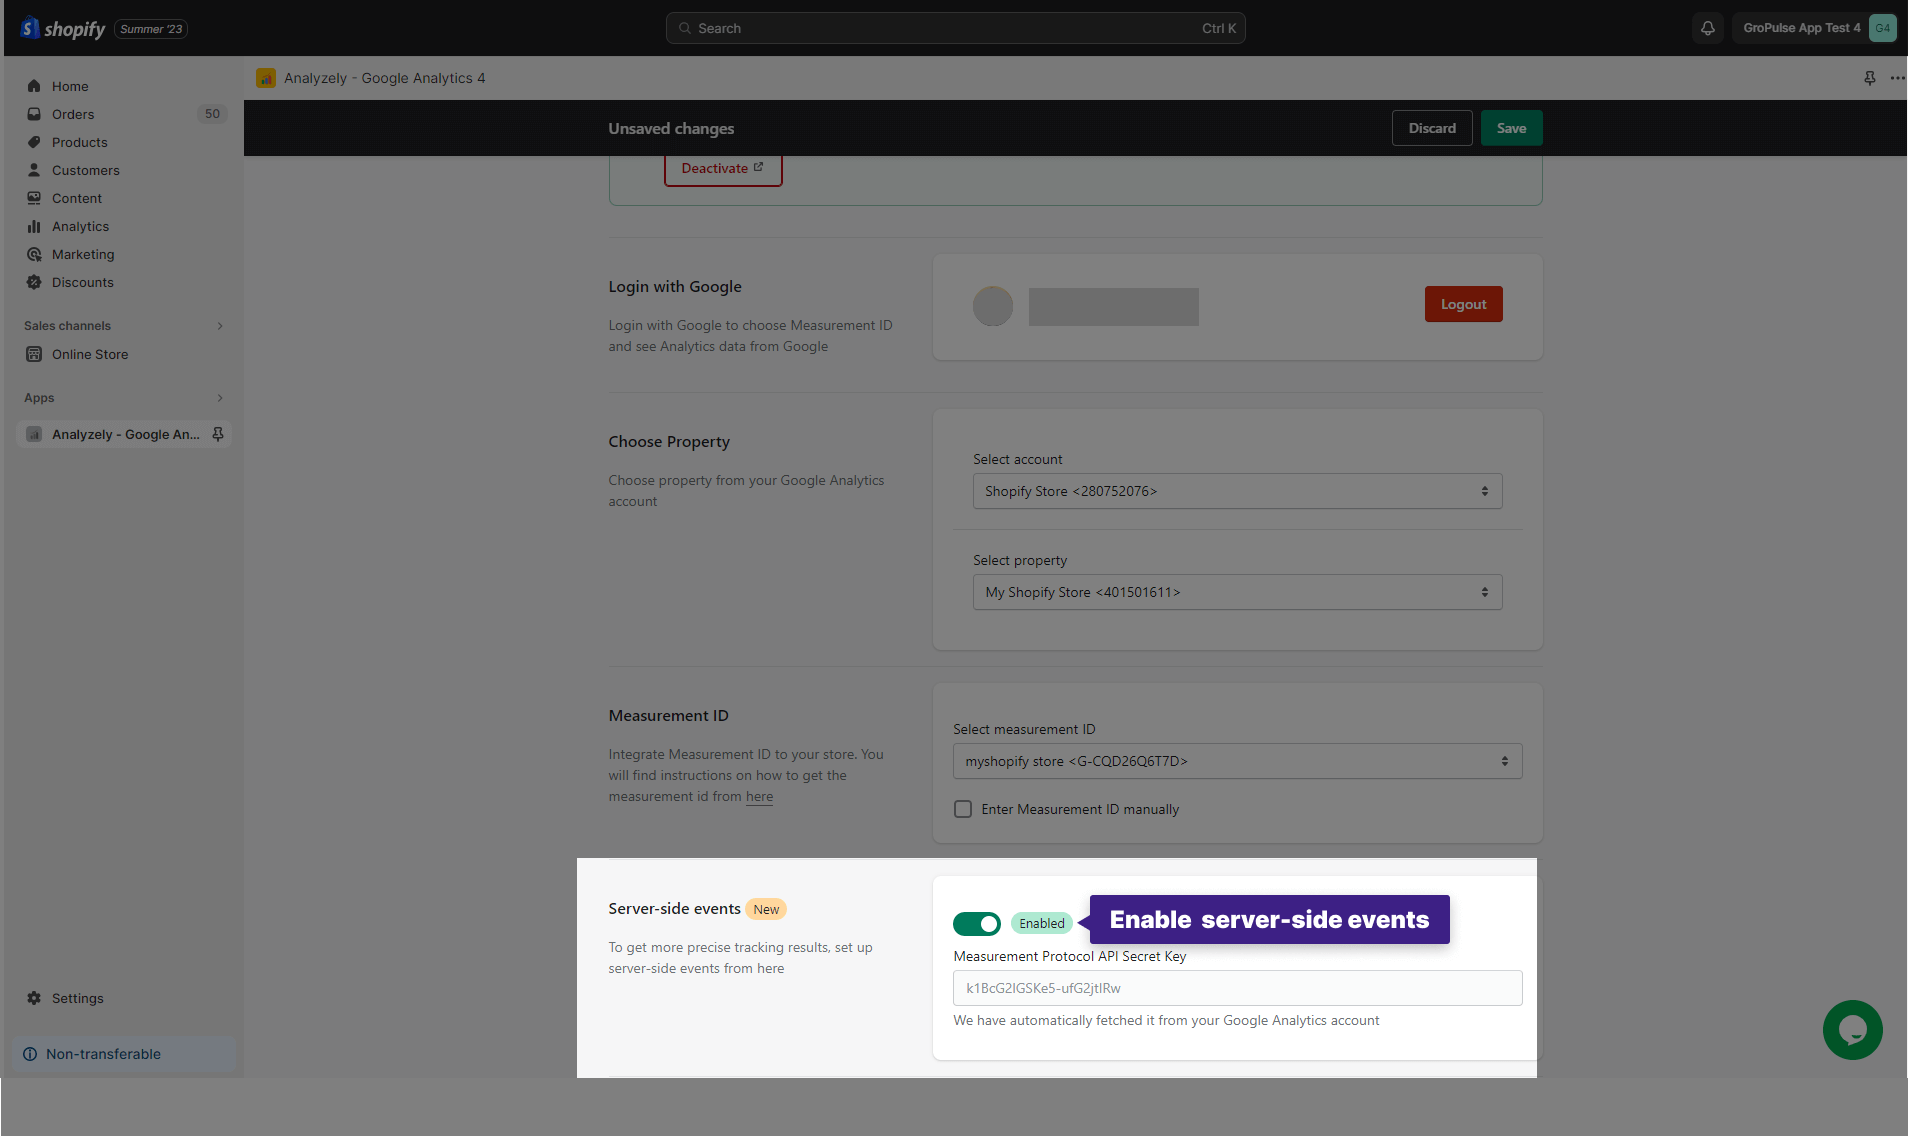
Server-Side Event
Sometimes, users use browser extensions, such as ad blockers or other tools, to avoid having their purchases and sessions tracked or they may not wait for the “thank you” page to load after completing a purchase. In such cases, certain data might not be recorded from the browser’s end.
This is where server-side events come into play, offering a more accurate way to ensure that no transaction data is missed in these situations. Enable server-side events.
Choose Data Layer
In this step, you will find a list of events. Select the events that match your requirements.
Finally, Click the “Save” button to save your selections.
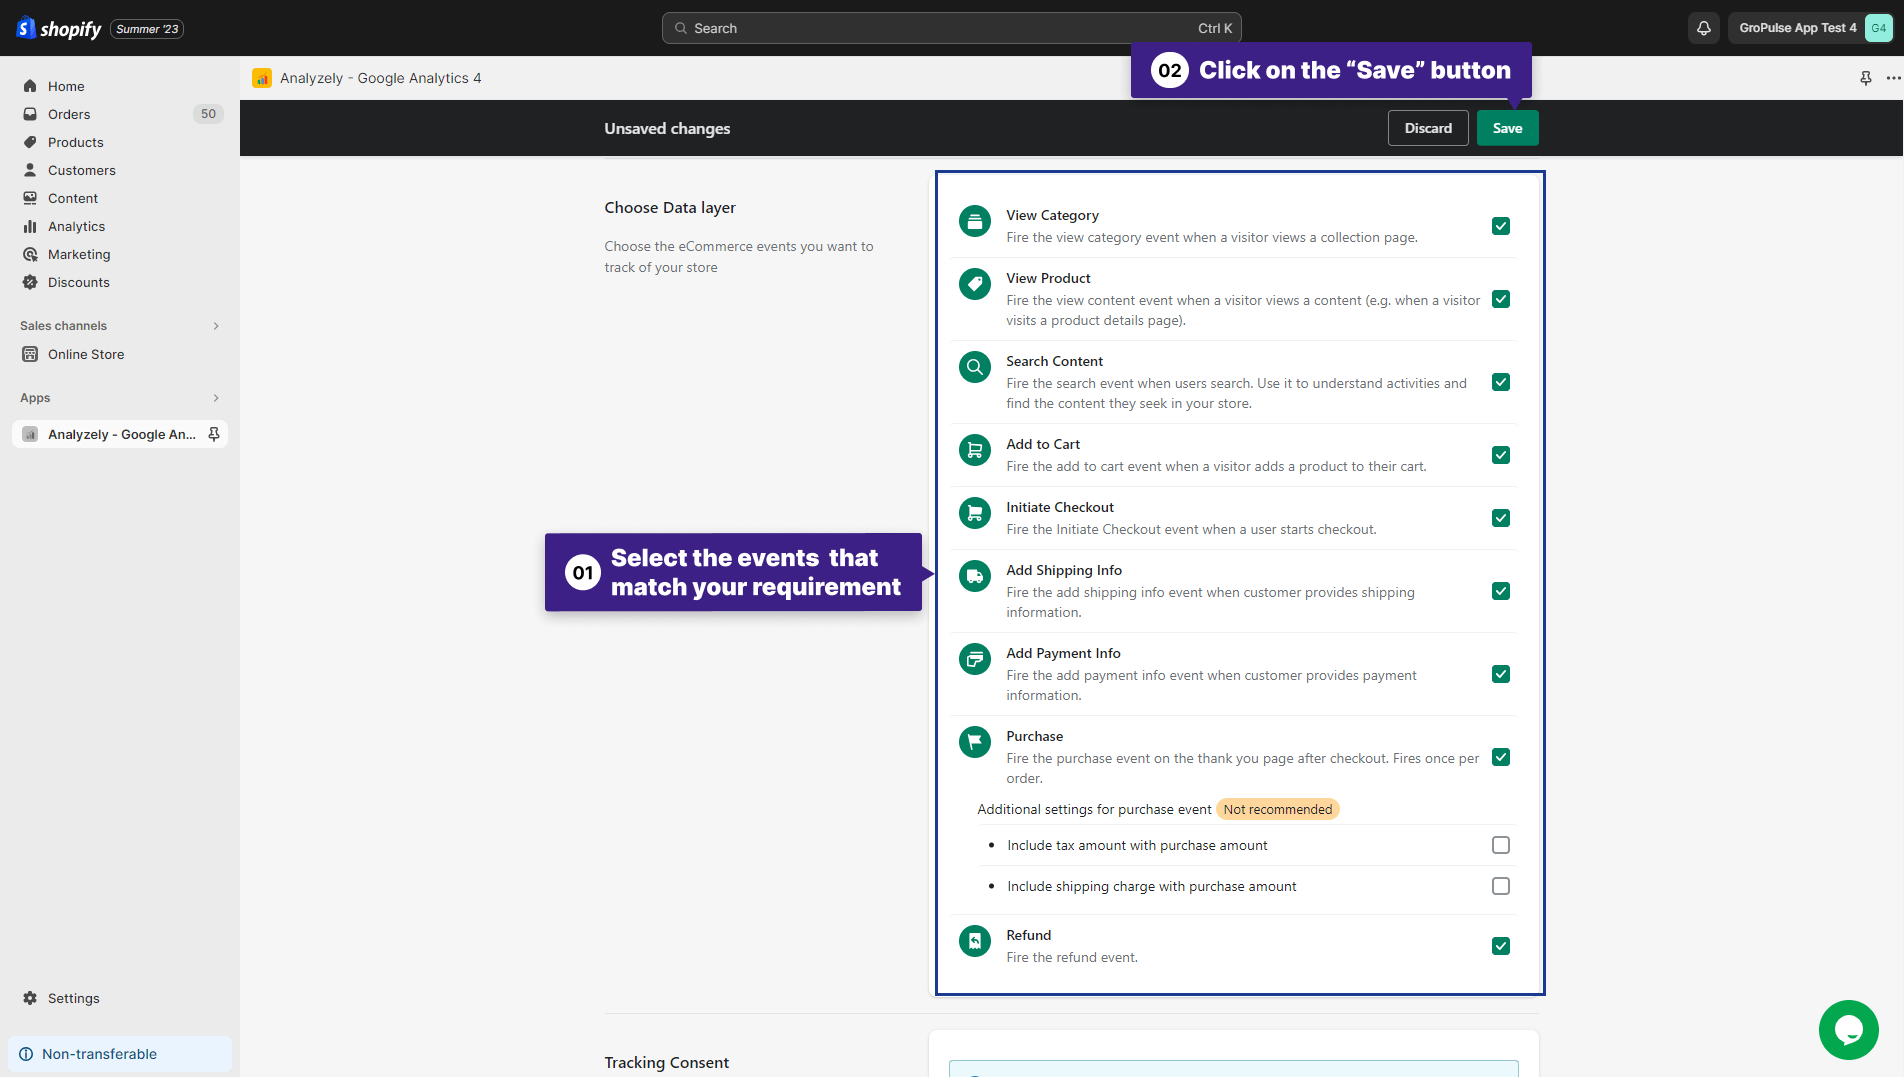
📝 Note: It’s important to note that in order to activate the “Add Shipping Info,” “Add Payment Info,” and “Refund” events, server-side events must be enabled first.
Following these steps, you will successfully activate and set up the Analyzely app from both the Wizard page and the Dashboard. Enjoy using the app for your analytics needs!