Event tracking is a crucial aspect that provides businesses with valuable insights into customer behavior, funnel optimization, and marketing effectiveness. This documentation will guide you on how to track eCommerce events in Google Analytics 4 using the Analyzely app.
Navigate to the Data Layer Section
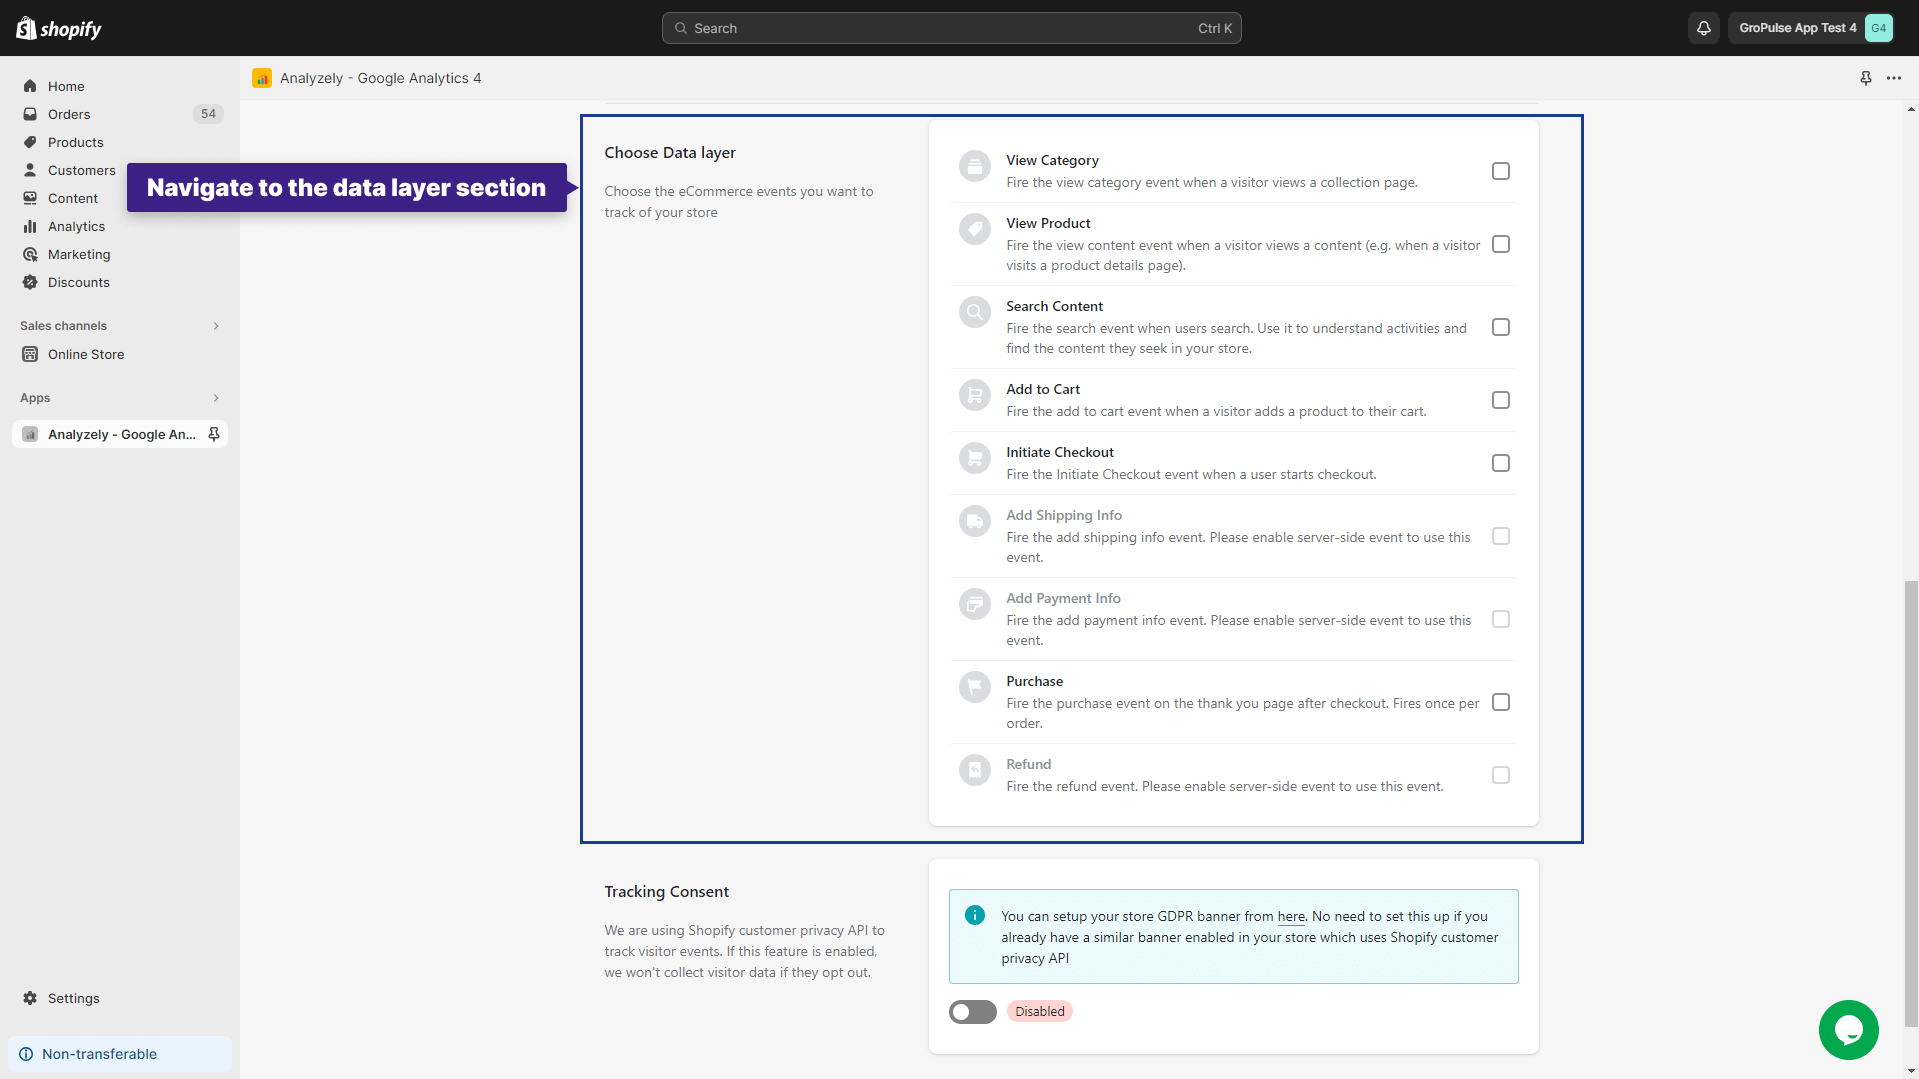
Scroll down to the data layer section within the Analyzely app dashboard. Here, you will find a list of events that you can track.
Event Types and Descriptions
Before we move forward, it’s important to understand the different types of events and what they mean:
View Category: This event is triggered when a visitor visits the collection page on your website.
View Product: This event is triggered when a visitor views specific content, like when they check out a product’s details page.
Search Content: This event is triggered when a visitor performs a search on your website. It helps you understand what users are looking for and assists them in finding the content they’re interested in within your store.
Add to Cart: This event is triggered when items are added to the shopping cart.
Initiate Checkout: This event is triggered when a visitor clicks on the checkout button.
Add Shipping Info: This event is triggered when a customer provides their shipping information during the checkout process.
Add Payment Info: This event is triggered when a customer provides their payment information during the checkout process.
Purchase: This event is triggered on the thank-you page after a successfully completed purchase.
Refund: This event is triggered when a refund is processed.
Choose the event types that meet your tracking requirements. You can select all events if needed.
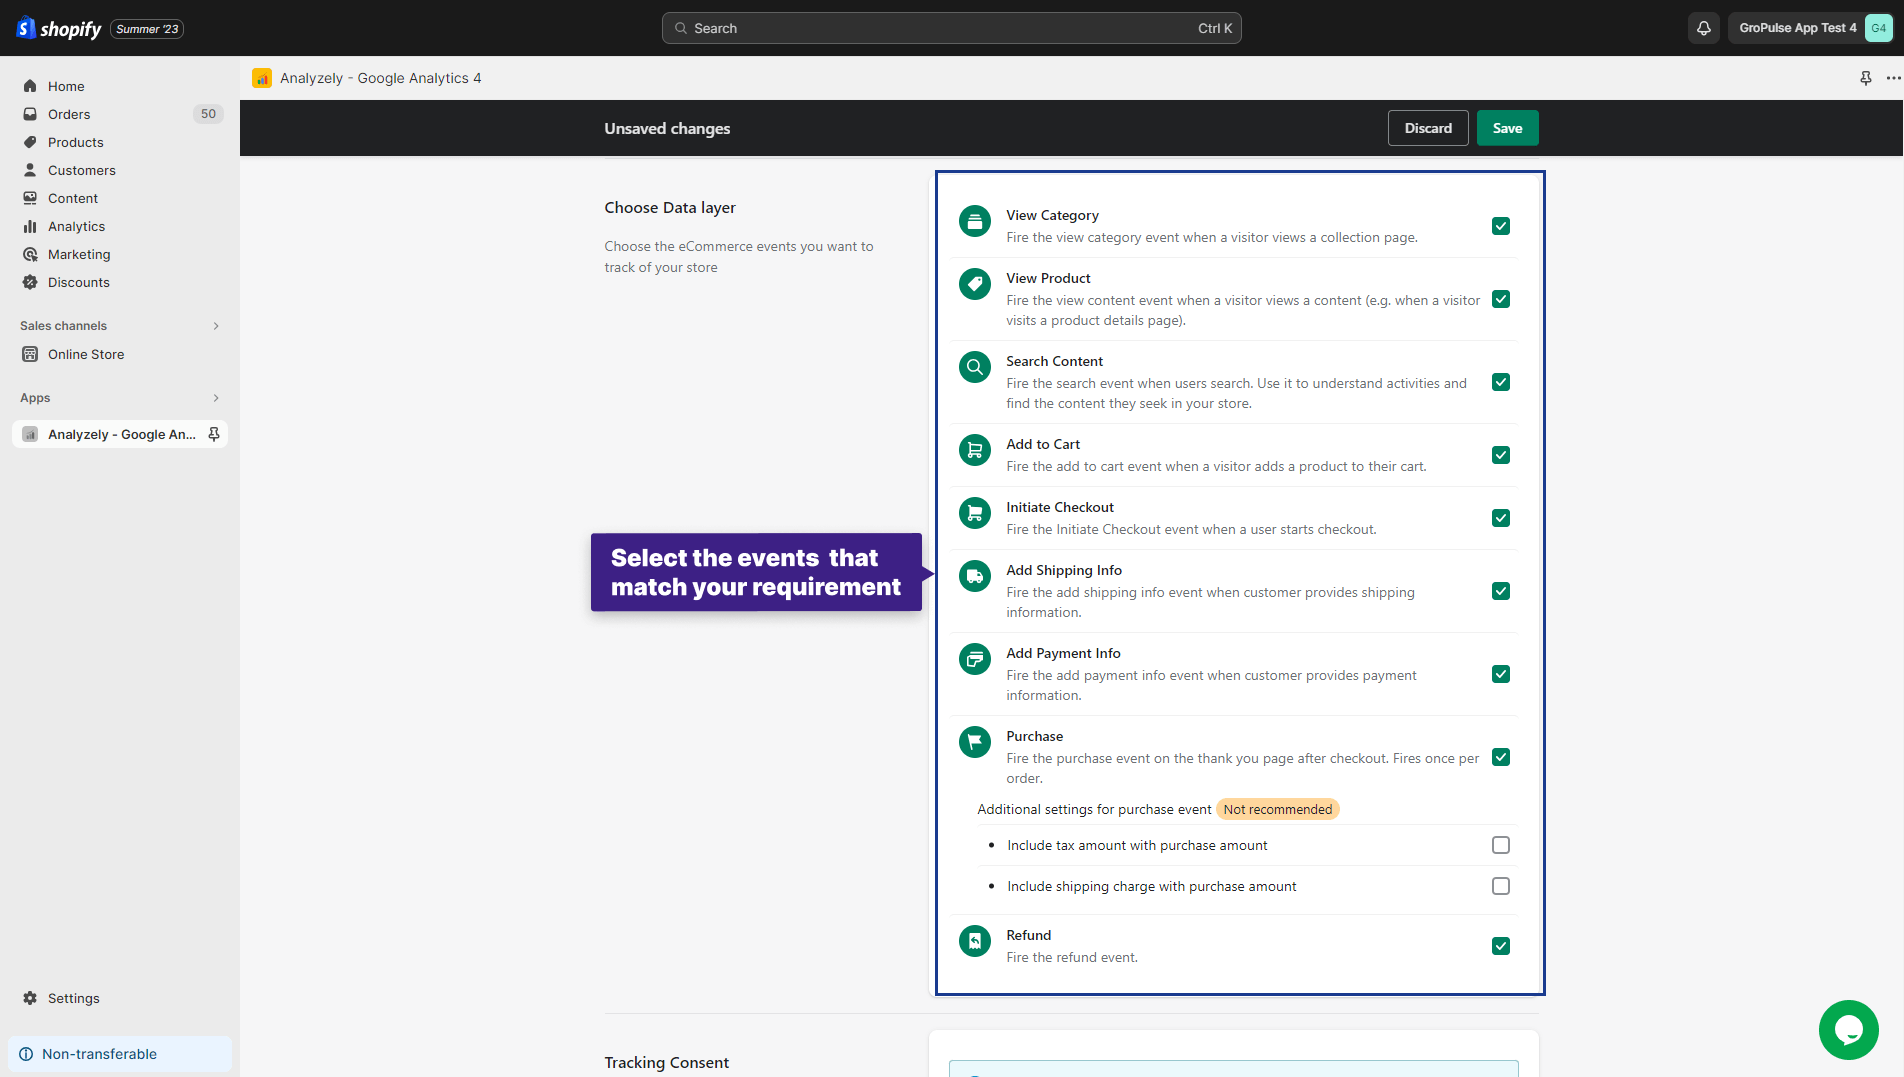
Save Your Event Selections:
After selecting the desired events, click on the “save” button to confirm your choices.

You have now successfully configured event tracking in Google Analytics 4 through the Analyzely app.
📝Note: It’s important to note that in order to activate the “Add Shipping Info,” “Add Payment Info,” and “Refund” events, server-side events must be enabled first.
By implementing event tracking, you can make data-driven decisions that lead to higher conversions, more satisfied customers, and sustained success in a competitive market.
By following these steps, you can harness the power of event tracking in Google Analytics 4 to gain valuable insights into user interactions on your Shopify store, ultimately leading to data-driven decisions and improved business outcomes.