This guide will walk you through the initial setup of GroPulse Free Shipping Bar. You’ll have your first shipping bar up and running in just a few minutes.
Prerequisites
Before you begin, make sure you have:
- An active Shopify store
- The GroPulse Free Shipping Bar app installed from the Shopify App Store
- Free shipping configured in your Shopify shipping settings (recommended)
Step 1: Open the App
- Log in to your Shopify admin dashboard
- Click on Apps in the left sidebar
- Select GP Free Shipping Bar from your installed apps
Navigate to Apps > GP Free Shipping Bar in your Shopify admin
Step 2: Choose Your Bar Type
When you first open the app, you’ll see the main selection page with four bar type options:
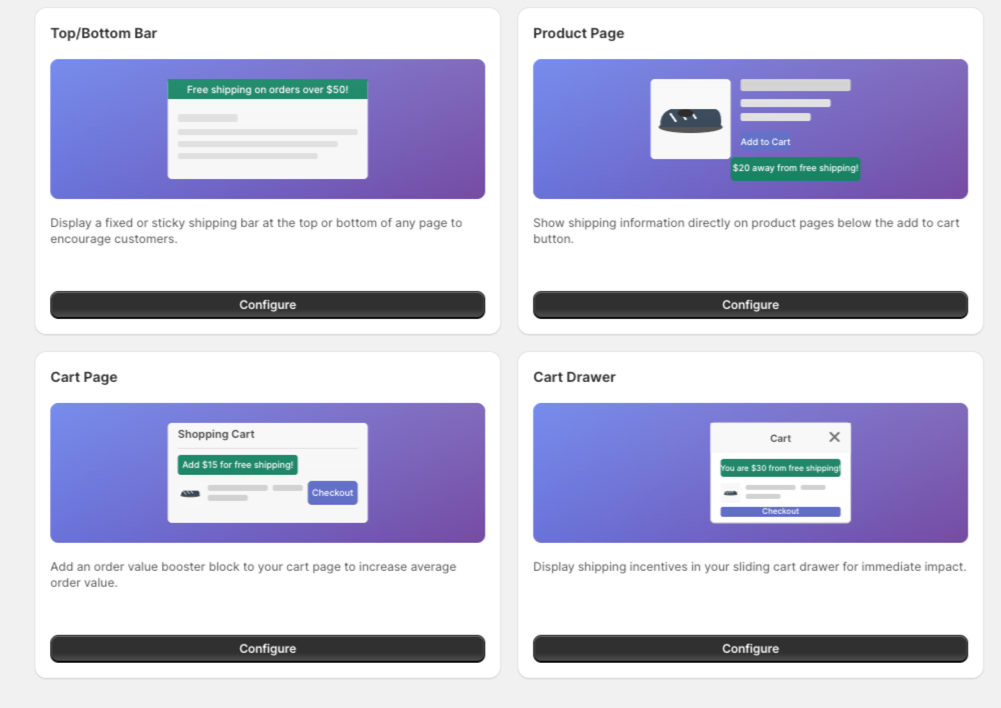
- Top/Bottom Bar (Free) – Best for new users, displays on all pages
- Product Page Bar (Premium) – Shows on individual product pages
- Cart Page Bar (Premium) – Displays on the cart page
- Cart Drawer Bar (Premium) – Shows in the sliding cart drawer
For this getting started guide, we’ll set up the Top/Bottom Bar since it’s available on the free plan.
Step 3: Activate the App Embed
Before your shipping bar can appear on your store, you need to activate the app embed in your theme:
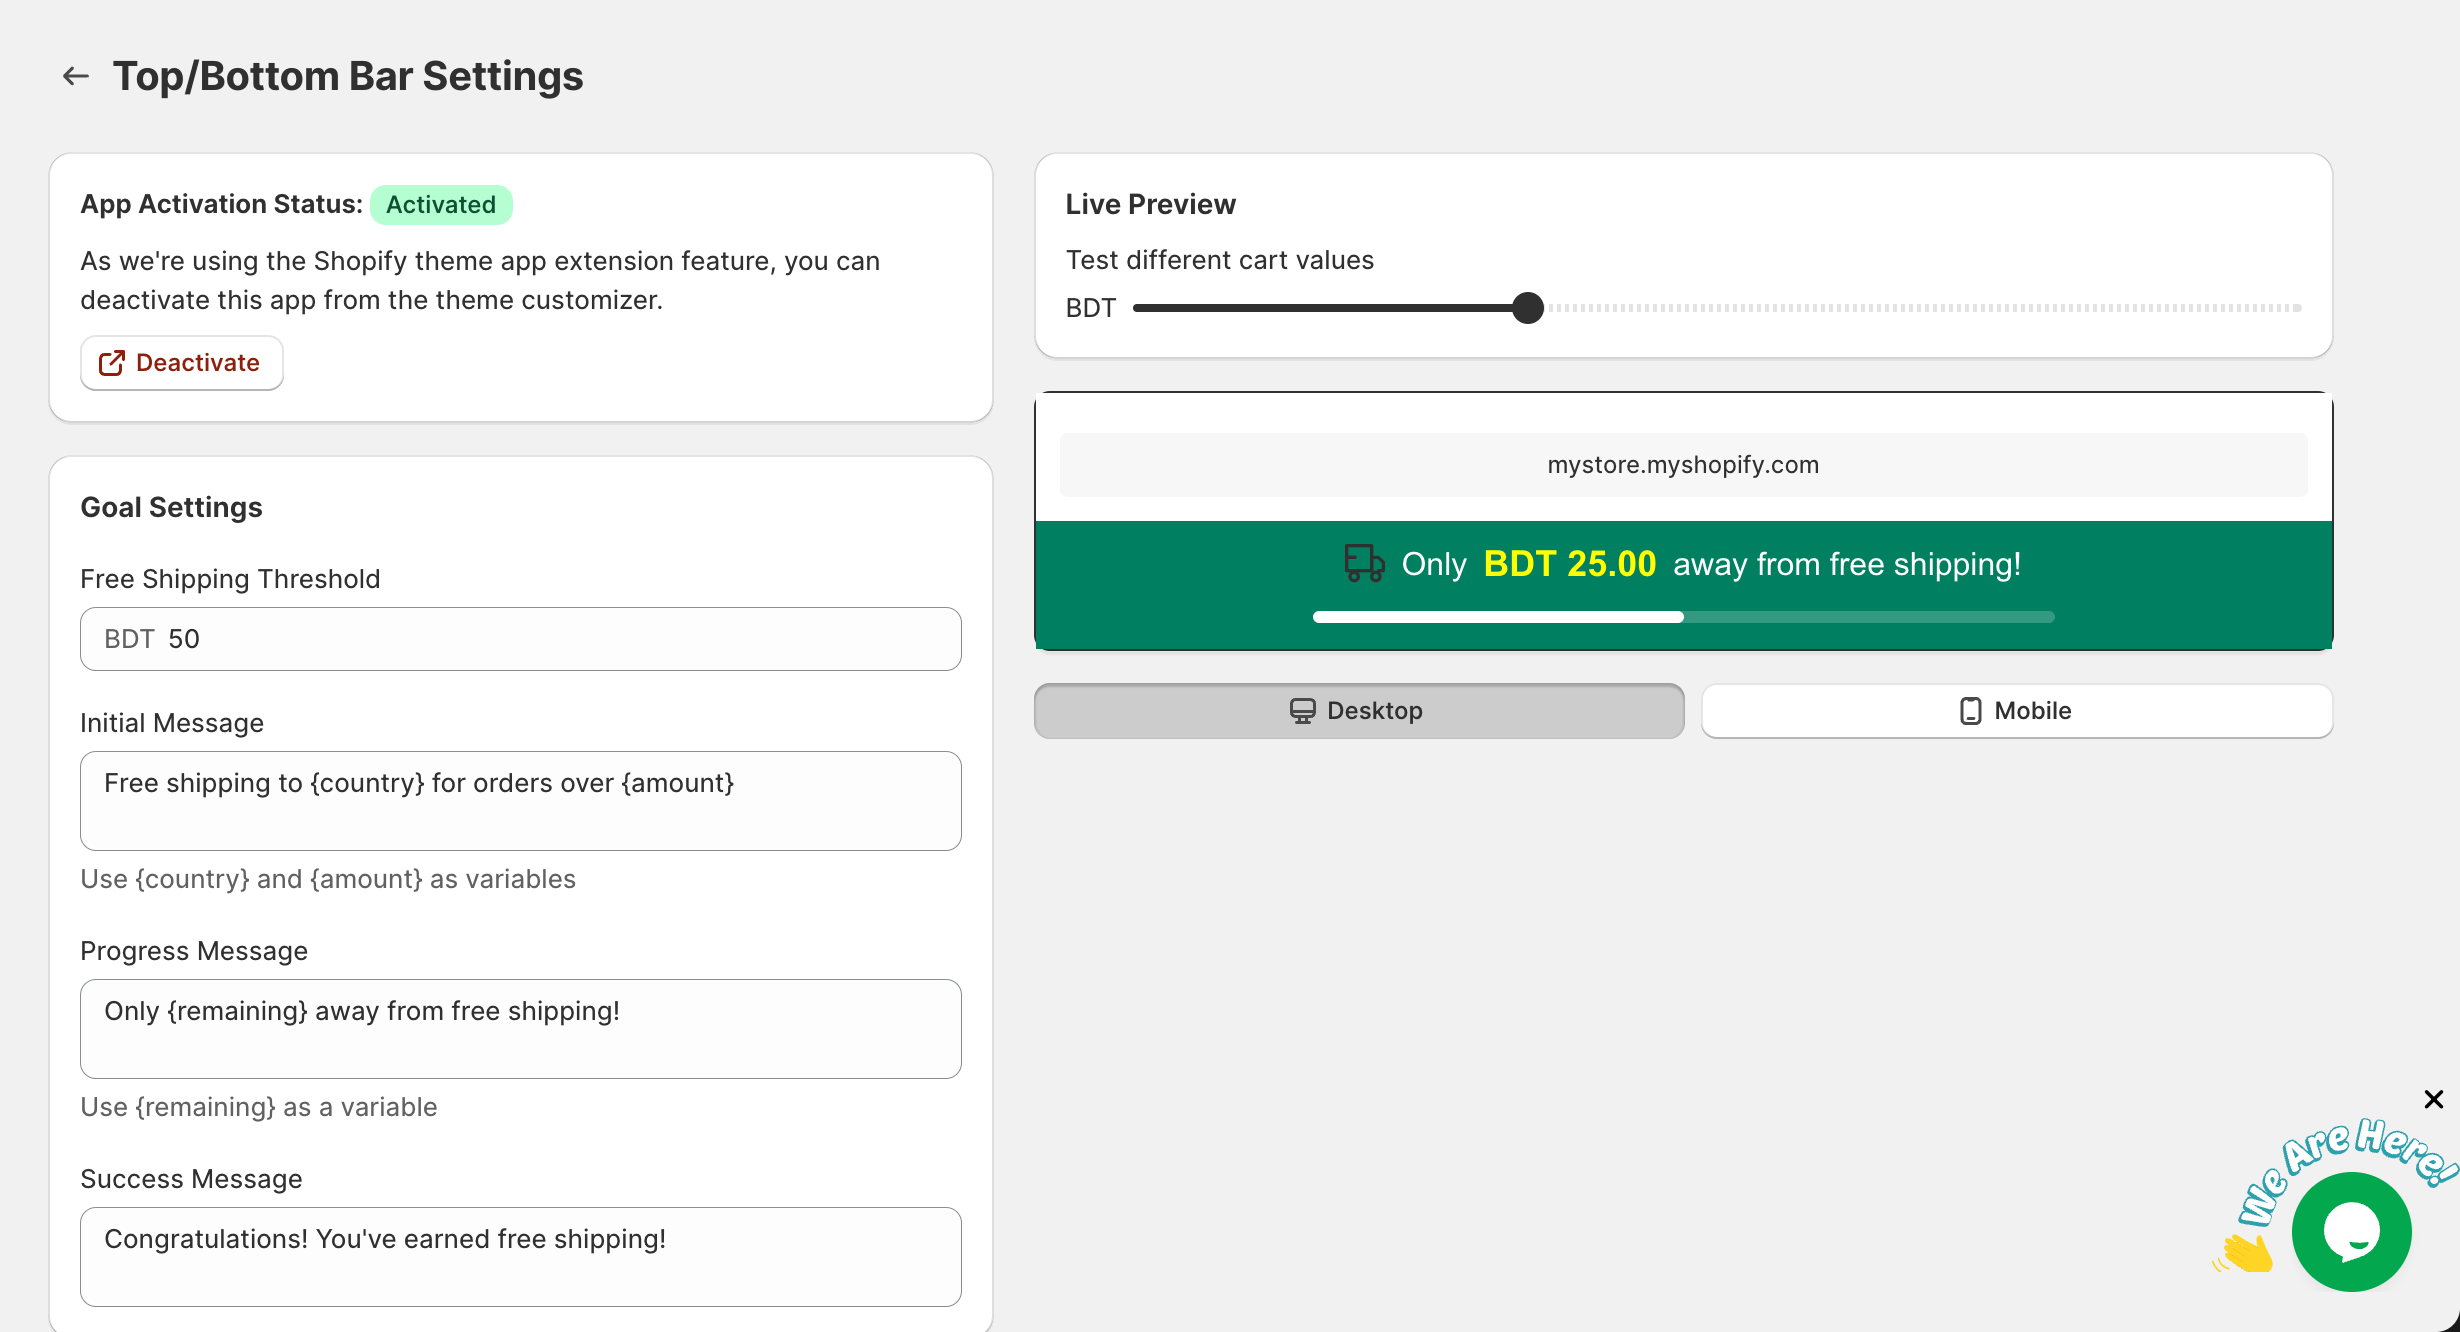
- Click Configure on the Top/Bottom Bar card
- Look for the App Activation Status section at the top
- If it shows "Not Activated", click the Activate button
Look for the App Activation Status banner at the top of the settings page
This will open your Shopify theme customizer where you can enable the app. Toggle the app embed to ON and save your changes.
Step 4: Set Your Free Shipping Threshold
The free shipping threshold is the minimum order amount customers need to reach for free shipping.
- In the Goal Settings section, find the Free Shipping Threshold field
- Enter your threshold amount (e.g., 50 for $50)
- The currency symbol will match your store’s default currency
Tip: Set this to match your actual free shipping threshold in your Shopify shipping settings for a consistent customer experience.
Step 5: Customize Your Messages
The shipping bar displays different messages based on the customer’s cart value:
Initial Message
Shown when the cart is empty or just starting. Example:
Free shipping to {country} for orders over {amount}Progress Message
Shown when the customer has items but hasn’t reached the threshold. Example:
Only {remaining} away from free shipping!Success Message
Shown when the customer qualifies for free shipping. Example:
Congratulations! You've earned free shipping!Available Variables:
{country}– Customer’s detected country{amount}– Free shipping threshold amount{remaining}– Amount still needed for free shipping
Step 6: Preview Your Bar
Before saving, use the Live Preview section to see how your bar will look:
- Scroll down to the Live Preview section on the right side
- Use the slider to test different cart values
- Watch how the message and progress bar change
- Toggle between Desktop and Mobile views to check responsiveness
Use the Live Preview to test how your bar will look with different cart values
Step 7: Save Your Settings
Once you’re happy with your configuration:
- Click the Save button in the top right corner (or use the contextual save bar)
- Wait for the confirmation message
- Visit your store to see the shipping bar in action
Click Save to apply your changes
Step 8: Test on Your Store
- Open your store in a new browser tab
- You should see the shipping bar at the top (or bottom) of your page
- Add items to your cart and watch the progress bar update
- Test on both desktop and mobile devices
Your shipping bar will appear on your store for customers to see
Next Steps
Congratulations! Your free shipping bar is now live. Here are some things you can do next:
Customize Further
Upgrade to Growth Plan
Unlock additional features:
- Product Page Bar
- Cart Page Bar
- Cart Drawer Bar
- Schedule Settings
- Countdown Timer
Get Help
- Read the FAQ for common questions
- Use the in-app chat for support
Quick Troubleshooting
The bar isn’t showing on my store
- Make sure the app embed is activated (Step 3)
- Check that the bar status is set to "Active"
- Clear your browser cache and refresh
The bar shows the wrong currency
The app uses your Shopify store’s default currency. Make sure your store currency settings are correct in Shopify admin.
Changes aren’t saving
Make sure you click the Save button after making changes. Look for the green confirmation toast message.
For more help, see the FAQ & Troubleshooting guide.