This guide will walk you through setting up comprehensive e-commerce tracking on your Shopify store in just a few minutes.
Prerequisites
Before you begin, you’ll need:
- A Shopify store with the GroPulse GTM & Data Layer app installed
- A Google Tag Manager account (free at tagmanager.google.com)
- Account credentials for any platforms you want to track (GA4, Facebook, etc.)
Step 1: Activate the App
After installing the app, you need to activate it in your theme:
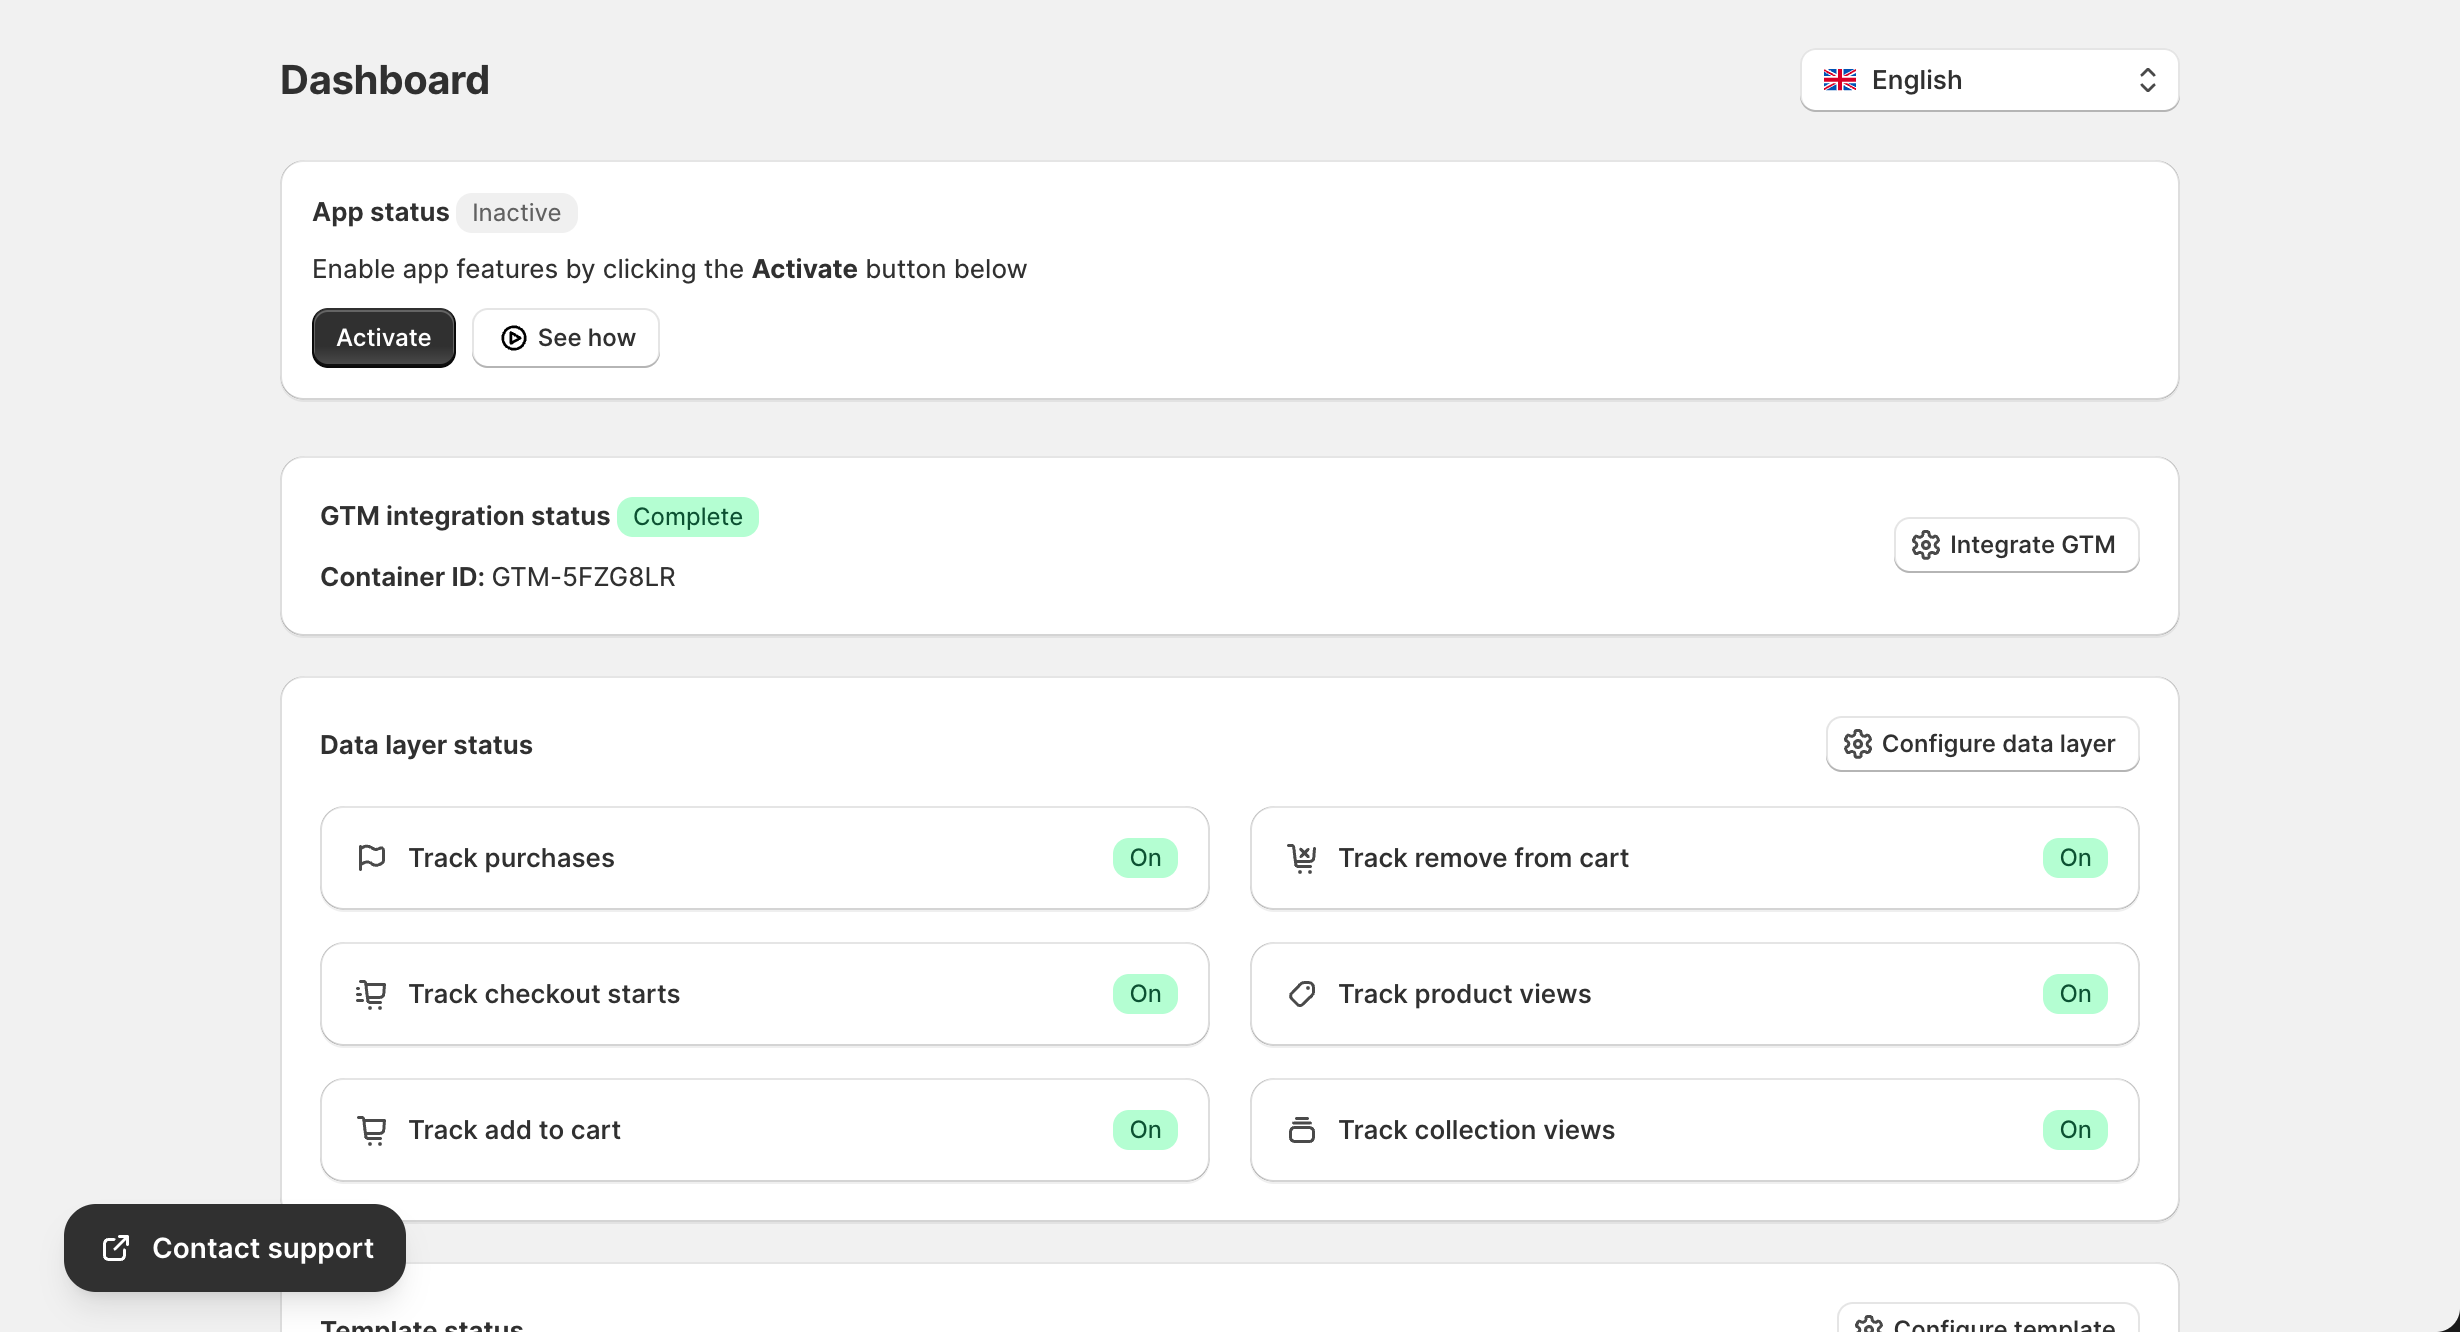
- Open the app from your Shopify admin
- On the Dashboard, you’ll see “App status: Inactive”
- Click the “Activate” button
- This opens your theme customizer – make sure the app block is enabled
- Save your theme changes
Important: The app uses Shopify’s theme app extension feature, so activation is required for tracking to work.
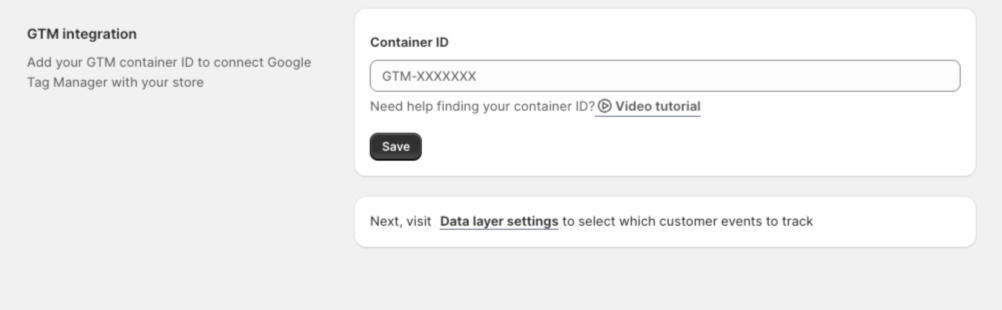
Step 2: Add Your GTM Container ID
- Navigate to GTM Setup (or click “Integrate GTM” from the Dashboard)
- Enter your GTM Container ID (format:
GTM-XXXXXXX) - Click Save
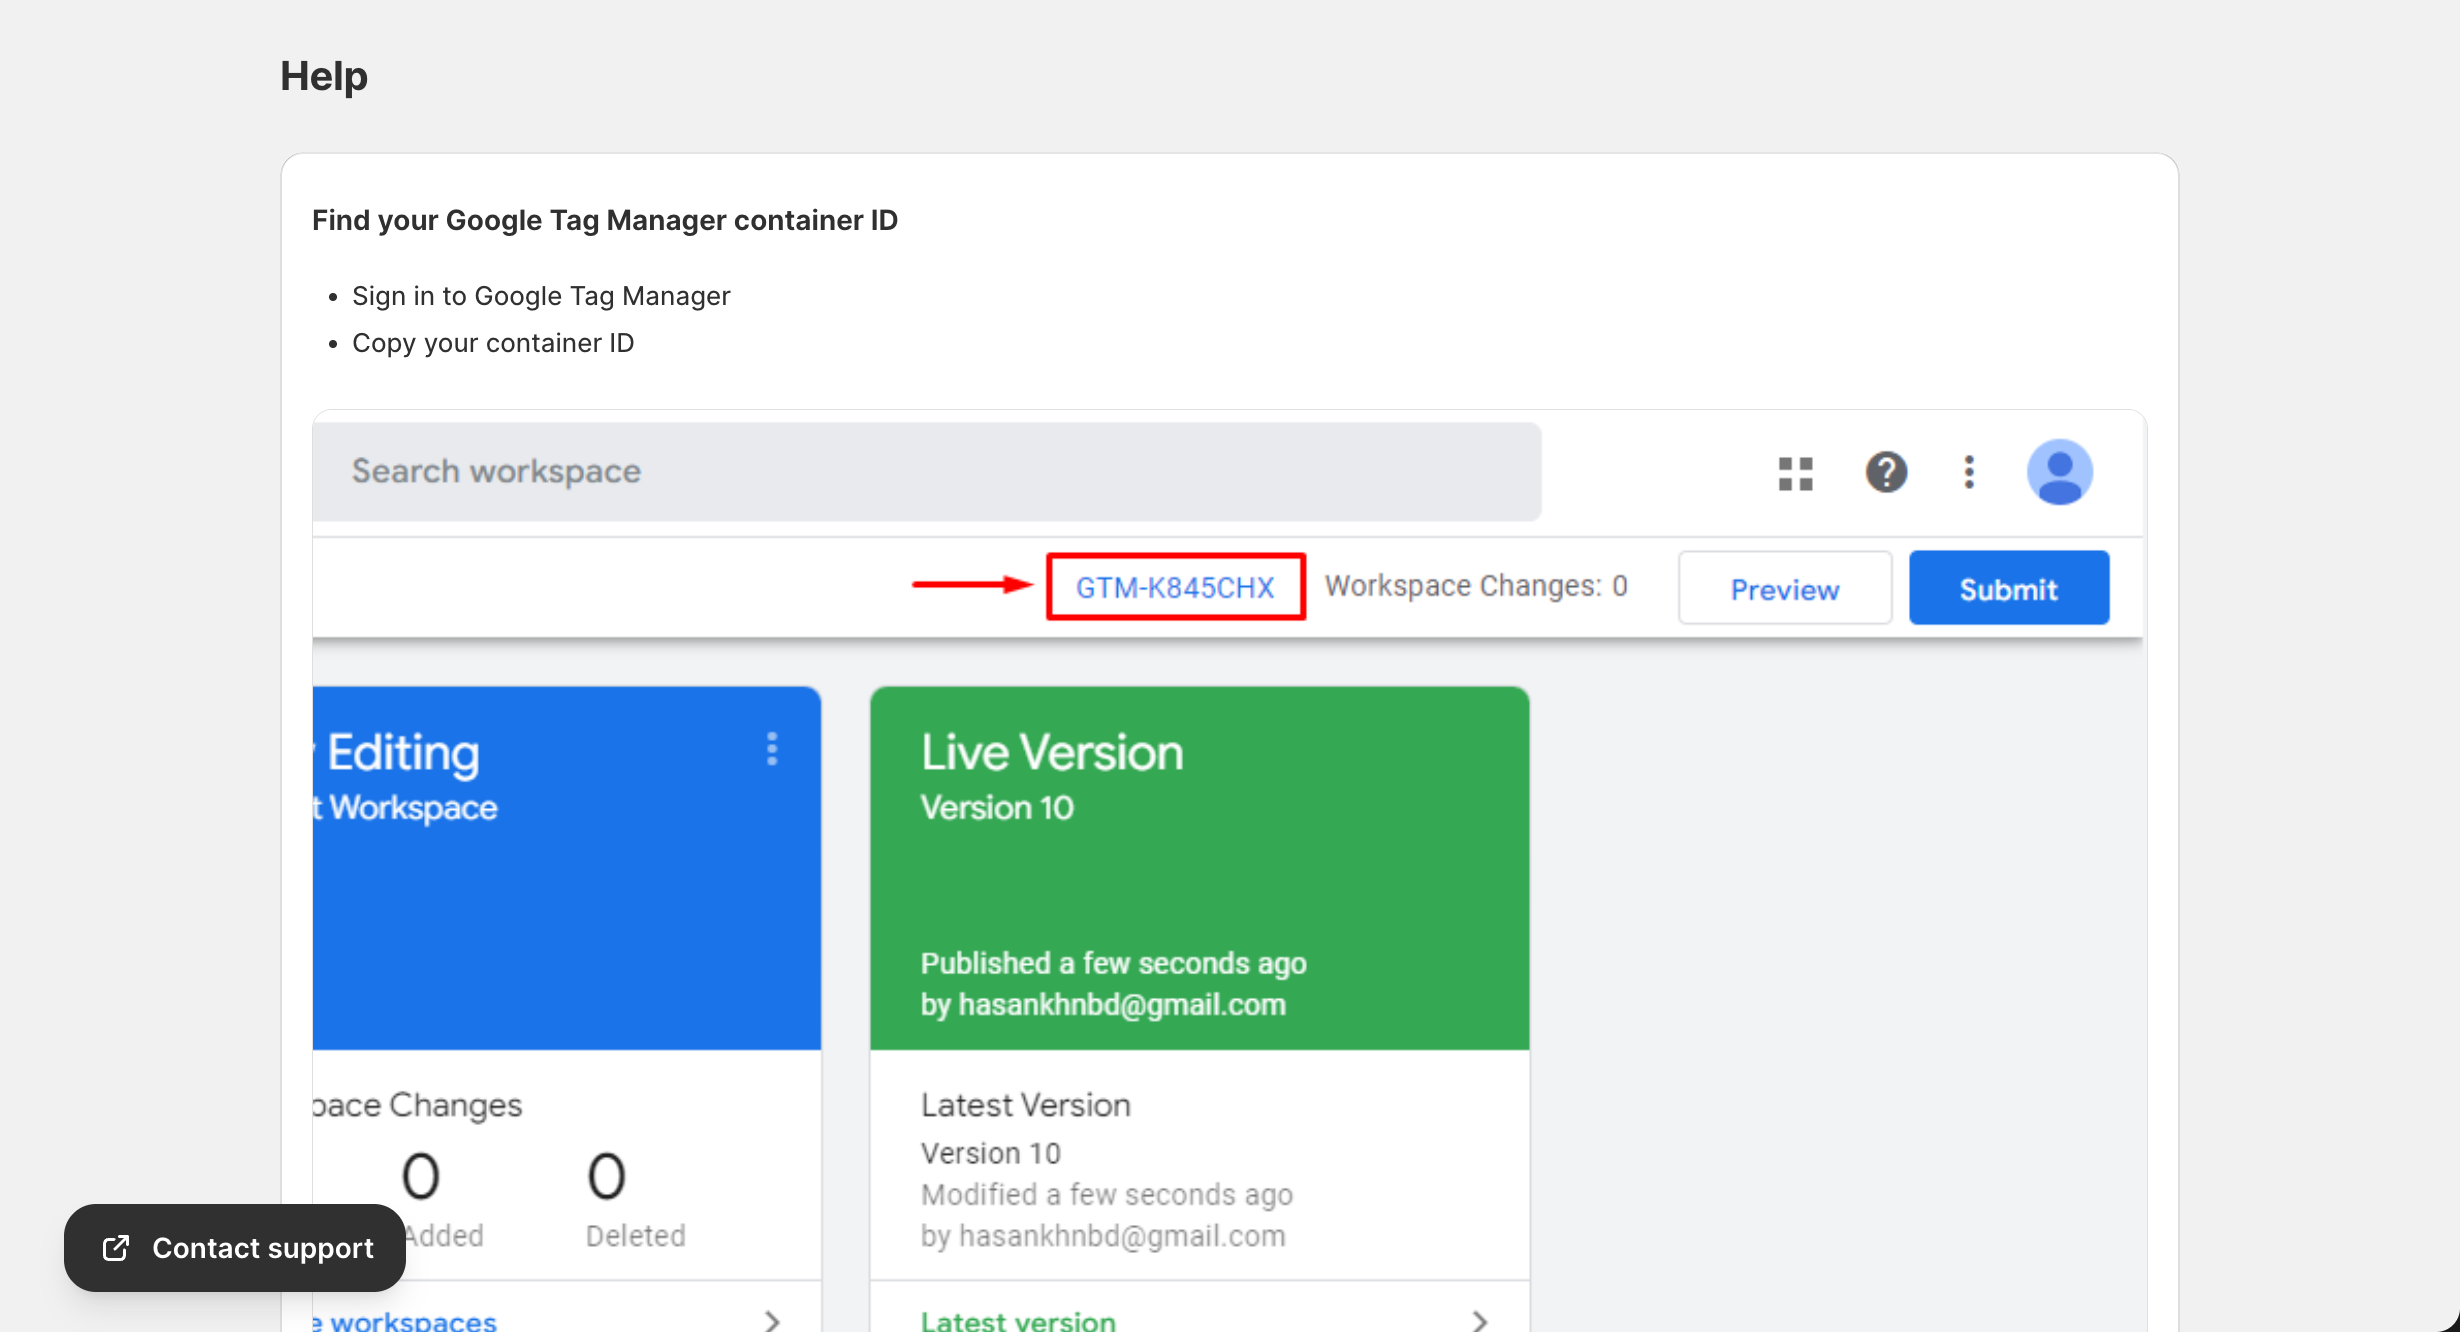
How to Find Your GTM Container ID
- Go to tagmanager.google.com
- Sign in with your Google account
- Your Container ID is displayed at the top of the workspace (e.g.,
GTM-5BNQ4H6B)
Don’t have a GTM account? Create one here – it’s free!
Step 3: Configure Data Layer Events
- Go to Data Layer Settings
- Choose which events to track:

Client-Side Events (Browser-based)
- Track purchases – Fires on order completion
- Track checkout starts – Fires when customer begins checkout
- Track add to cart – Fires when products are added to cart
- Track remove from cart – Fires when products are removed
- Track product views – Fires on product page visits
- Track collection views – Fires on collection page visits
Server-Side Events (Enhanced tracking)
- Server purchases – Server-side purchase confirmation
- Server checkouts – Server-side checkout tracking
- Server add to cart – Server-side cart tracking
- Server collection views – Server-side browsing data
- Click Save to apply your settings
Step 4: Set Up Platform Templates
- Navigate to the Template page
- Enable the platforms you want to track:
- Google Analytics 4 – Enter Measurement ID and API Secret
- Facebook Pixel – Enter Pixel ID and Conversion API Token
- TikTok Pixel – Enter Pixel ID and Access Token
- And more…
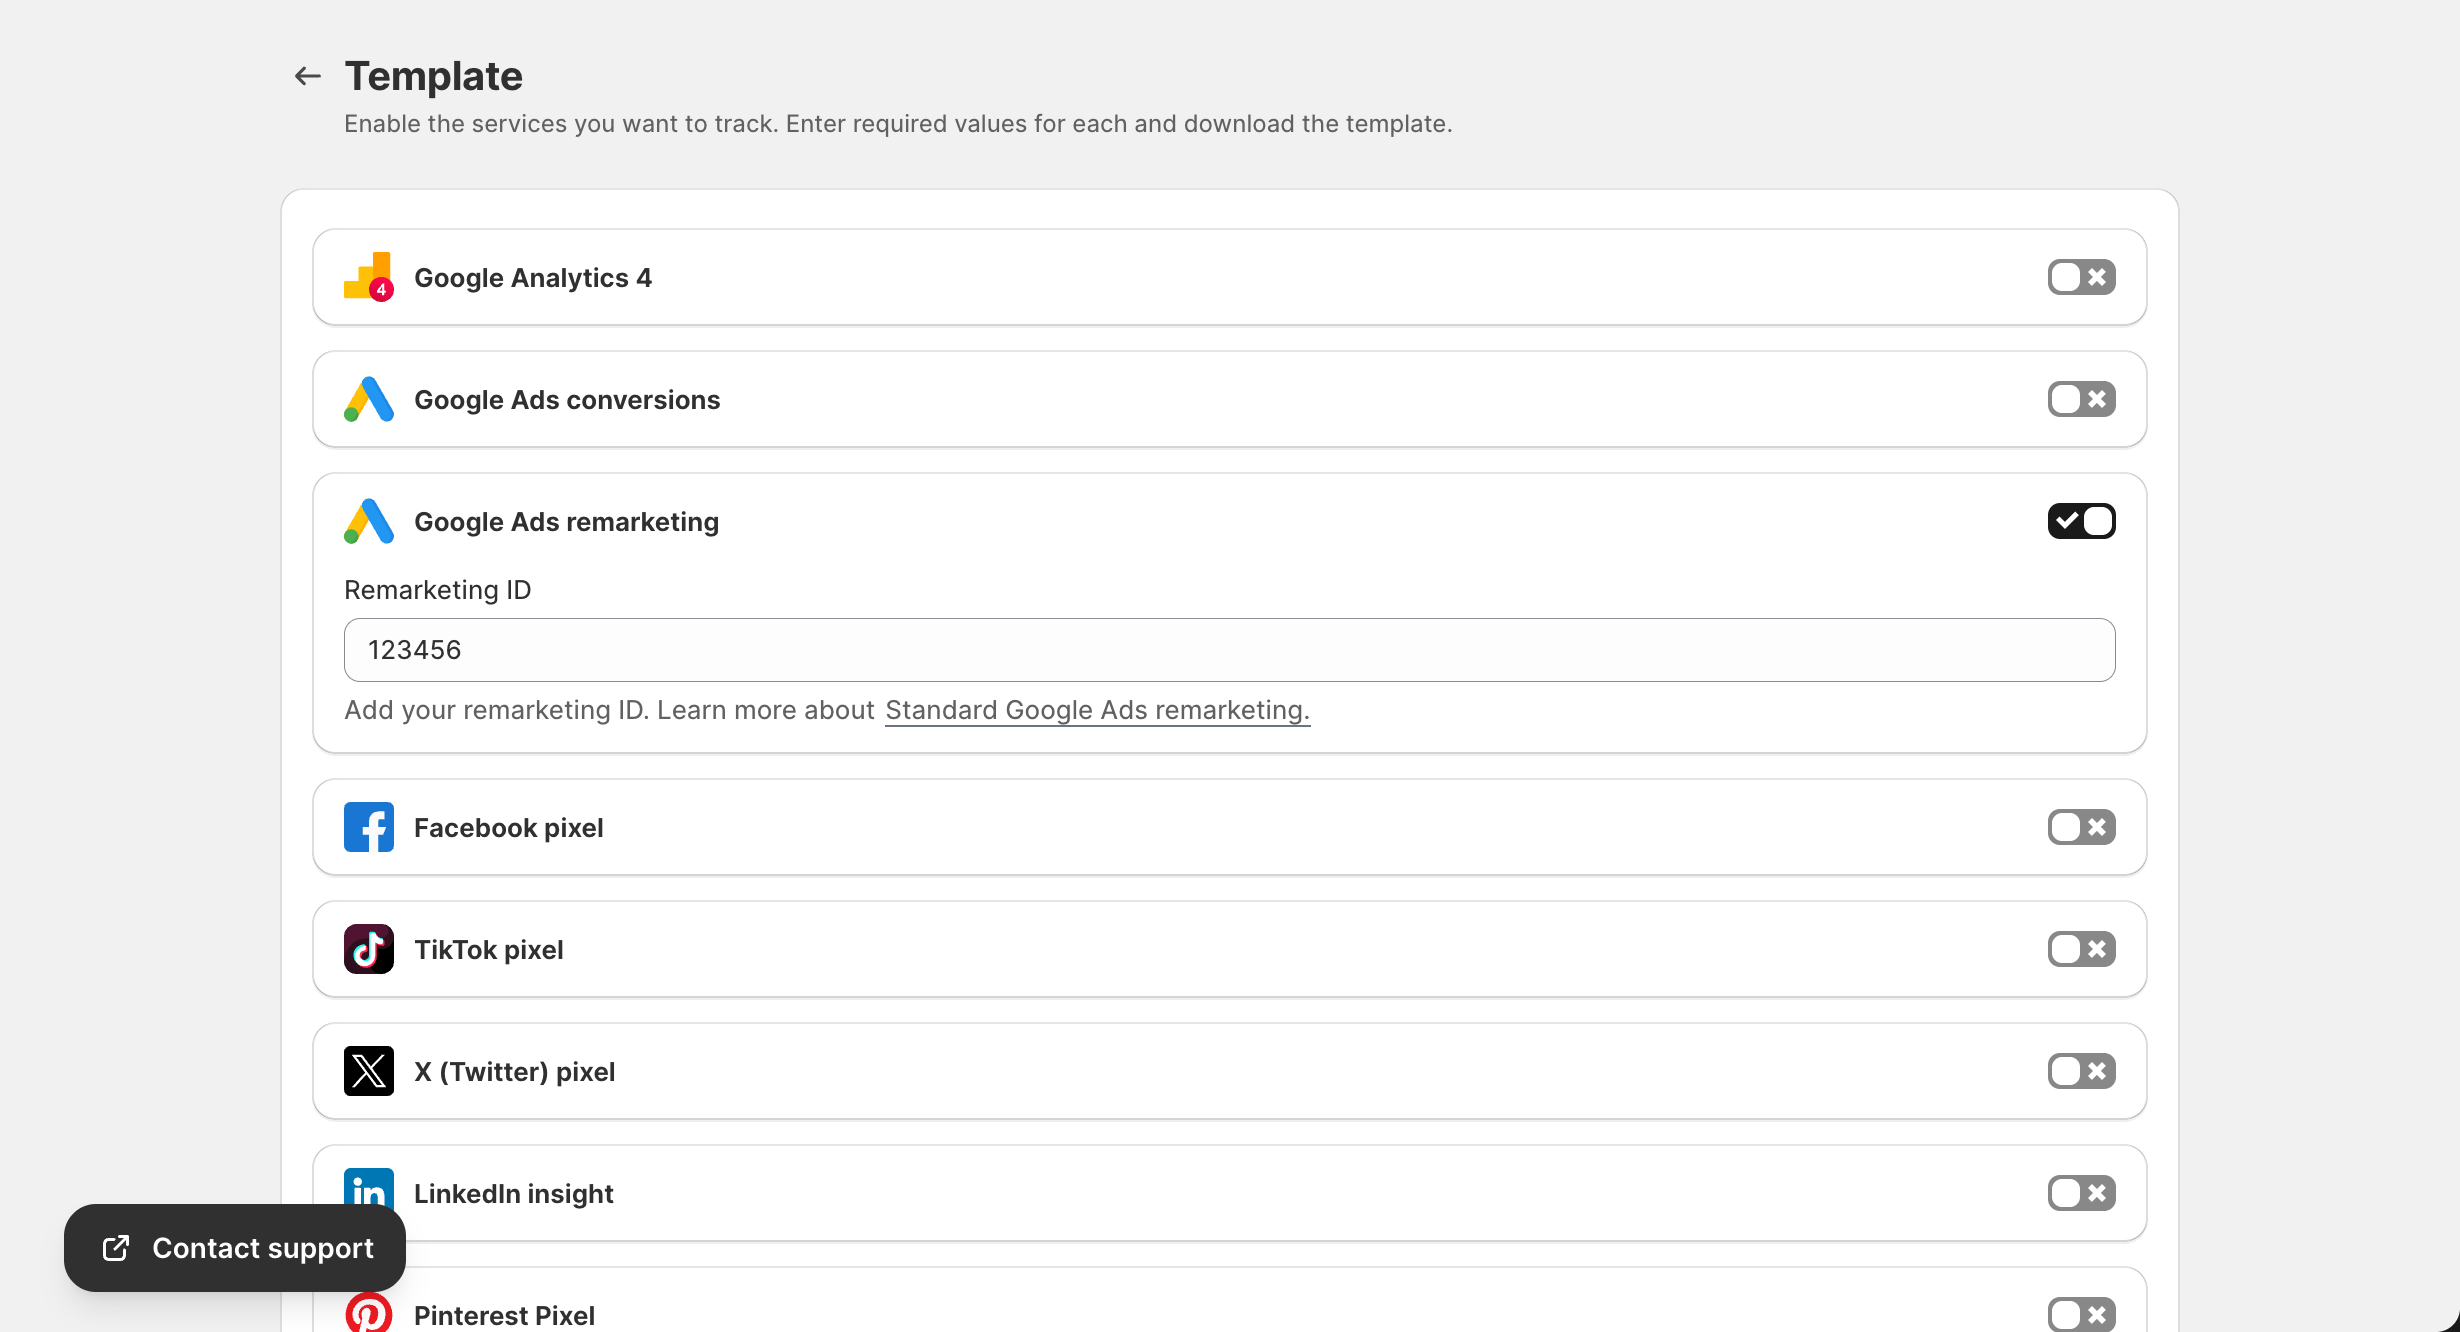
- Click Download GTM Template
- Import the template into Google Tag Manager (see Template Configuration)
Step 5: Import Template to GTM
- Go to tagmanager.google.com
- Select your container
- Click Admin → Import Container
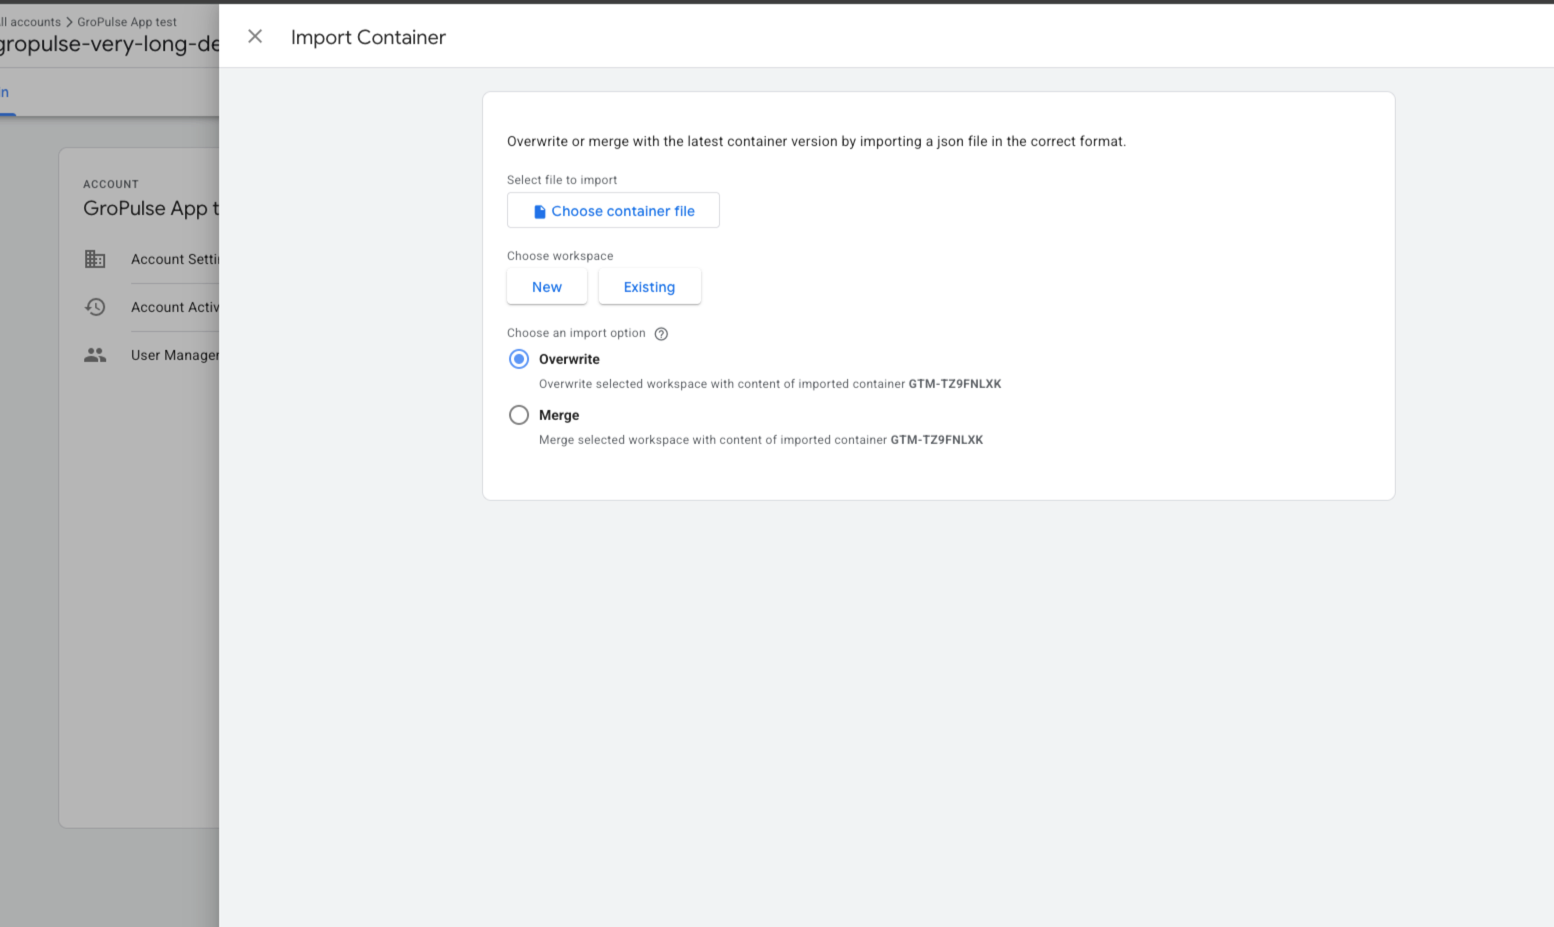
- Upload the downloaded template file
- Choose Merge and select workspace
- Click Confirm
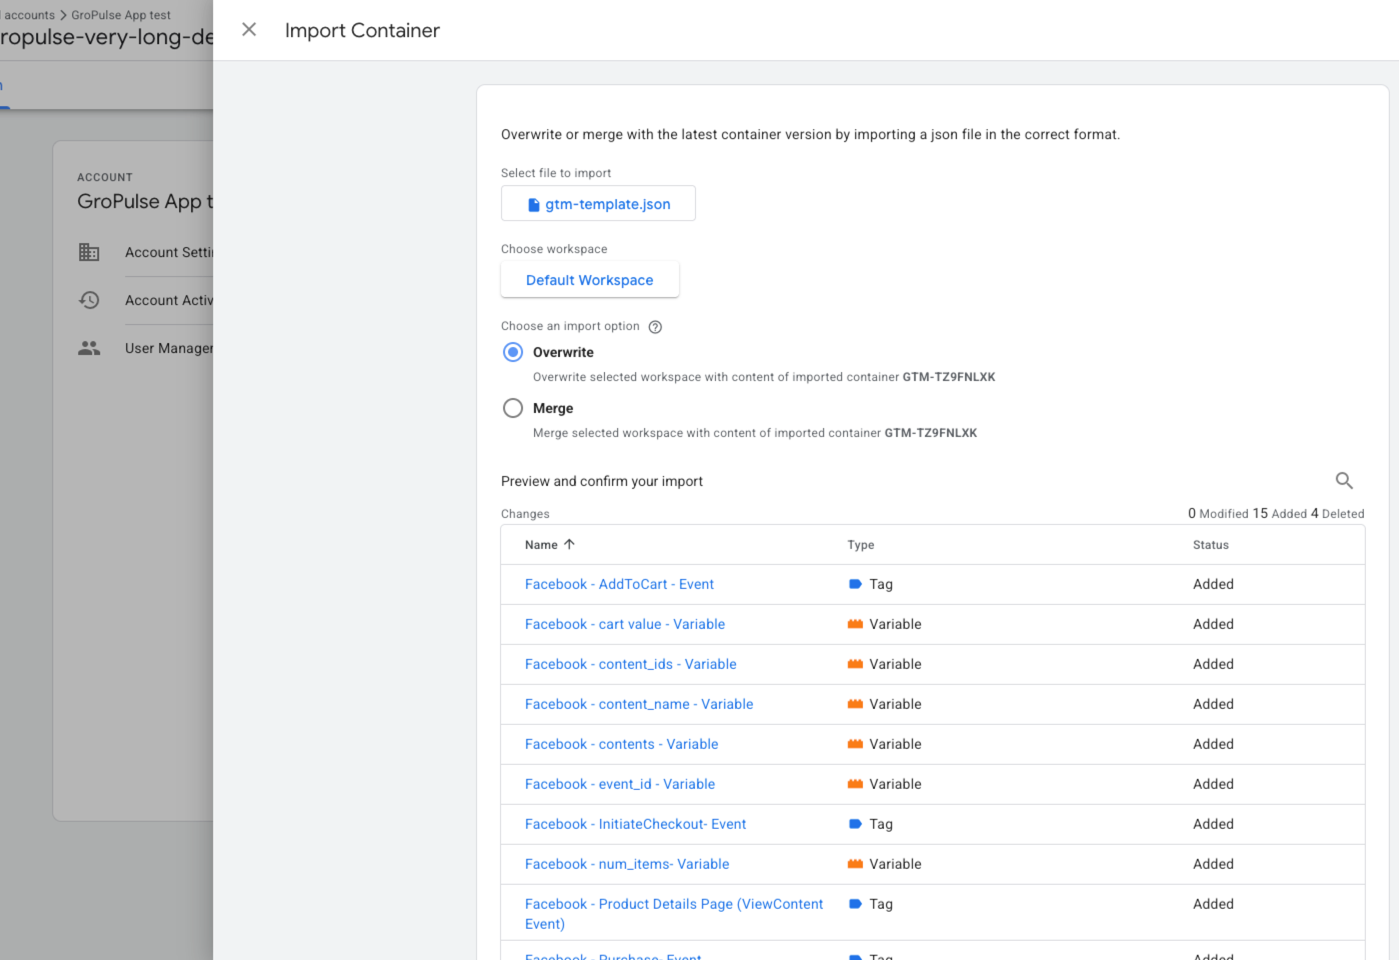
- Review the imported tags and triggers
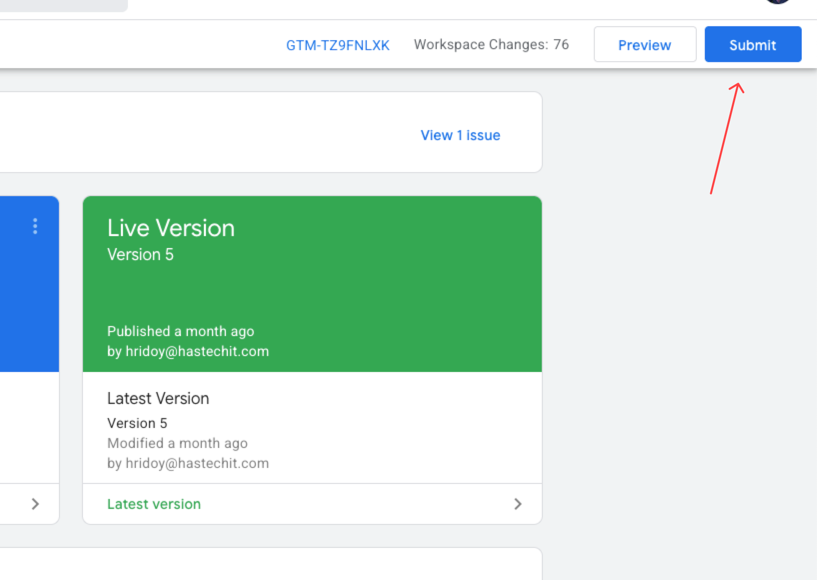
- Click Submit to publish your changes
Step 6: Test Your Setup
- Enable GTM Preview mode from Tag Manager
- Visit your store and perform test actions:
- View a product
- Add to cart
- Start checkout
- Complete a test purchase
- Verify events are firing correctly in:
- GTM Preview panel
- Google Analytics 4 DebugView
- Facebook Events Manager Test Events
- Platform-specific debugging tools
You’re All Set!
Your store is now tracking e-commerce events. Monitor your data in:
- Google Analytics 4
- Facebook Ads Manager
- Other configured platforms
Next Steps
- Configure server-side events for enhanced accuracy
- Set up consent management for GDPR compliance
- Explore advanced features like custom events
Need Help?
- Watch our video tutorial
- Contact support at gropulse.com/contact
Last updated on February 16, 2026
Was this article helpful?
Powered by Support Genix