This guide covers how to connect Google Tag Manager to your Shopify store using the GroPulse GTM & Data Layer app.
What is Google Tag Manager?
Google Tag Manager (GTM) is a free tool that allows you to manage and deploy marketing tags (snippets of code) on your website without modifying the code directly. It acts as a container for all your tracking pixels and scripts.
Creating a GTM Account
If you don’t have a GTM account yet:
- Visit tagmanager.google.com
- Sign in with your Google account
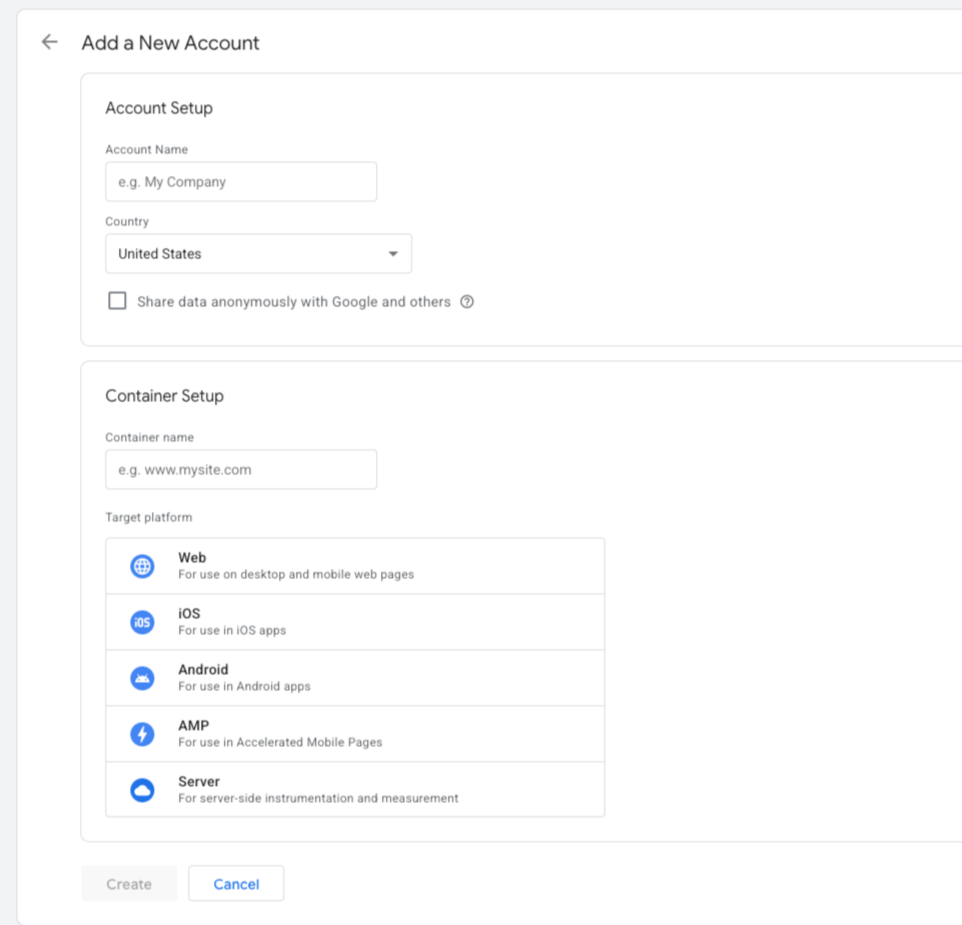
- Click Create Account
- Enter your Account Name (usually your company name)
- Select your Country
- Enter your Container Name (usually your website URL)
- Select Web as the target platform
- Click Create
- Accept the Terms of Service
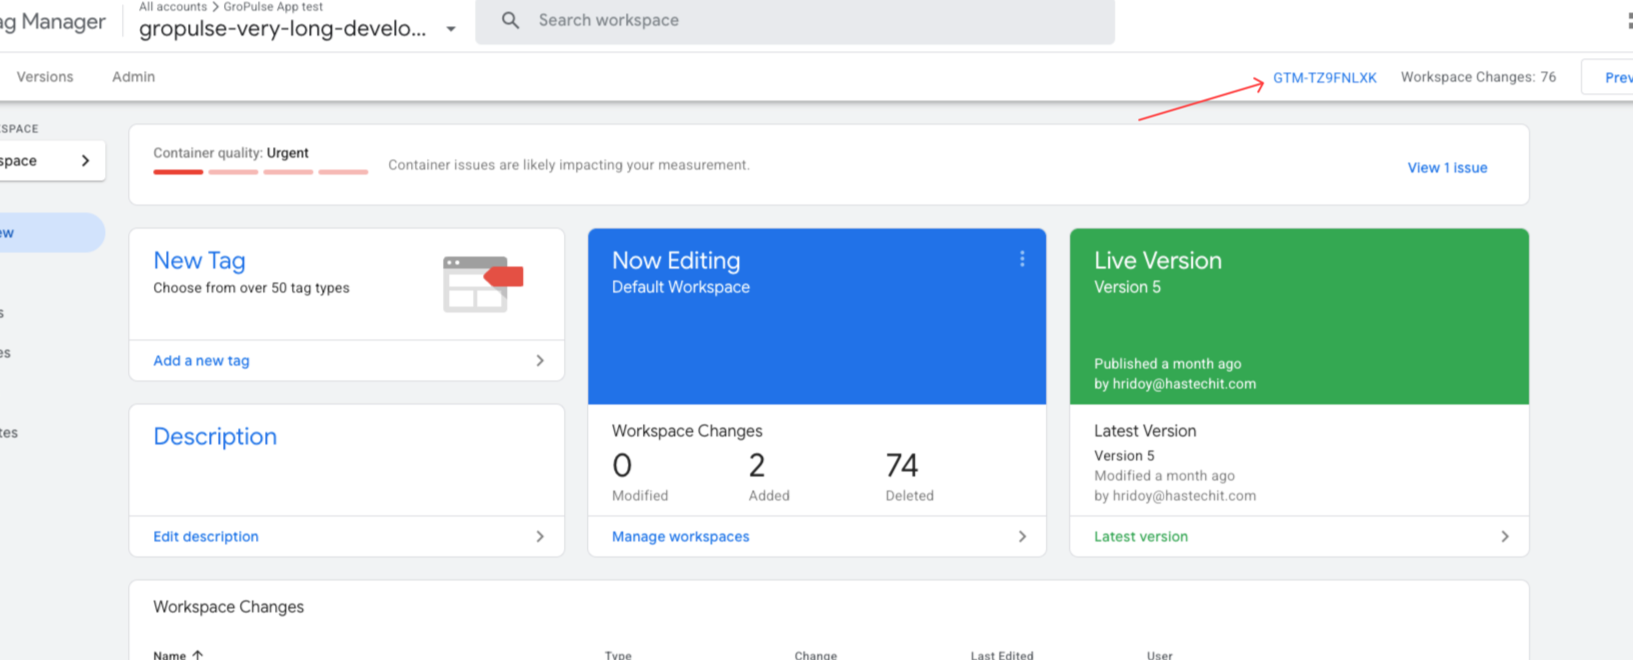
Finding Your Container ID
Your GTM Container ID is a unique identifier that looks like GTM-XXXXXXX:
- Log in to tagmanager.google.com
- Look at the top of your workspace
- Your Container ID is displayed next to your container name
- Copy this ID for use in the app
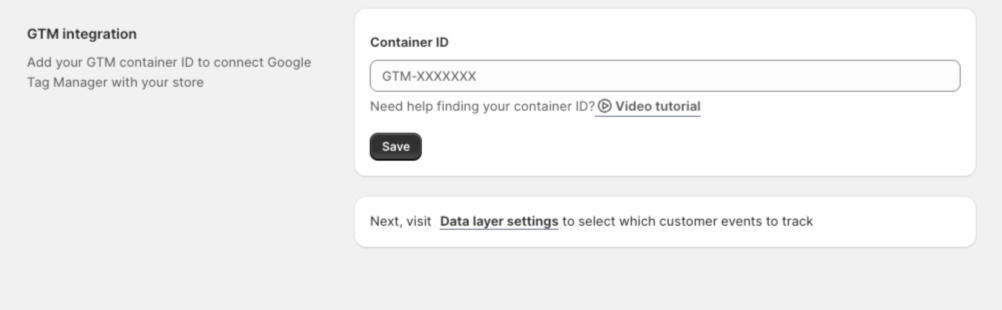
Adding Your Container ID to the App
- Open the GroPulse GTM & Data Layer app in your Shopify admin
- Navigate to GTM Setup from the sidebar or Dashboard
- Enter your GTM Container ID in the input field
- Click Save
Validation
The app validates your Container ID format:
- Must start with
GTM- - Followed by alphanumeric characters
- Example:
GTM-5BNQ4H6B
Activating the App in Your Theme
The app uses Shopify’s Theme App Extension feature, which requires activation:
- After saving your Container ID, click Activate
- This opens your theme customizer
- Ensure the GroPulse GTM app block is enabled
- Click Save in the theme customizer
Why Theme Activation is Required
Shopify’s architecture requires explicit activation of theme app extensions for security. This ensures:
- No unauthorized code injection
- Clear visibility of what apps modify your theme
- Easy enable/disable without code changes
Verifying Your Setup
After setup, verify GTM is working:
Method 1: GTM Preview Mode
- In Google Tag Manager, click Preview
- Enter your store URL
- Browse your store
- Check that the GTM container is firing
Method 2: Browser Developer Tools
- Open your store in a browser
- Right-click and select Inspect
- Go to the Network tab
- Filter by “gtm”
- You should see requests to
googletagmanager.com
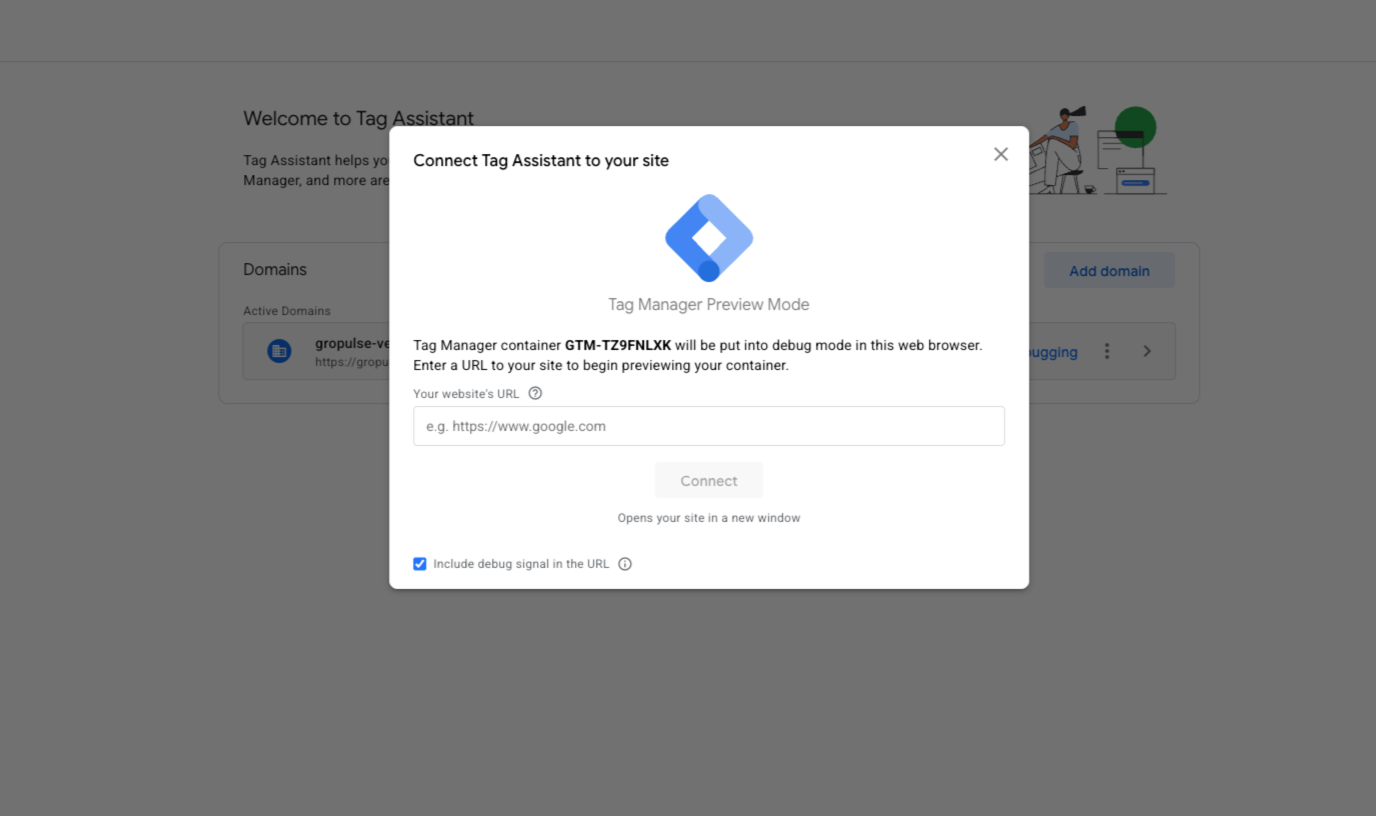
Method 3: Tag Assistant
- Install the Tag Assistant Chrome extension
- Visit your store
- Click the Tag Assistant icon
- Verify your GTM container is detected
Troubleshooting
Container ID Not Saving
- Ensure the format is correct (
GTM-XXXXXXX) - Check for extra spaces before or after the ID
- Try refreshing the page and re-entering
GTM Not Firing
- Check App Activation: Ensure the app is activated in your theme
- Check Theme Compatibility: The app works with Online Store 2.0 themes
- Clear Cache: Clear your browser cache and try again
- Check for Conflicts: Disable other GTM apps temporarily
Events Not Appearing in GTM
- Verify you’ve configured Data Layer Settings
- Check that the correct events are enabled
- Ensure your GTM container has triggers set up for these events
Best Practices
- Use One Container: Only use one GTM container per store
- Test in Preview: Always test changes in GTM Preview mode first
- Version Control: Use GTM’s built-in versioning to track changes
- Organize Tags: Use folders in GTM to organize your tags
- Document Changes: Add notes when publishing new versions
Next Steps
Video Tutorial
Watch our step-by-step video guide for GTM setup: