This guide walks you through setting up and configuring sales notifications for your store, from activation to your first customization.
Prerequisites
Before setting up sales notifications:
- Install the SalesPulse app from the Shopify App Store
- Have at least one completed order in your store (or use test orders)
- Access to your Shopify admin
Step 1: Access Sales Notifications
- Open your Shopify admin
- Navigate to Apps > SalesPulse – Sales Pop Up
- Click Sales Notifications in the left sidebar
Step 2: Activate the Feature
Sales notifications require activation in your theme before they can display.
Check Activation Status
Look at the App activation status card at the top of the page:
- If it shows Deactivated, you need to activate the feature
- If it shows Activated, skip to Step 3
Activate in Theme Customizer
- Click the Activate button
- This opens the Shopify Theme Customizer
- In the App Embeds panel on the left, find Sales Pop Up
- Toggle the switch to ON
- Click Save in the top-right corner
- Return to the SalesPulse app
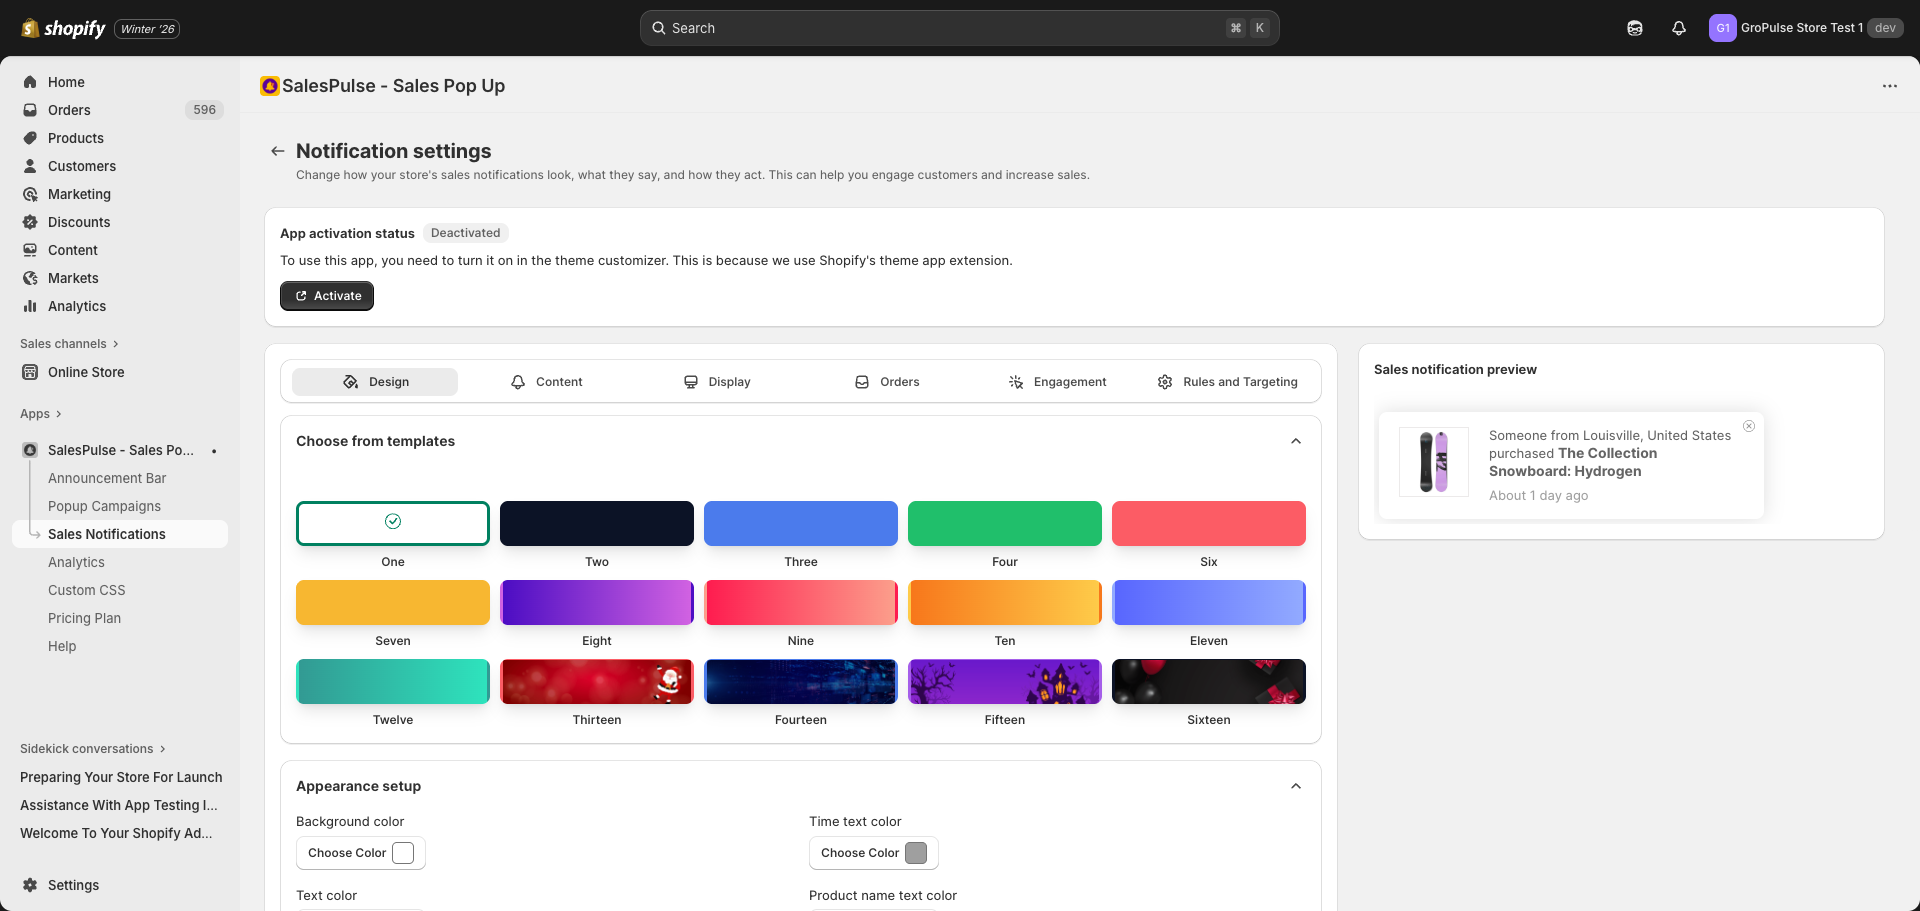
Step 3: Choose a Template
The quickest way to get started is by selecting a pre-designed template.
- Make sure you are on the Design settings tab
- Scroll to the Choose from templates section
- Browse the 15 available template designs
- Click on a template to apply it
Step 4: Configure Basic Appearance
After selecting a template, customize the colors to match your brand.
Color Settings
In the Appearance setup section:
| Setting | Description |
|---|---|
| Background color | Main notification background |
| Text color | Primary text color |
| Close button color | X button color |
| Time text color | “About X ago” text color |
| Product name text color | Product link color |
How to Change Colors
- Click the Choose Color button next to any color setting
- Use the color picker to select a color
- Or enter a hex code directly (e.g., #000000)
- View the change in the live preview
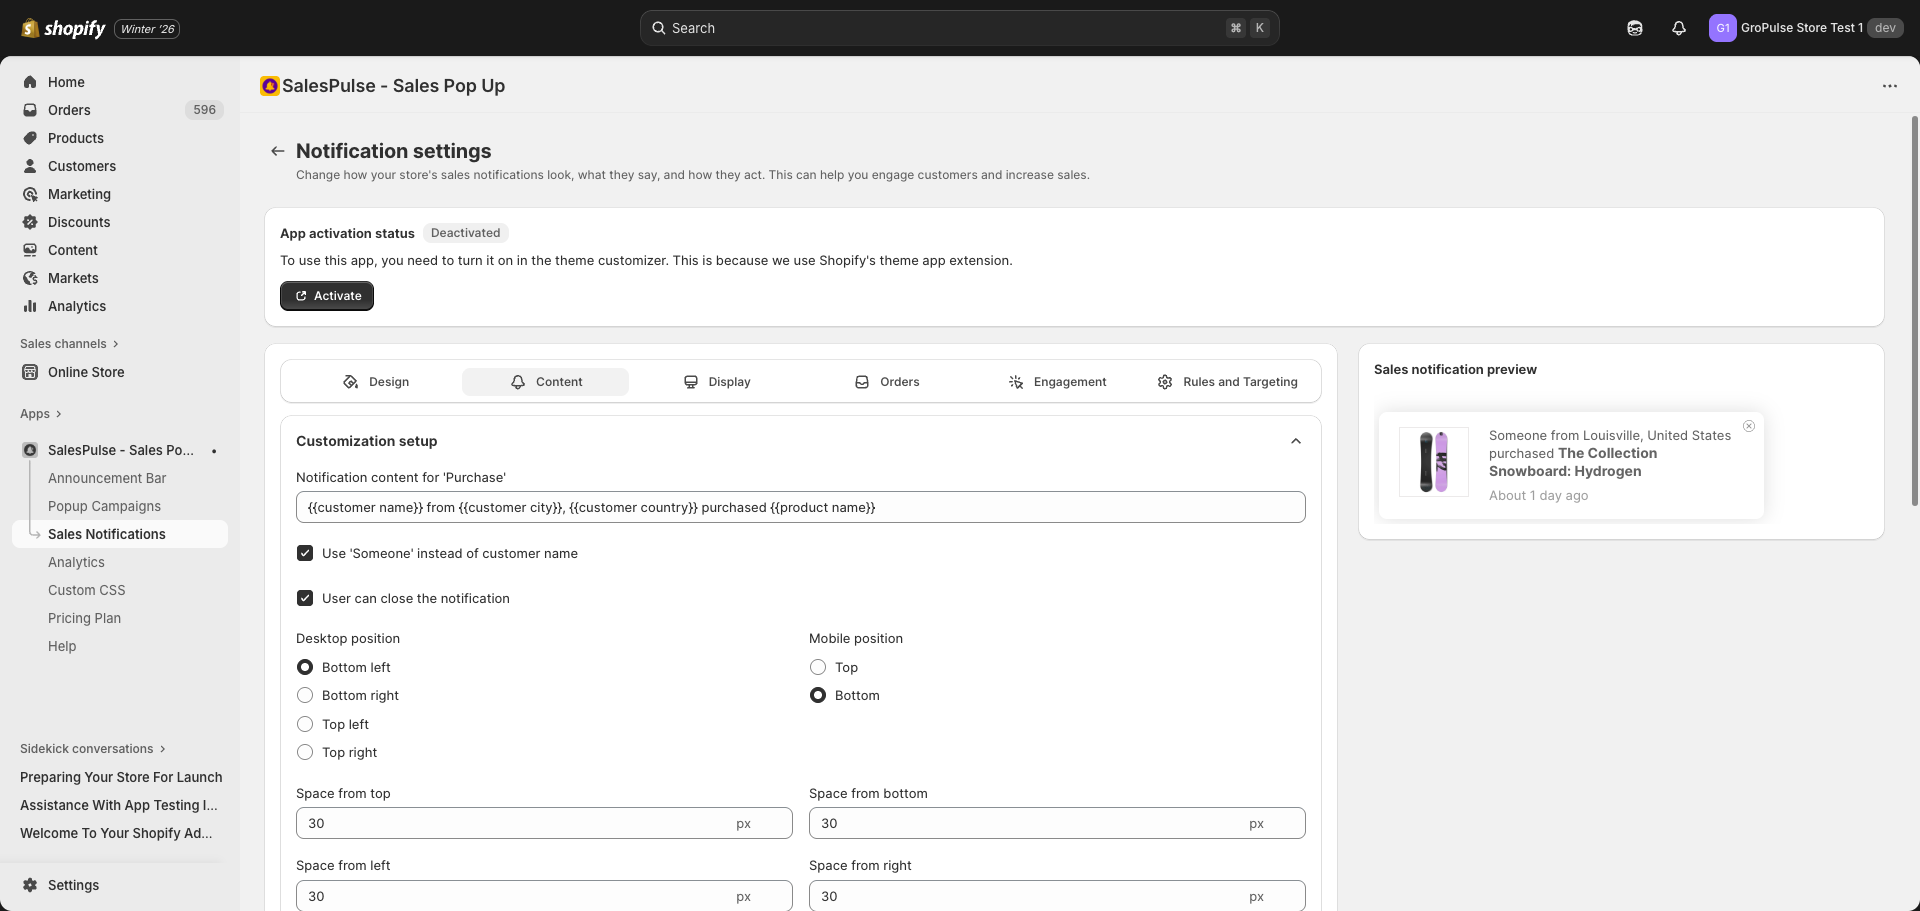
Step 5: Set Notification Position
Configure where notifications appear on your store.
- Click the Content settings tab
- Find the Desktop position options:
- Bottom left (default)
- Bottom right
- Top left
- Top right
- Find the Mobile position options:
- Top
- Bottom (default)
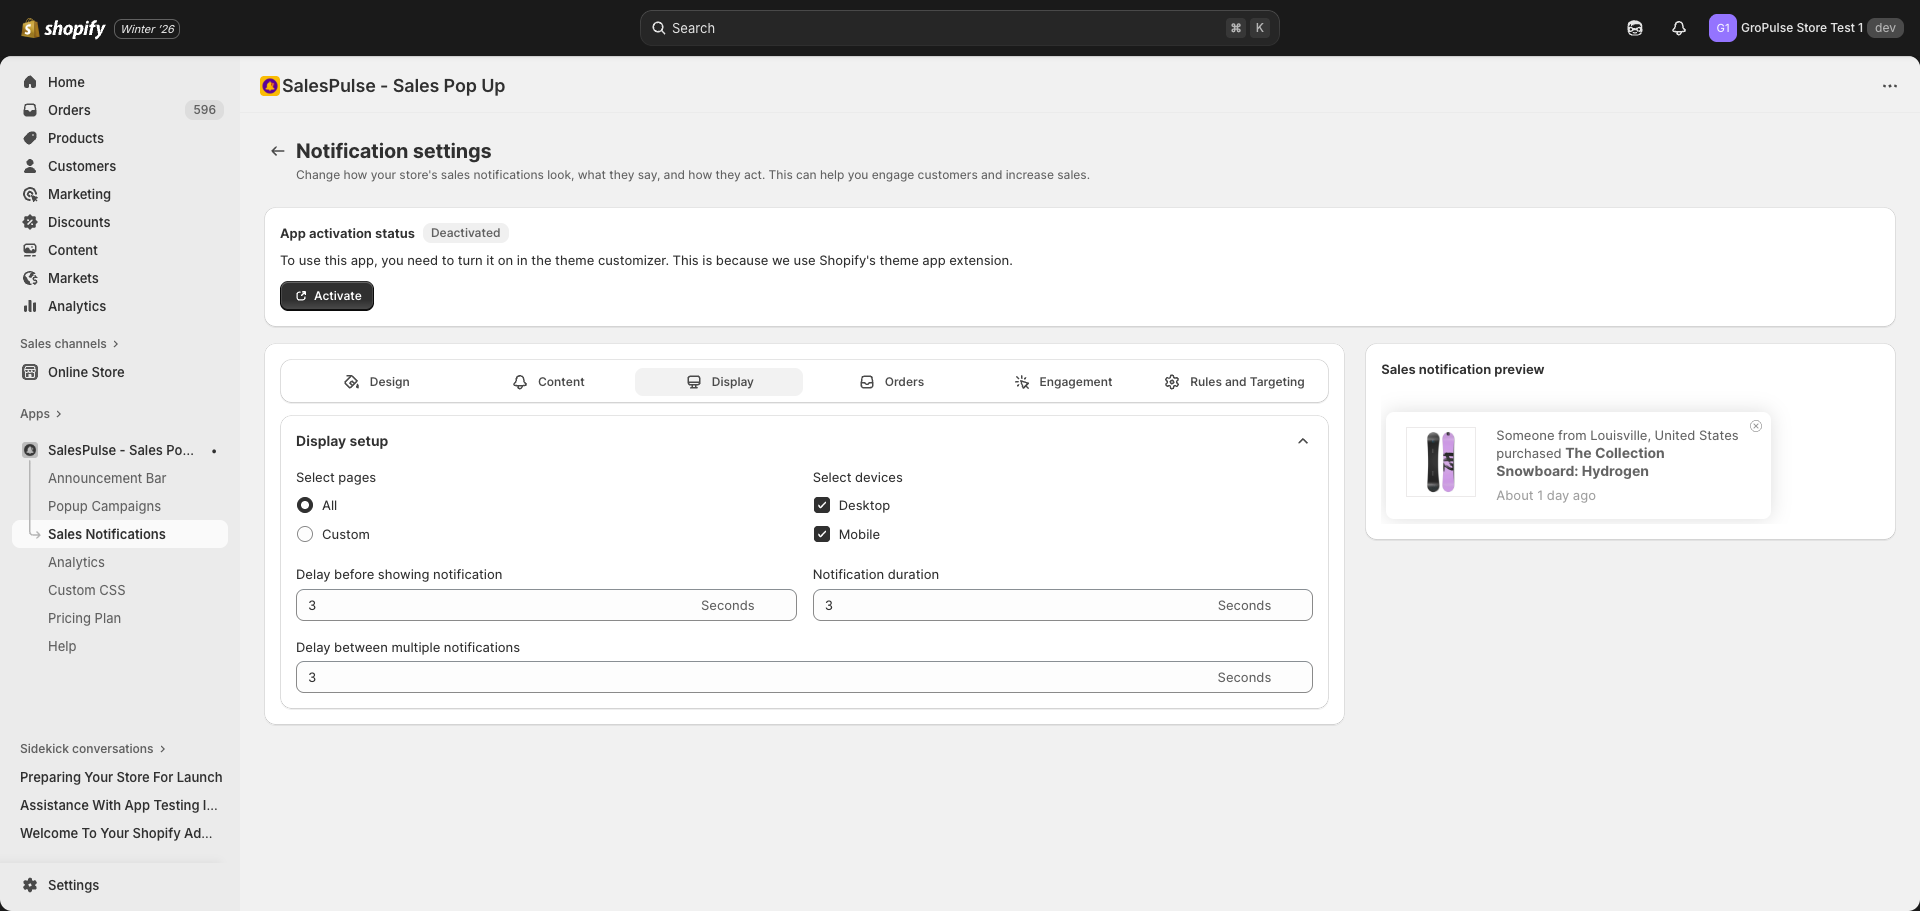
Step 6: Configure Display Timing
Control when and how long notifications appear.
- Click the Display settings tab
- Configure timing options:
| Setting | Default | Description |
|---|---|---|
| Delay before showing notification | 3 seconds | Wait time before first notification |
| Notification duration | 3 seconds | How long each notification displays |
| Delay between multiple notifications | 3 seconds | Gap between consecutive notifications |
Step 7: Configure Order Settings
Control which orders are used for notifications.
- Click the Order settings tab
- Set the Number of previous orders: 1-20 orders
- These are pulled from the past 60 days
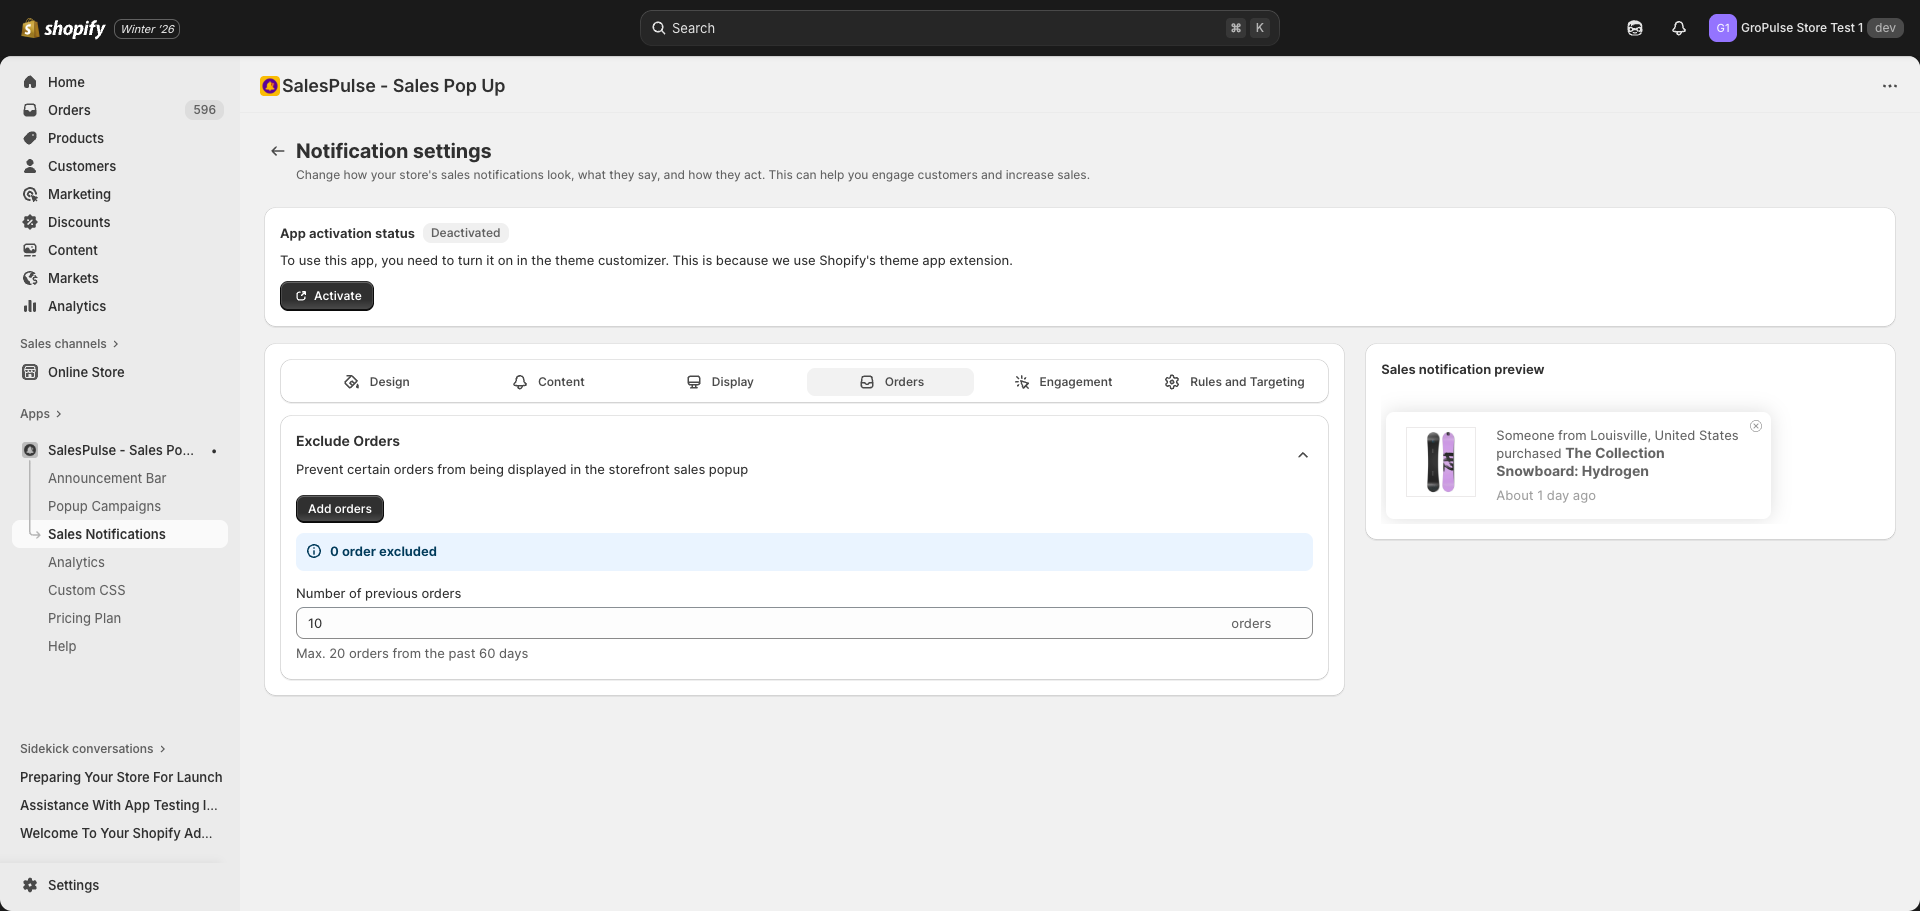
Excluding Specific Orders
If you want to exclude certain orders:
- Click Add orders button
- Search for and select orders to exclude
- Excluded orders will not appear in notifications
Step 8: Save Your Settings
After configuring your settings:
- Review the live preview at the bottom of the page
- Ensure the notification looks correct
- Click the Save button (appears when you have unsaved changes)
Testing Your Notifications
To verify notifications are working:
- Open your store in an incognito/private browser window
- Navigate to any page
- Wait for the notification to appear (based on your delay setting)
- Verify the notification shows correct order data
- Test the close button
- Click the product link to verify it works
Troubleshooting
Notifications Not Appearing
If notifications are not showing:
- Check activation: Ensure the feature is activated in Theme Customizer
- Check orders: Verify you have orders from the past 60 days
- Check page targeting: Verify Display settings include the current page
- Check device targeting: Ensure your device type is enabled
- Clear cache: Try clearing your browser cache