This guide explains how to configure the text content, form fields, and messaging for your popup campaign.
Content Settings
Configure the heading, message, and button appearance in the Content Settings tab.
Accessing Content Settings
- Open the Popup Campaign Editor
- Click the Content Settings tab
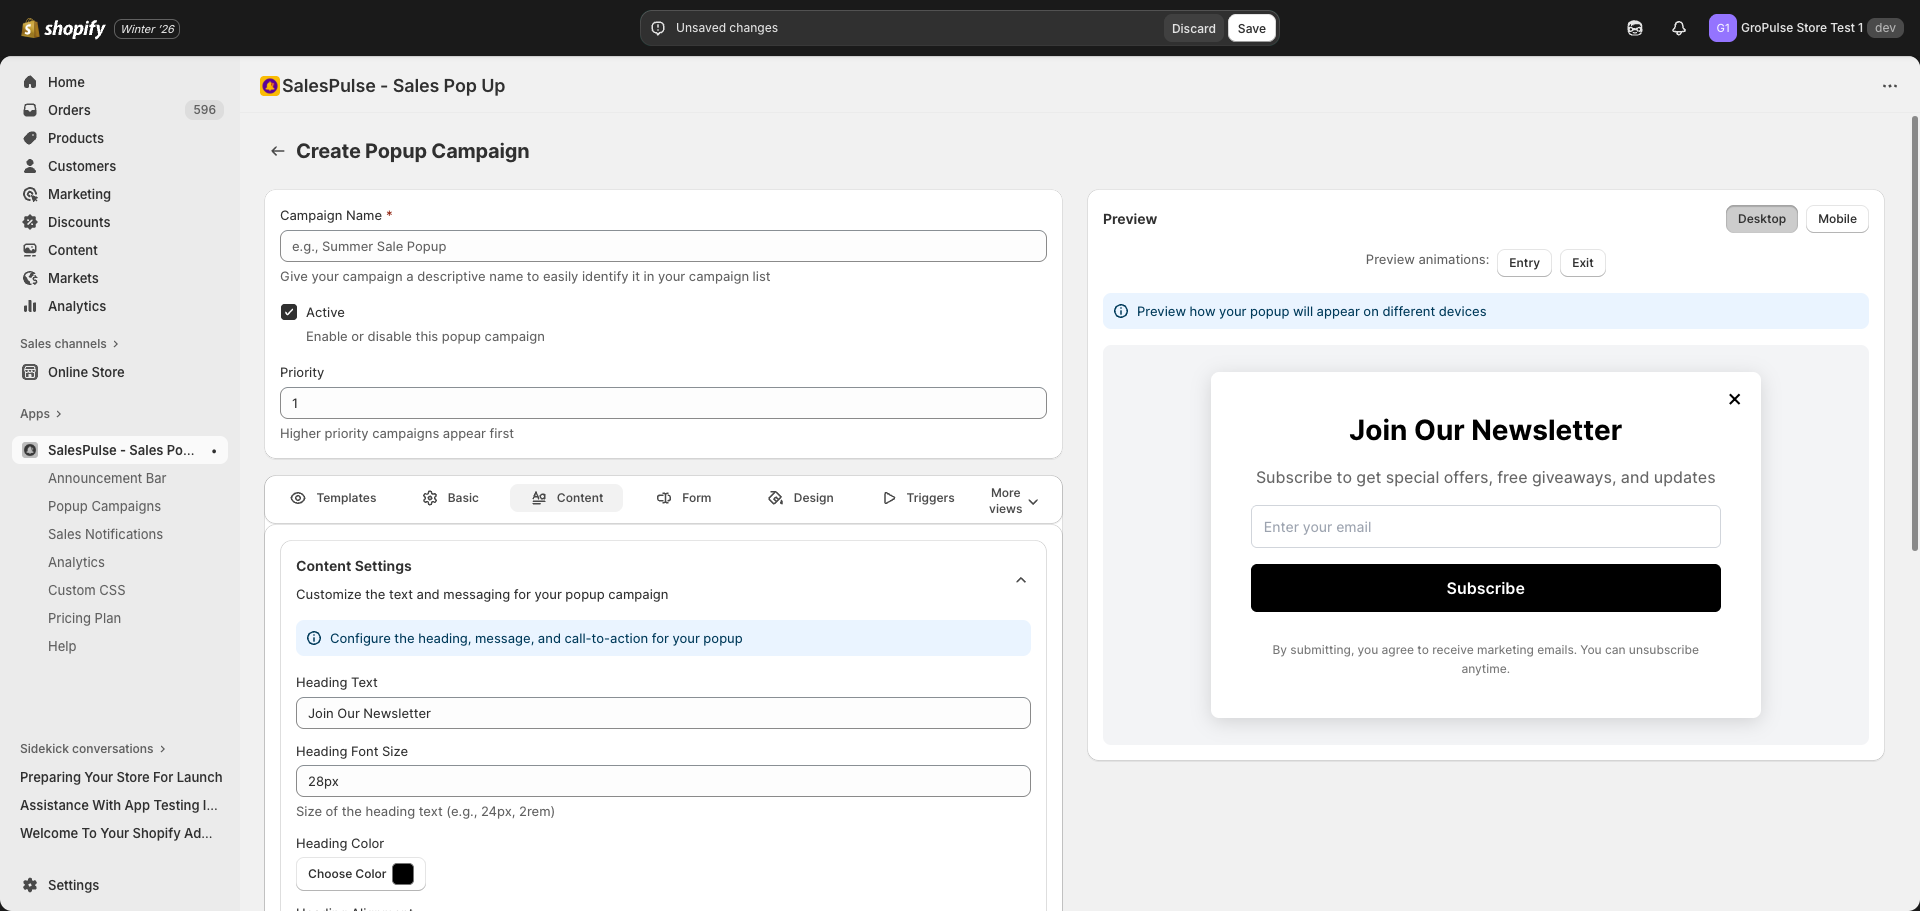
Heading Configuration
Heading Text
Enter your main headline:
- Keep it concise and attention-grabbing
- Focus on the value proposition
- Examples: “Join Our Newsletter”, “Get 15% Off”, “Wait! Don’t Go Yet!”
Heading Font Size
Control the size of your heading:
- Default:
28px - Enter values with units:
28px,32px,2rem - Larger sizes (28-36px) work well for impact
Heading Color
Set the heading text color:
- Click Choose Color next to “Heading Color”
- Select from the color picker or enter a hex code
Heading Alignment
Choose how the heading is positioned:
| Option | Description |
|---|---|
| Left | Align text to the left |
| Center | Center text (default) |
| Right | Align text to the right |
Message Configuration
Message Text
Enter your supporting message:
- Explain the offer or value in more detail
- Keep it to 1-2 sentences
- Examples: “Subscribe to get special offers, free giveaways, and updates”
Message Font Size
Control the size of your message:
- Default:
16px - Enter values with units:
16px,14px,1rem - Keep smaller than heading for hierarchy
Message Color
Set the message text color:
- Click Choose Color next to “Message Color”
- Select from the color picker or enter a hex code
Message Alignment
Choose how the message is positioned:
| Option | Description |
|---|---|
| Left | Align text to the left |
| Center | Center text (default) |
| Right | Align text to the right |
Button Configuration
Button Background Color
Set the background color of your submit button:
- Click Choose Color next to “Button Background Color”
- Choose a color that stands out from the popup background
Button Text Color
Set the text color of your submit button:
- Click Choose Color next to “Button Text Color”
- Ensure good contrast with the button background
Tips:
- Use contrasting colors to make the button stand out
- Match your brand’s primary action color
- Test readability on both desktop and mobile
Form Builder
Create and configure form fields to collect visitor information.
Accessing Form Builder
- Open the Popup Campaign Editor
- Click the Form tab
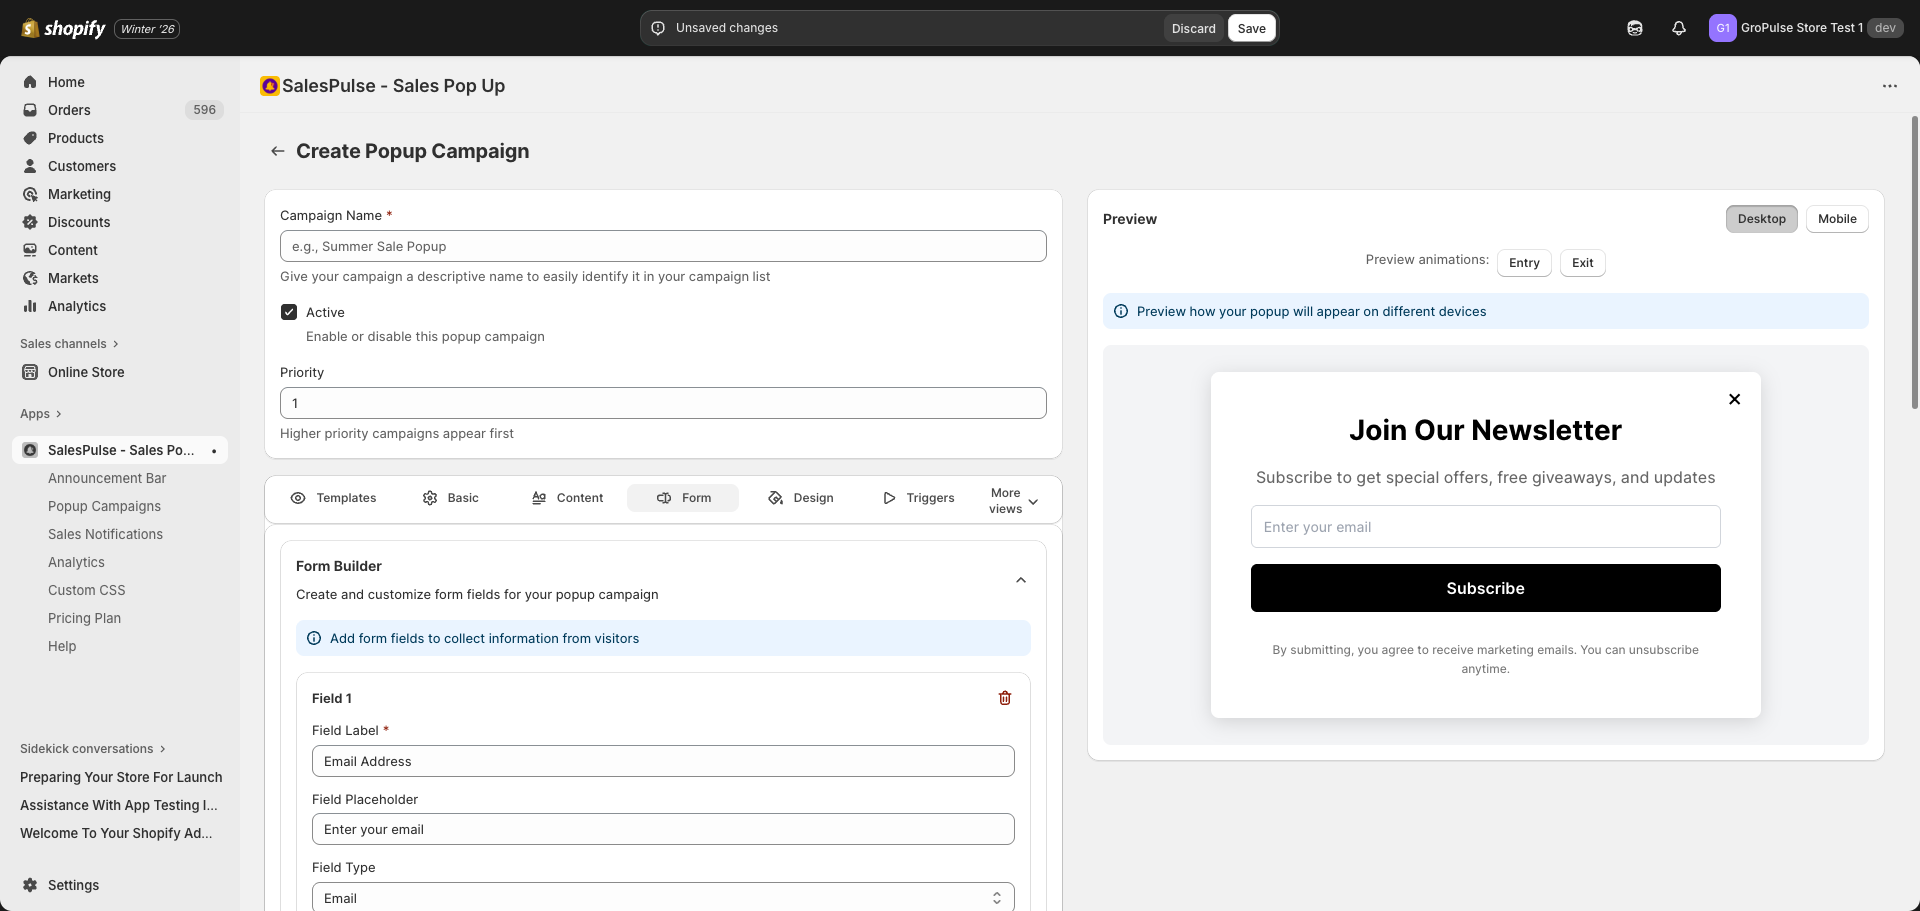
Form Fields
Adding Fields
- In the Form tab, you’ll see existing fields
- Click Add Field to add a new field
- Configure the field settings
- You can add up to 5 fields
Field Configuration
Each field has these settings:
| Setting | Description |
|---|---|
| Field Label | Internal label for the field (required) |
| Field Placeholder | Text shown in empty field |
| Field Type | Type of input (Email, Name, Phone, Text) |
| Required | Whether the field must be filled |
Field Types
| Type | Description | Use Case |
|---|---|---|
| Email input with validation | Newsletter signups | |
| Name | Text input for names | Personalization |
| Phone | Phone number input | SMS marketing |
| Text | General text input | Custom questions |
Removing Fields
Click the trash icon next to a field to remove it.
Note: Removing all fields converts the popup to a call-to-action style with just a button.
Submit Button Settings
Submit Button Text
The text displayed on the submit button:
- Default: “Subscribe”
- Examples: “Get My Discount”, “Join Now”, “Download Free Guide”
Submitting Text
Text shown while the form is being submitted:
- Default: “Submitting…”
- Shows while waiting for server response
Success Message
Success Message Text
Message displayed after successful form submission:
- Default: “Thank you for subscribing!”
- Keep it positive and confirm the action
- Examples: “Welcome! Check your email for your discount code.”
Success Message Colors
| Setting | Description |
|---|---|
| Background Color | Background of the success message |
| Text Color | Text color of the success message |
Form Note/Disclaimer
Form Note Text
Optional text that appears below the submit button:
- Default: “By submitting, you agree to receive marketing emails. You can unsubscribe anytime.”
- Use for privacy notices, terms links, or additional info
Form Note Font Size
Size of the disclaimer text:
- Default:
12px - Keep small to not distract from the main message
Form Note Color
Color of the disclaimer text:
- Choose a subtle color that doesn’t compete with main content
- Often a lighter gray works well
Form Note Alignment
Position of the disclaimer text:
| Option | Description |
|---|---|
| Left | Align to the left |
| Center | Center text (default) |
| Right | Align to the right |
Validation Messages
Customize error messages shown when form validation fails.
Required Field Message
Message shown when a required field is empty:
- Default: “This field is required”
Invalid Email Message
Message shown when email format is invalid:
- Default: “Please enter a valid email address”
Invalid Phone Message
Message shown when phone number is invalid:
- Default: “Please enter a valid phone number”
Integration Settings
Connect your popup forms with email marketing platforms.
Accessing Integration Settings
- Click More views in the editor
- Select Integration Settings
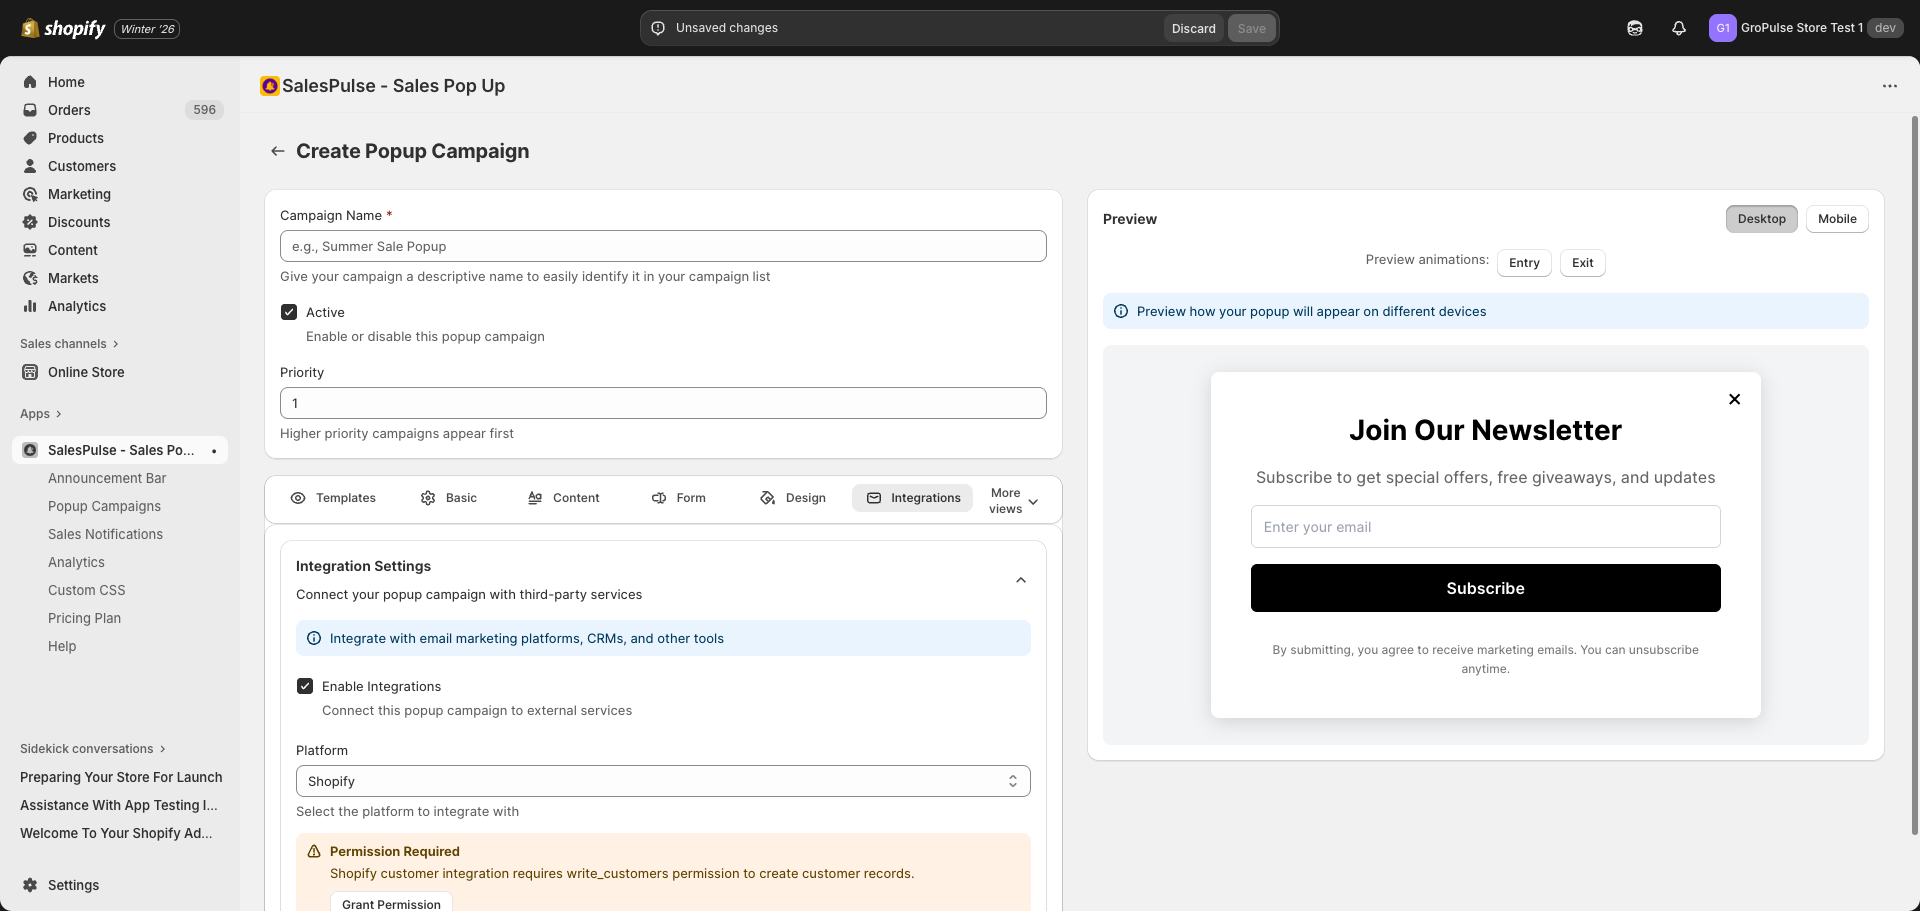
Enabling Integrations
- Check Enable Integrations
- Select your platform from the dropdown
Available Platforms
| Platform | Description |
|---|---|
| Shopify | Add subscribers as Shopify customers |
| Klaviyo | Sync with Klaviyo email lists |
| Mailchimp | Sync with Mailchimp audiences |
Content Best Practices
Writing Effective Headlines
| Instead of… | Write… |
|---|---|
| “Newsletter” | “Get Exclusive Deals” |
| “Sign Up” | “Unlock 15% Off” |
| “Subscribe” | “Join 10,000+ Happy Customers” |
Creating Urgency
- Use time-sensitive language
- Mention limited availability
- Include countdown timers (via templates)
Value Proposition
| Weak | Strong |
|---|---|
| “Join our list” | “Get weekly style tips + 10% off” |
| “Subscribe” | “Be first to know about sales” |
| “Enter email” | “Unlock your exclusive discount” |
CTA Button Best Practices
| Weak | Strong |
|---|---|
| “Submit” | “Get My Discount” |
| “Sign Up” | “Yes, I Want 15% Off!” |
| “Subscribe” | “Join the VIP List” |