This guide explains how to control when, where, and to whom your popup campaign appears, including trigger settings, page targeting, device targeting, and audience segmentation.
Trigger Settings
Control when your popup appears to visitors.
Accessing Trigger Settings
- Open the Popup Campaign Editor
- Click the Triggers tab
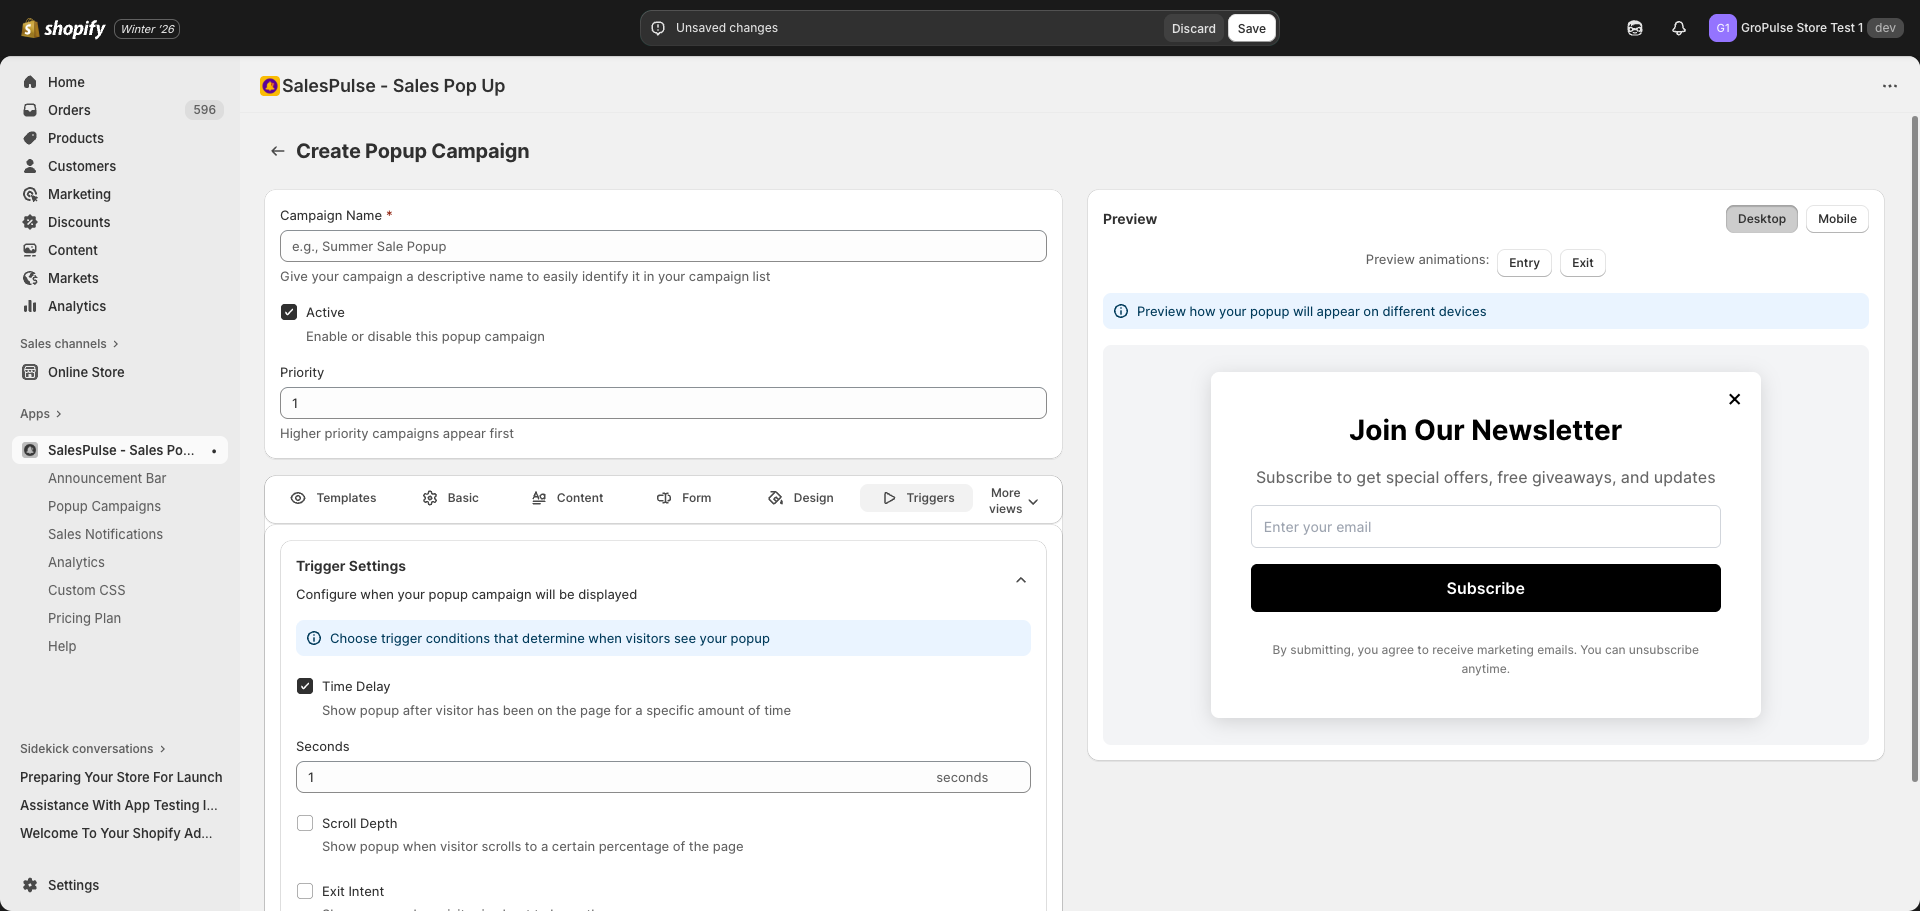
Trigger Types
You can enable multiple triggers. The popup will appear when any enabled trigger condition is met.
Time Delay
Show the popup after a visitor has been on the page for a specific amount of time.
| Setting | Description |
|---|---|
| Enable | Check “Time Delay” checkbox |
| Seconds | Enter delay in seconds |
Recommendations:
- 3-5 seconds: Quick engagement
- 10-15 seconds: Let visitors browse first
- 30+ seconds: For engaged visitors only
Best for: Most popup campaigns, especially welcome offers
Scroll Depth
Show the popup when a visitor scrolls to a certain percentage of the page.
| Setting | Description |
|---|---|
| Enable | Check “Scroll Depth” checkbox |
| Percentage | Enter scroll depth (e.g., 50%) |
Recommendations:
- 25%: Early engagement
- 50%: Mid-page engagement
- 75%: Engaged visitors
Best for: Content pages, blog posts, product pages
Exit Intent
Show the popup when a visitor is about to leave the page.
| Setting | Description |
|---|---|
| Enable | Check “Exit Intent” checkbox |
How it works: Detects when the cursor moves toward the browser’s close button or address bar.
Note: Works primarily on desktop. Mobile uses alternative detection methods.
Best for: Discount offers, cart abandonment recovery, last-chance promotions
Inactivity
Show the popup when a visitor has been inactive for a specific amount of time.
| Setting | Description |
|---|---|
| Enable | Check “Inactivity” checkbox |
| Seconds | Enter inactivity time in seconds |
Recommendations:
- 30 seconds: Re-engage distracted visitors
- 60 seconds: Long inactivity periods
Best for: Re-engaging visitors who may have tabbed away
Targeting Settings
Control where and to whom your popup appears.
Accessing Targeting Settings
- Click More views in the editor
- Select Targeting
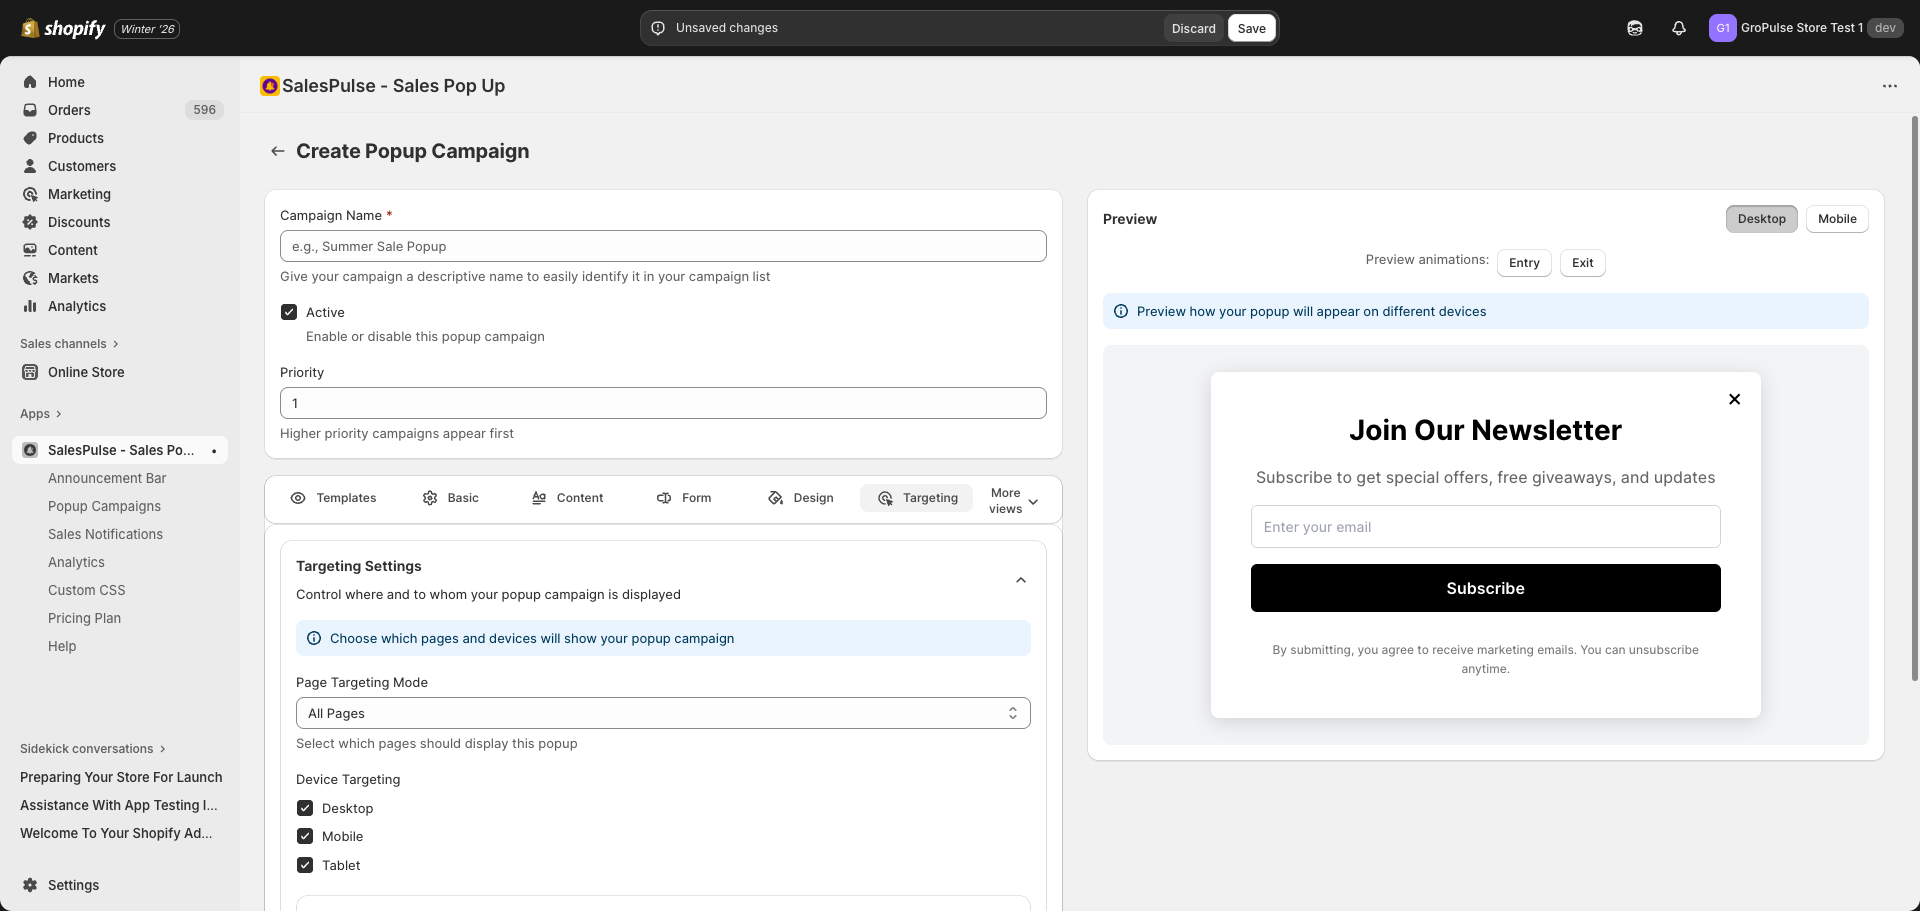
Page Targeting
Control which pages display your popup campaign.
Page Targeting Mode
| Option | Description |
|---|---|
| All Pages | Show the popup on every page of your store |
| Specific Pages | Show only on selected page types |
| All Pages Except | Show everywhere except selected page types |
Page Types
When selecting specific pages or exclusions:
| Page Type | Description |
|---|---|
| Home Page | Your store’s homepage |
| Collection Pages | Category and collection listing pages |
| Product Pages | Individual product detail pages |
| Cart Page | Shopping cart page |
| Checkout Pages | Checkout flow pages |
| Blog Pages | Blog posts and blog listing pages |
| Search Page | Search results page |
| Other Pages | Custom pages (about, contact, etc.) |
Use Case Examples
Homepage Welcome Popup
- Mode: Specific Pages
- Pages: Home Page only
Product Page Offer
- Mode: Specific Pages
- Pages: Product Pages only
Everywhere Except Cart
- Mode: All Pages Except
- Exclude: Cart Page, Checkout Pages
Device Targeting
Control which devices see your popup campaign.
Device Options
| Device | Description |
|---|---|
| Desktop | Computers and laptops |
| Mobile | Smartphones |
| Tablet | Tablets and iPads |
By default, all devices are selected. Uncheck devices to exclude them.
Use Cases
Mobile-Only Promotion
- Uncheck Desktop and Tablet
- Keep only Mobile checked
- Use for: App download prompts, mobile-specific offers
Desktop-Only Popup
- Uncheck Mobile and Tablet
- Keep only Desktop checked
- Use for: Complex forms, detailed promotions
Mobile Optimization
Create separate campaigns for mobile with:
- Shorter messages
- Simpler forms
Geo-Targeting
Display popups based on visitor location.
Enabling Geo-Targeting
- Check Show popup based on location
- Configure country or region targeting
Location-Based Options
- Include specific countries
- Exclude specific countries
Use Cases
- Show free shipping messages only for domestic visitors
- Display country-specific promotions
- Show localized content for different regions
- Currency-specific offers
Customer Segmentation
Target specific customer groups.
Enabling Customer Segmentation
- Check Enable customer segmentation
- Select target segments
Customer Segments
| Segment | Description |
|---|---|
| Logged-in Customers | Visitors who are signed in to their account |
| Guest Visitors | Visitors who are not logged in |
Use Cases
VIP Customer Message
- Target Logged-in Customers only
- Show exclusive offers for members
New Visitor Welcome
- Target Guest Visitors only
- Show sign-up incentives or welcome discounts
Cart Value Targeting
Show popups based on the value of items in the visitor’s cart.
Enabling Cart Value Targeting
- Check Show based on cart value
- Set minimum and/or maximum cart value
Frequency Settings
Control how often visitors see your popup.
Accessing Frequency Settings
- Click More views in the editor
- Select Frequency

Frequency Options
| Option | Description |
|---|---|
| Show Once Only | Show popup only once per visitor, ever |
| Show Once Per Session | Show popup only once per browser session |
| Show Every X Days | Show popup again after X days |
| Enable ‘Do Not Show Again’ | Let visitors dismiss permanently |
Show Once Only
The popup will never appear again after the first view, even on return visits.
Best for: One-time offers, welcome messages
Show Once Per Session
The popup appears once per browsing session. If the visitor closes the browser and returns, they’ll see it again.
Best for: Session-specific promotions
Show Every X Days
Set a cooldown period before showing the popup again:
- Enter the number of days
- Example: 7 days = once per week
Best for: Recurring promotions, regular reminders
Do Not Show Again
When enabled, visitors can click a “Do not show again” link to permanently dismiss the popup.
Best for: Respecting visitor preferences, reducing annoyance
Combining Targeting Rules
Combine multiple targeting rules for precise control.
Example Combinations
First-Time Visitor Welcome
- Page Targeting: Home Page only
- Customer Segment: Guest visitors
- Trigger: Time delay (5 seconds)
- Frequency: Show once only
- Message: “Welcome! Get 10% off your first order”
Exit Intent for Cart
- Page Targeting: Cart Page only
- Trigger: Exit intent
- Frequency: Once per session
- Message: “Complete your order and get free shipping!”
VIP Member Benefits
- Page Targeting: Product pages
- Customer Segment: Logged-in customers
- Trigger: Time delay (3 seconds)
- Frequency: Once per session
- Message: “VIP Members: Extra 10% off this item”
Mobile App Promotion
- Device Targeting: Mobile only
- Page Targeting: All pages
- Trigger: Scroll depth (50%)
- Frequency: Show every 7 days
- Message: “Download our app for exclusive deals!”
Targeting Best Practices
Relevance
- Show popups that are relevant to the page context
- Product pages: Product-related promotions
- Cart page: Upsell and free shipping messages
- Homepage: Store-wide announcements
Avoid Overload
- Don’t show popups too quickly
- Use appropriate delays (5-10 seconds minimum)
- Respect visitor intent with exit intent triggers
- Consider the customer journey
Test Different Approaches
- Use A/B testing to compare targeting strategies
- Monitor analytics to see what performs best
- Adjust based on data