This guide explains how to schedule your announcement bars for specific time periods and add countdown timers to create urgency.
Scheduling Settings
Control when your announcement bar appears based on dates and times.
Accessing Scheduling Settings
- Open the Announcement Bar Editor
- Click the Schedule tab
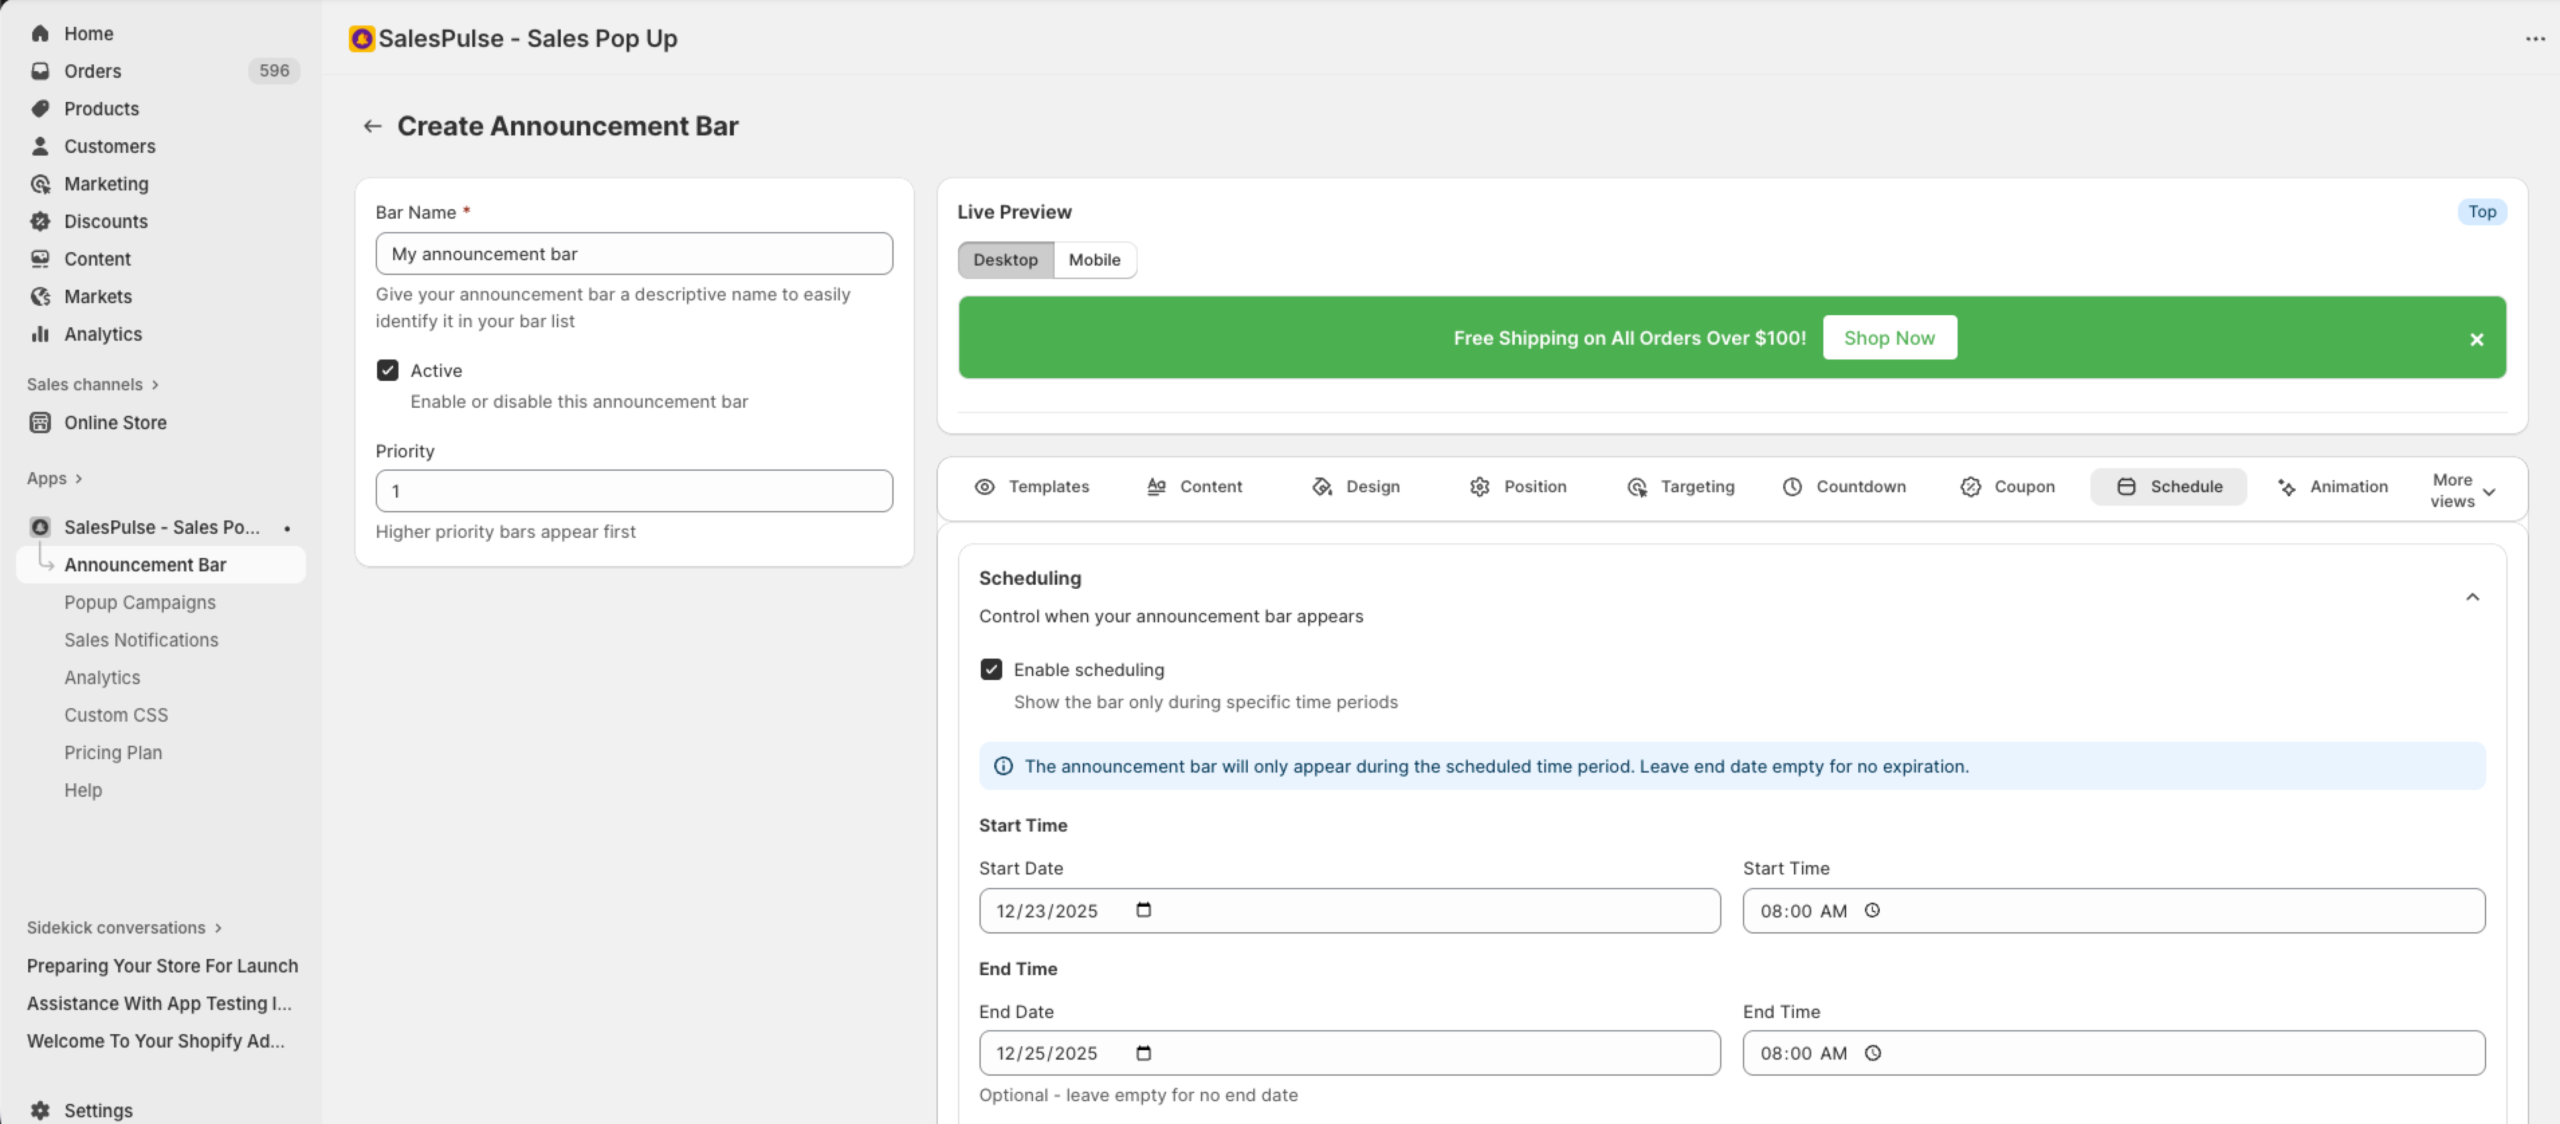
Enabling Scheduling
- Check Enable scheduling
- Configure start and end times
Basic Scheduling
Start Time
Set when the bar begins appearing:
| Field | Description |
|---|---|
| Start Date | The date the bar starts showing |
| Start Time | The time of day the bar activates |
End Time
Set when the bar stops appearing:
| Field | Description |
|---|---|
| End Date | The date the bar stops showing (optional) |
| End Time | The time of day the bar deactivates |
Note: Leave the end date empty for bars that should run indefinitely.
Timezone
Select the timezone for your schedule:
| Timezone | Description |
|---|---|
| UTC | Coordinated Universal Time |
| America/New_York (EST) | Eastern Standard Time |
| America/Los_Angeles (PST) | Pacific Standard Time |
| America/Chicago (CST) | Central Standard Time |
| Europe/London (GMT) | Greenwich Mean Time |
| Europe/Paris (CET) | Central European Time |
| Asia/Tokyo (JST) | Japan Standard Time |
| Asia/Shanghai (CST) | China Standard Time |
| Australia/Sydney (AEST) | Australian Eastern Time |
Tip: Choose the timezone that matches your primary customer base.
Recurring Schedules
Set your bar to appear on specific days or times repeatedly. This is a Growth plan feature.
Enabling Recurring Schedules
- Enable scheduling
- Check Enable recurring schedule
- Select frequency and days
Frequency Options
| Frequency | Description |
|---|---|
| Daily | Appears every day during scheduled times |
| Weekly | Appears on selected days of the week |
| Monthly | Appears on selected days of the month |
Weekly Recurring
Select which days of the week to show the bar:
- Sunday
- Monday
- Tuesday
- Wednesday
- Thursday
- Friday
- Saturday
Use case: Weekend sale promotions, weekday-only offers
Monthly Recurring
Select which days of the month to show the bar:
- Days 1-31
Use case: Monthly flash sales, first-of-month promotions
Countdown Timer Settings
Add urgency with countdown timers that show time remaining.
Accessing Countdown Timer Settings
- Open the Announcement Bar Editor
- Click the Countdown Timer Settings tab
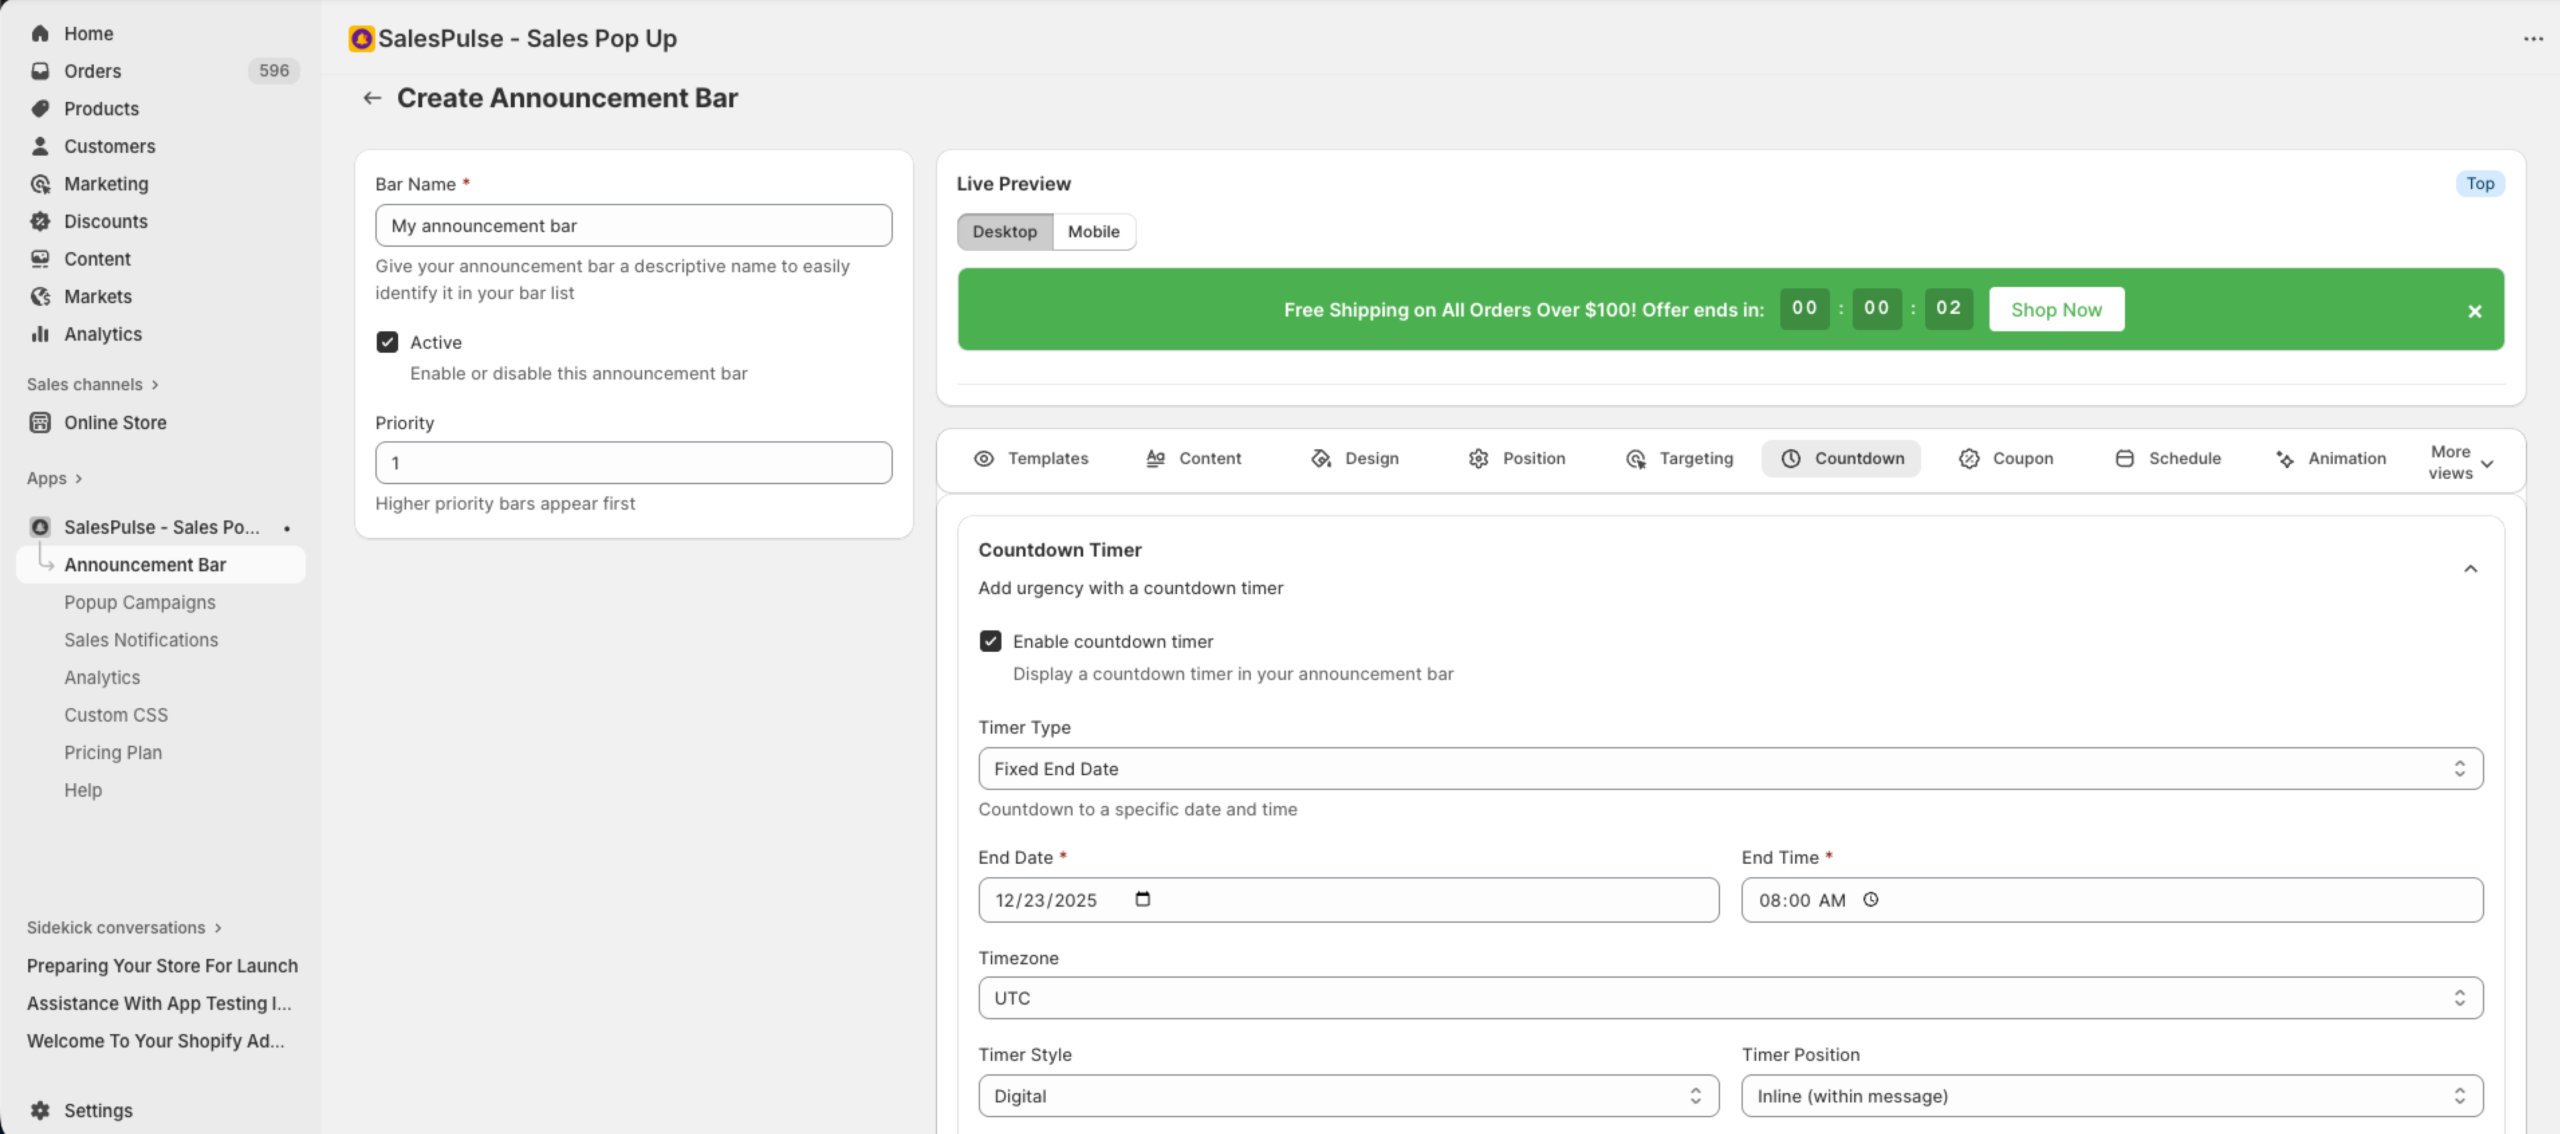
Enabling Countdown Timer
- Check Enable countdown timer
- Configure timer type and settings
Timer Types
Fixed End Date
Countdown to a specific date and time:
| Field | Description |
|---|---|
| End Date | The target date |
| End Time | The target time |
| Timezone | Timezone for the end time |
Use case: Flash sales, product launches, event countdowns
Recurring Timer (Growth+)
Countdown that resets automatically:
| Field | Description |
|---|---|
| Reset Time | Time of day when timer resets |
| Reset Days | Days of the week when timer resets |
Use case: Daily deals, weekly specials, regular promotions
Evergreen Timer (Pro)
Unique countdown for each visitor:
| Field | Description |
|---|---|
| Duration (hours) | Length of countdown from first view |
How it works:
- Each visitor sees their own timer starting when they first visit
- Creates personalized urgency
- Timer persists across sessions
Use case: Limited-time discount for new visitors, personalized offers
Timer Appearance
Timer Style
| Style | Description |
|---|---|
| Simple | Clean, minimal number display |
| Digital | LCD-style digital clock look |
| Circular | Circular progress indicators |
Timer Position
| Position | Description |
|---|---|
| Inline (within message) | Timer appears in the message flow |
| Before message | Timer appears before the text |
| After message | Timer appears after the text |
| Below message | Timer appears on a separate line |
Custom Text
| Field | Description |
|---|---|
| Text Before Timer | Text shown before the countdown (e.g., “Offer ends in:”) |
| Text After Timer | Text shown after the countdown (e.g., “Don’t miss out!”) |
Display Options
Choose which time units to display:
- Show days: Display days remaining
- Show hours: Display hours remaining
- Show minutes: Display minutes remaining
- Show seconds: Display seconds remaining
Recommendation: For short promotions (< 24 hours), hide days. For longer promotions, include all units.
Scheduling Use Cases
Flash Sale (24 hours)
Scheduling:
- Start Date: December 26
- Start Time: 12:00 AM
- End Date: December 27
- End Time: 12:00 AM
- Timezone: America/New_York

Countdown Timer:
- Type: Fixed End Date
- End Date: December 27
- End Time: 12:00 AM
- Text Before: "Flash Sale ends in:"
- Show: hours, minutes, seconds
Weekend Sale (Recurring)
Scheduling:
- Enable recurring schedule
- Frequency: Weekly
- Days: Saturday, Sunday

Message: "Weekend Special: 25% Off Everything!"
Daily Deal
Scheduling:
- Enable recurring schedule
- Frequency: Daily

Countdown Timer:
- Type: Recurring
- Reset Time: 12:00 AM
- Reset Days: Every day
- Text Before: "Today's deal expires in:"
New Visitor Offer (Evergreen)
Countdown Timer:
- Type: Evergreen
- Duration: 24 hours
- Text Before: "Your exclusive offer expires in:"

Message: "First-time visitor? Get 15% off with code WELCOME15"
Troubleshooting
Bar Not Showing at Scheduled Time
- Check the timezone setting
- Verify current date/time falls within schedule
- Ensure the bar is set to Active
- Confirm no conflicting bars with higher priority
Countdown Timer Not Displaying
- Verify countdown timer is enabled
- Check that end date/time is in the future
- Ensure display options have at least one unit selected
Timer Showing Wrong Time
- Verify timezone settings match your intended audience
- Check that date and time are set correctly
- Test from different locations if using geo-targeting