Get your Google reviews displaying on your Shopify store in minutes. This guide walks you through the essential steps to set up GroPulse Google Reviews and display your first review widget.

Prerequisites
Before you begin, make sure you have:
- A Shopify store with GroPulse Google Reviews installed
- A Google Business Profile with reviews
Step 1: Add Your Business Location
After installing the app, your first task is to connect your Google Business location.
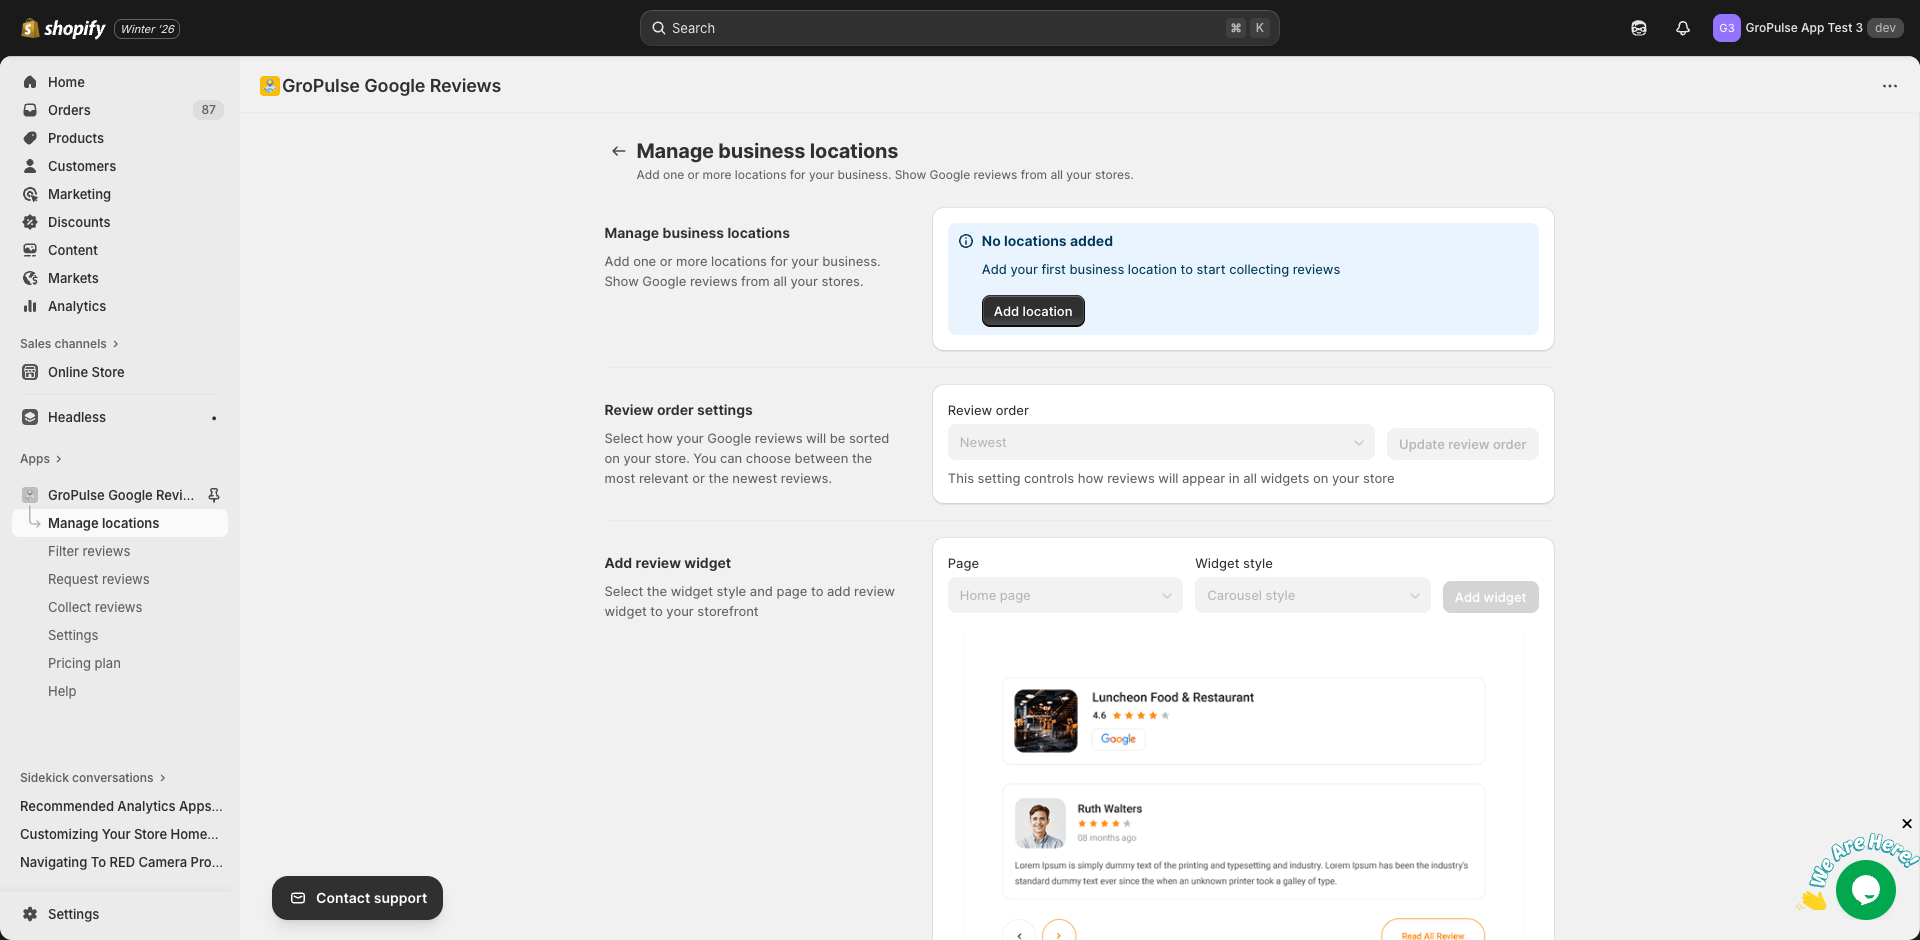
Navigate to Manage Locations
- From the Dashboard, click Manage locations in the Business locations card
- Or select Manage locations from the sidebar navigation
Add Your Location
- Click the Add location button
- Choose one of the following methods:
Option A: Search by Name (Recommended)
- Type your business name in the search field
- Select your business from the Google Maps results
- Click Select on the info window that appears
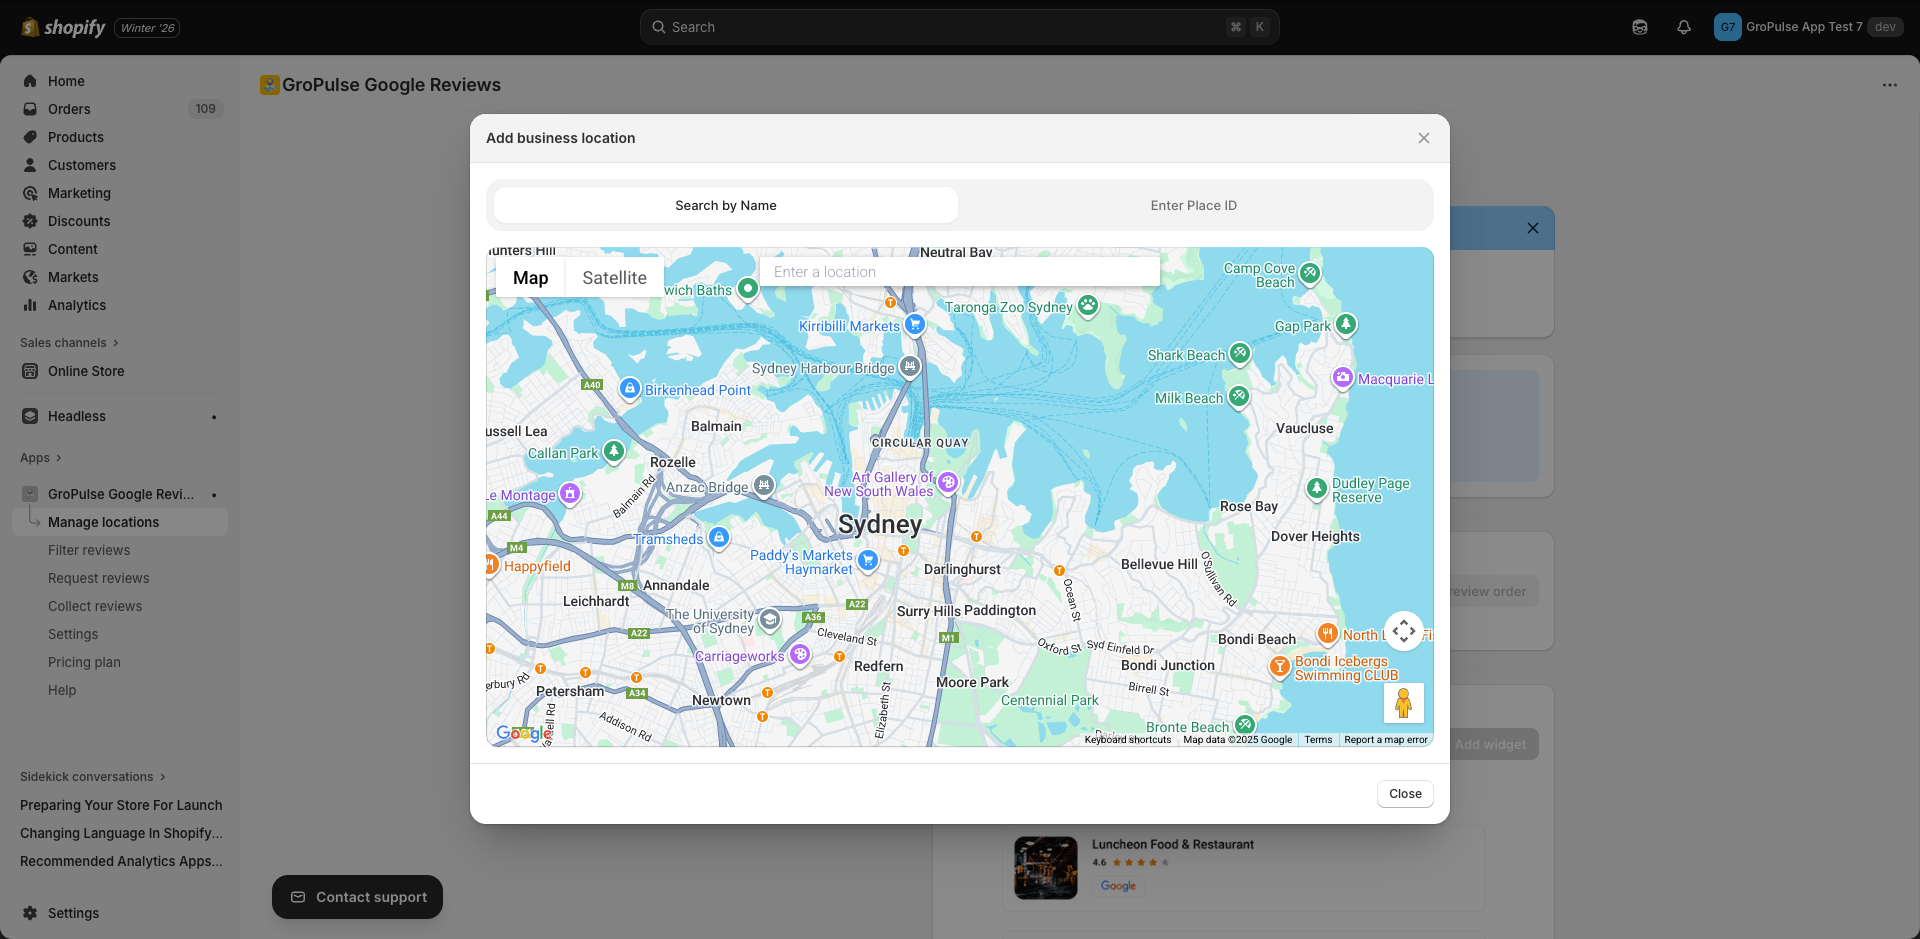
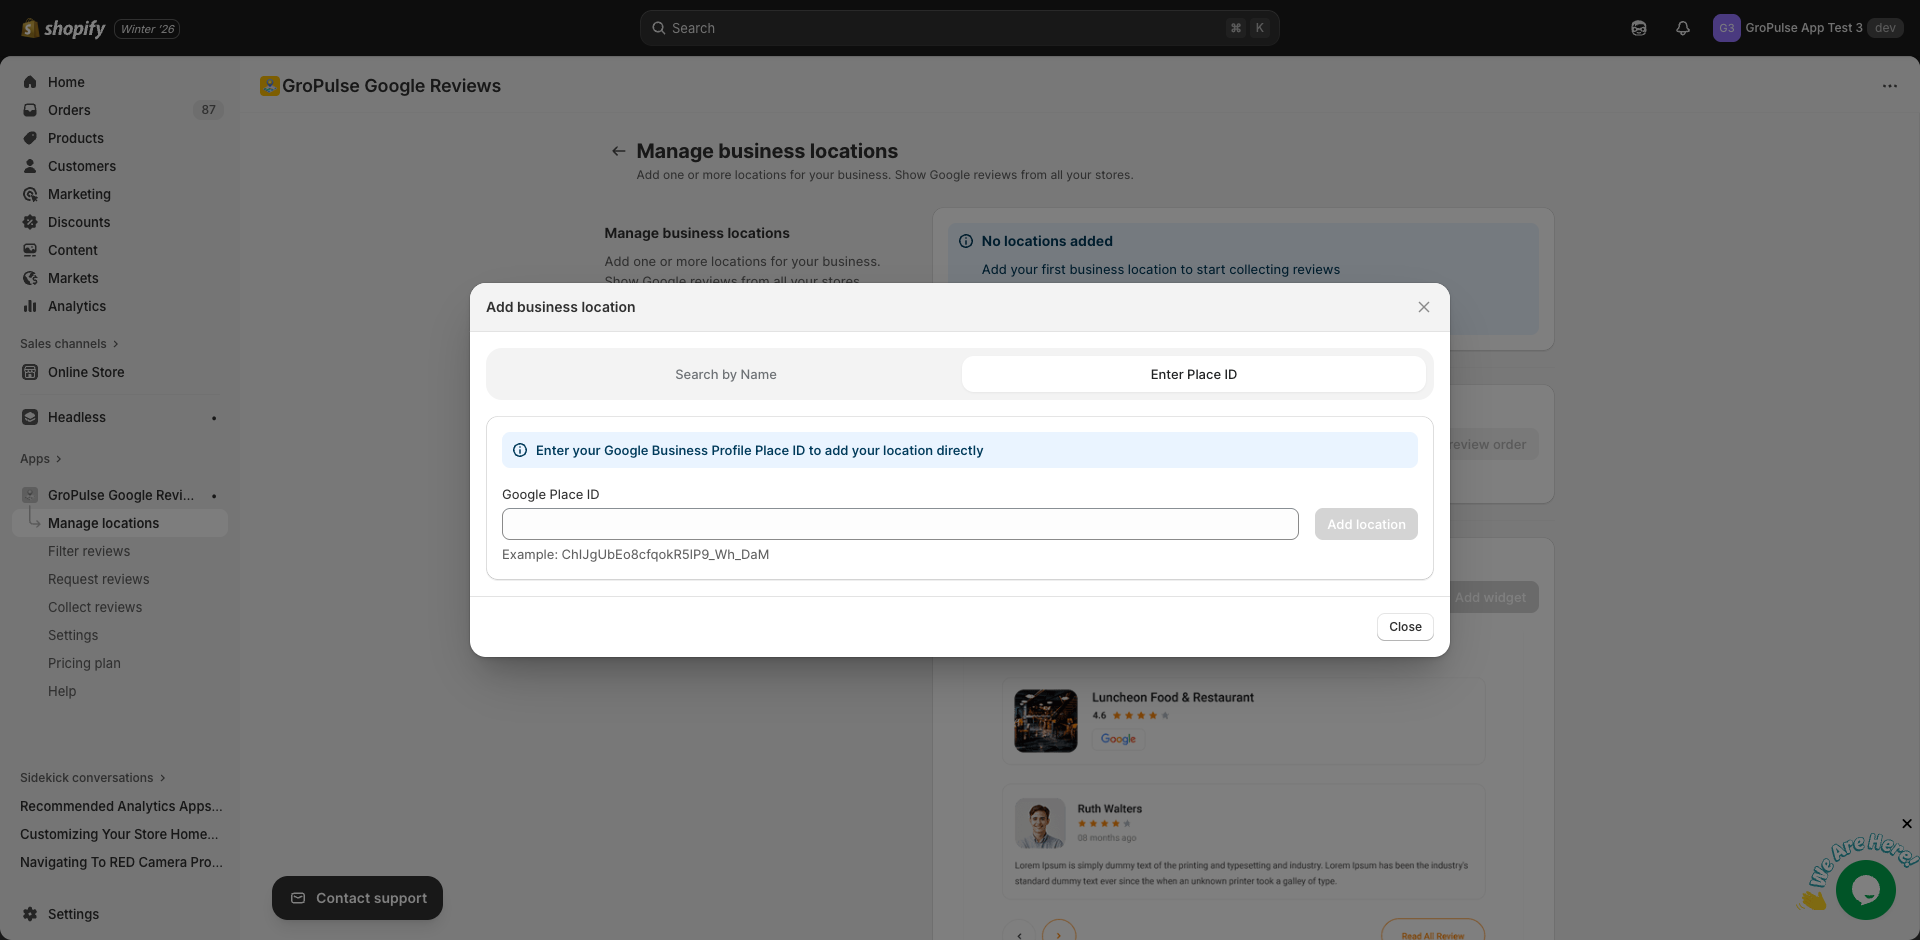
Option B: Enter Place ID
- Switch to the Enter Place ID tab
- Paste your Google Place ID
- Click Add location
Your location will be added and automatically marked as Primary.
Finding Your Place ID
Search for your business on Google Maps, click on it, and look for the Place ID in the URL. Alternatively, use Google’s Place ID Finder.
Step 2: Add a Review Widget
Now that your location is connected, let’s display your reviews on your store.
Configure Your Widget
- On the Manage locations page, scroll to Add review widget
- Select a Page for your widget:
- Home page
- Product page
- Collection page
- Collection list page
- Cart page
- Blog page
- Article page
- Search page
- Custom page
- Select a Widget style:
- Carousel style
- Four columns style 1
- Four columns style 2
- Three columns style 1
- Three columns style 2
- Two column style 1
- Two column style 2
- Two column style 3
- Two column style 4
- Two column style 5
- Single column style 1
- Single column style 2
- Click Add widget
Position in Theme Editor
- The Shopify theme editor will open
- Find the GroPulse Google Reviews app block
- Drag it to your desired position
- Click Save
Step 3: Verify Your Widget
- Visit your store’s live page where you added the widget
- Confirm your Google reviews are displaying correctly
- If reviews don’t appear, click Update reviews now on the Manage locations page
Step 4: Customize Your Display
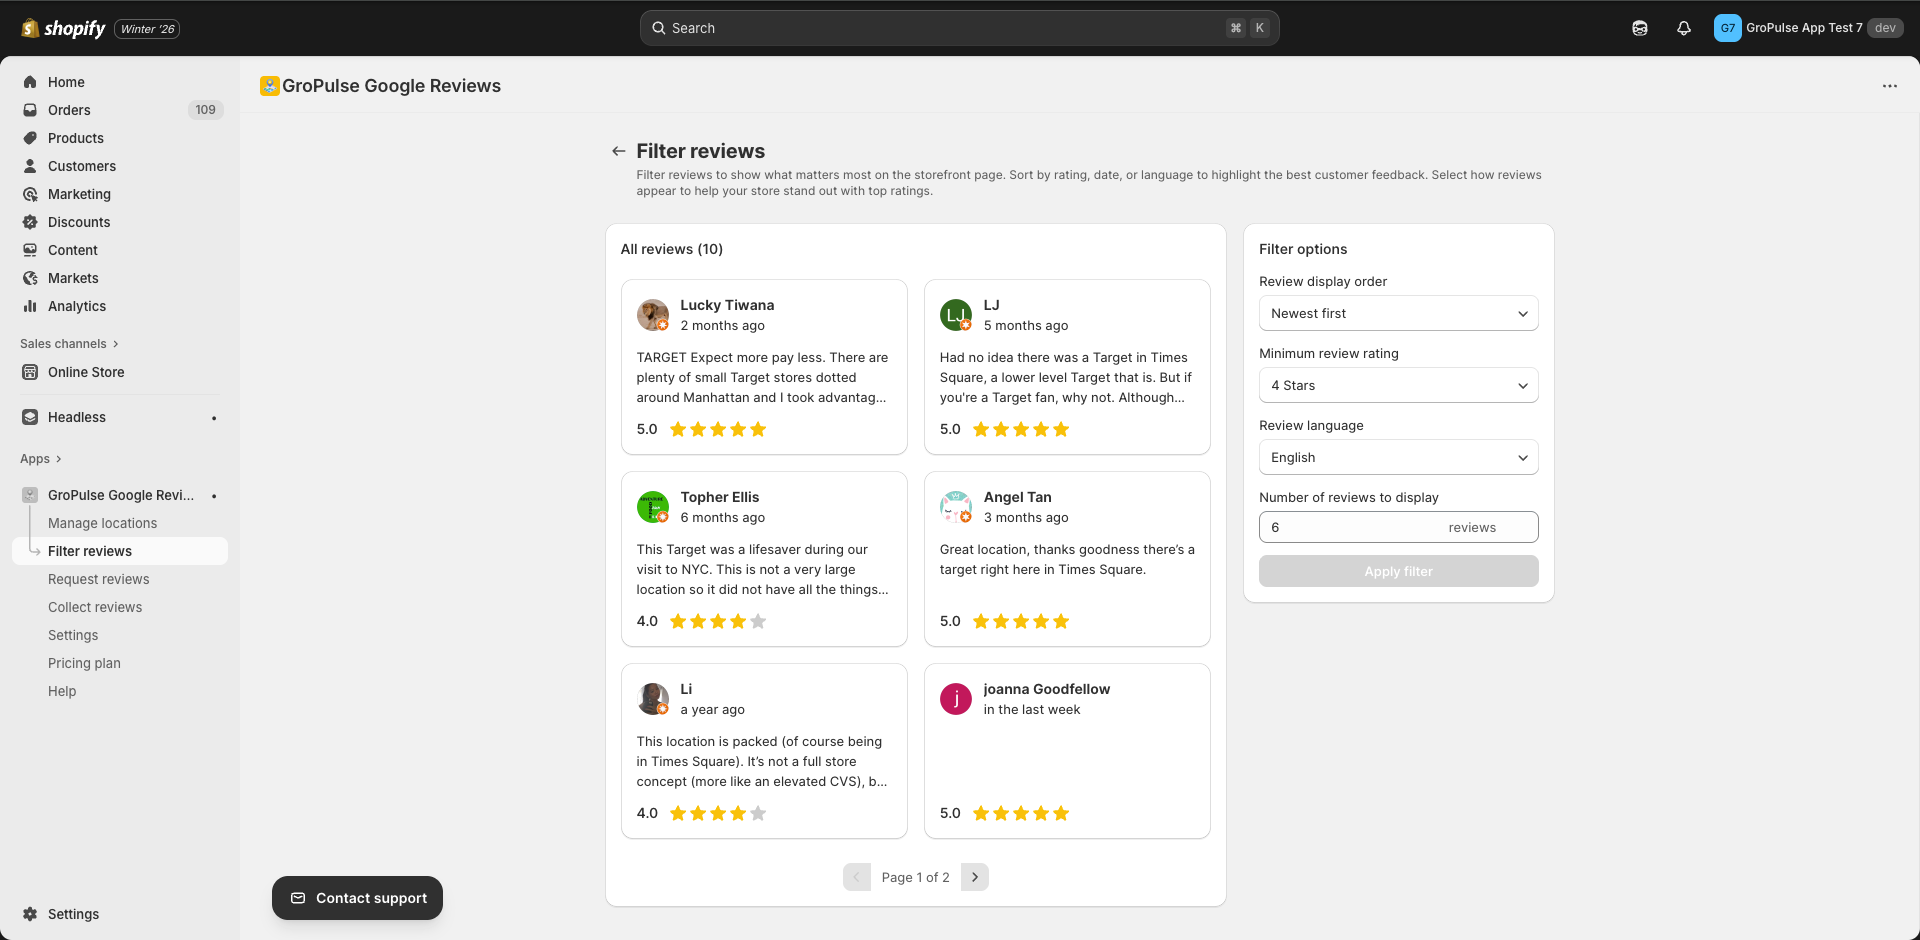
Filter Reviews
Control which reviews appear on your store.
- Go to Filter reviews from the sidebar
- Configure your preferences:
- Minimum review rating — Show only 4-5 star reviews
- Review language — Filter by language
- Number of reviews — Set display limit
- Click Apply filter
Change Review Order
- On Manage locations, find Review order settings
- Select your preferred order:
- Newest — Most recent reviews first
- Most relevant — Google’s default ordering
- Click Update review order
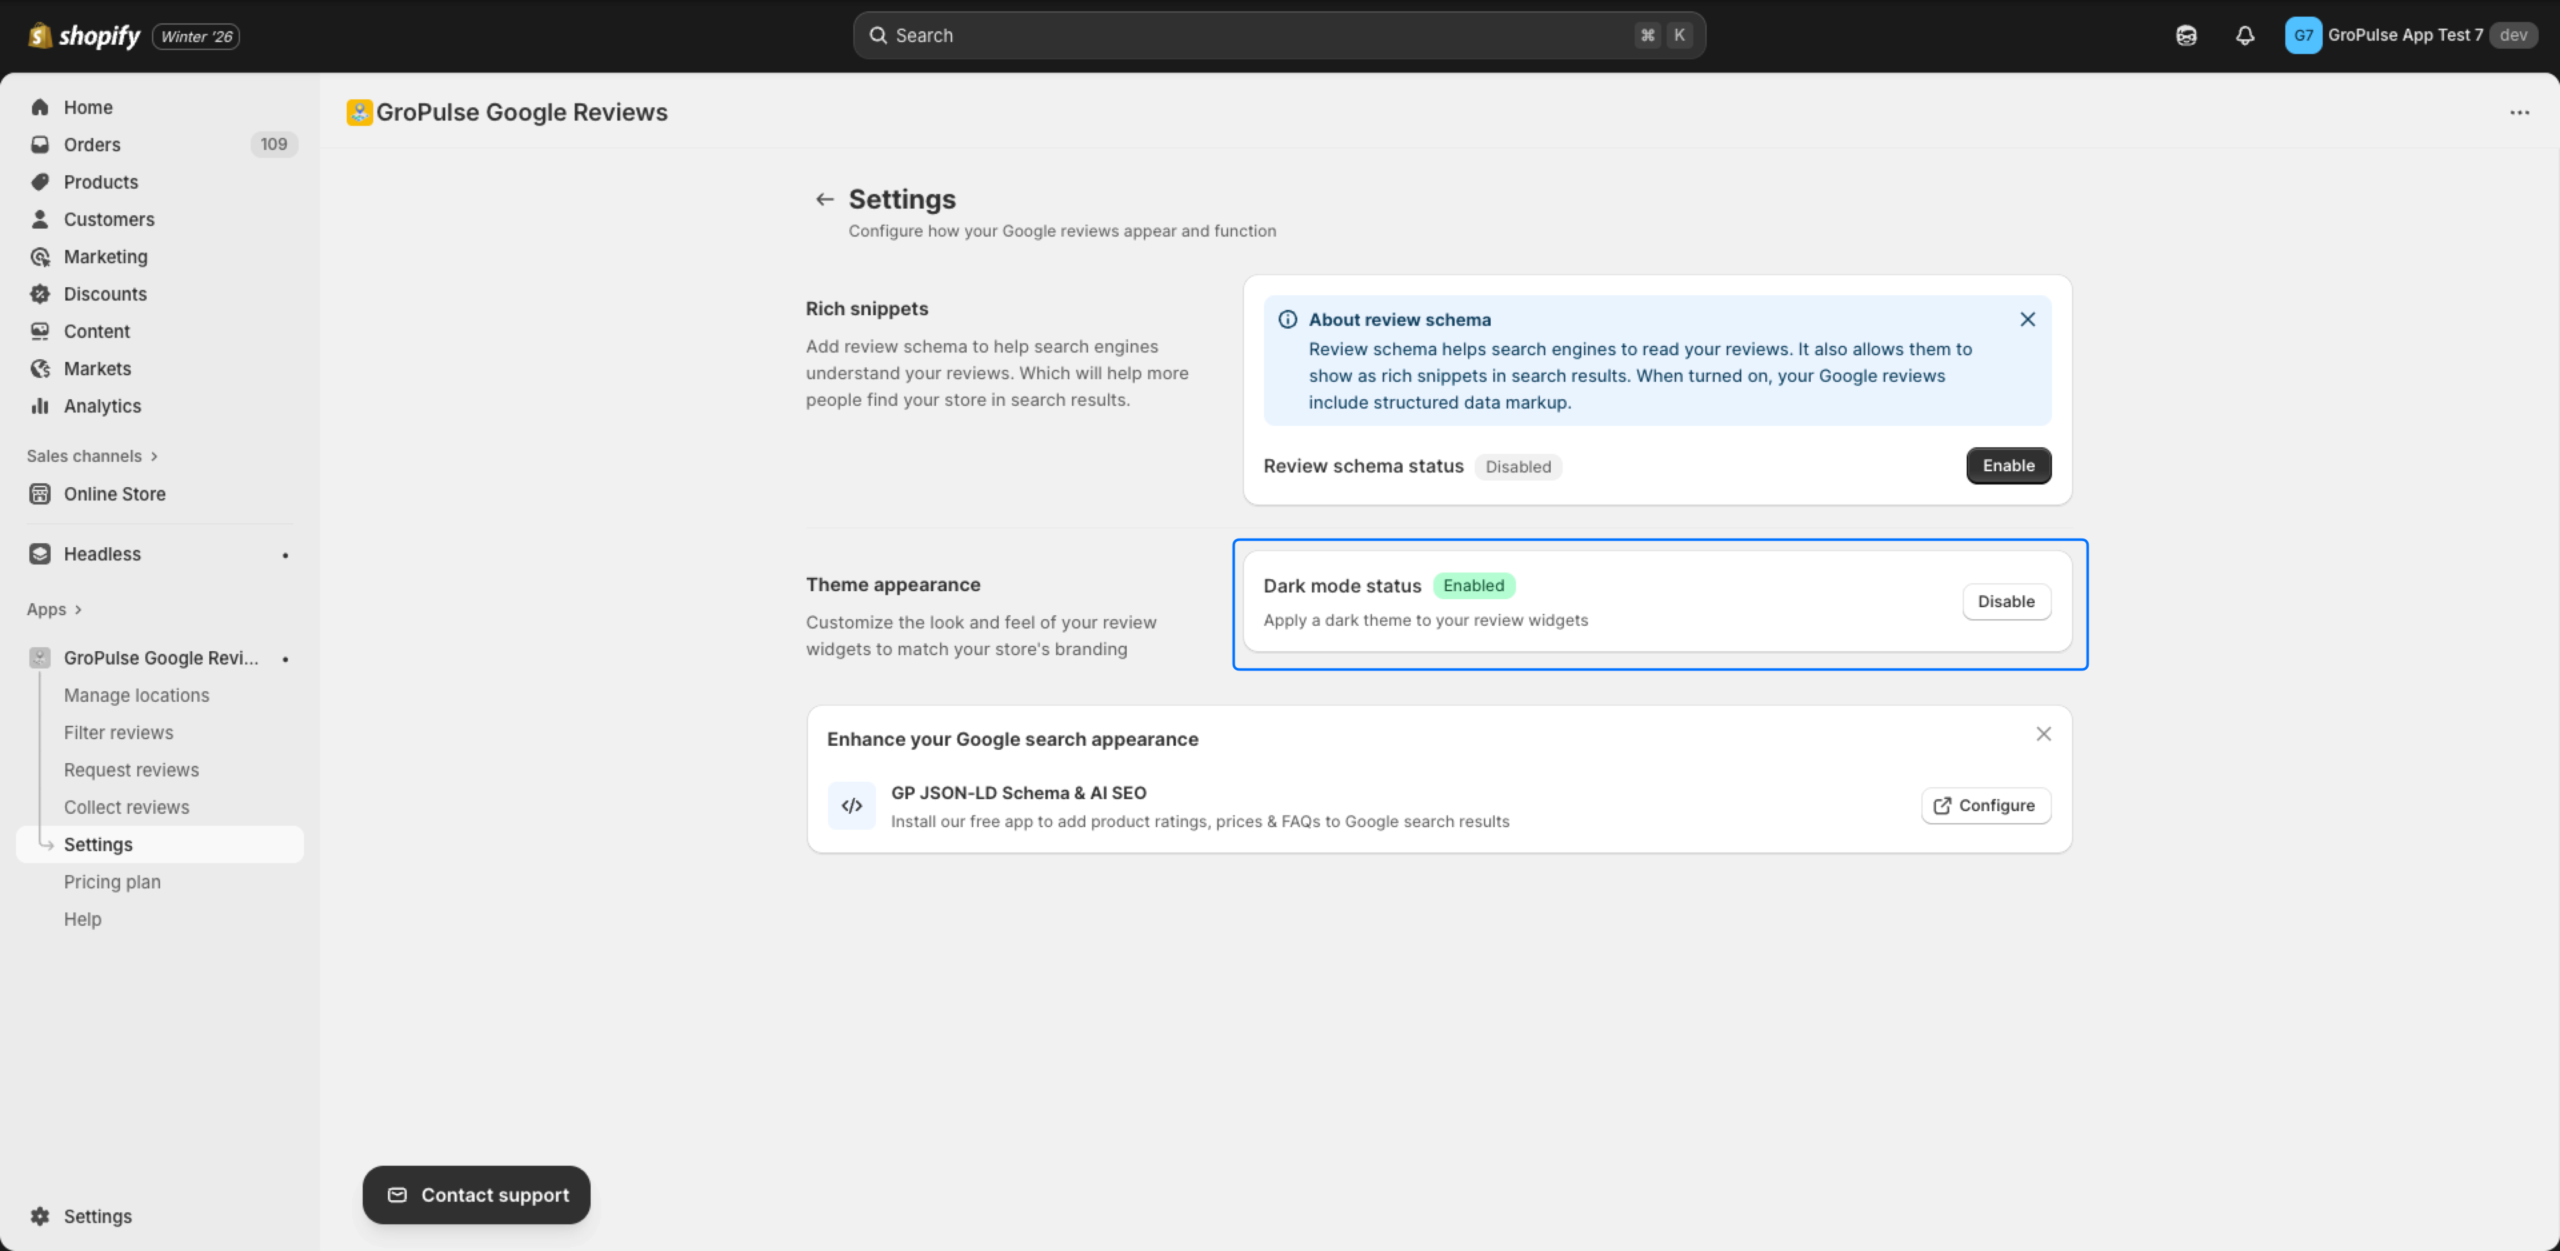
Enable Dark Mode
For stores with dark themes:
- Go to Settings
- Find Theme appearance
- Click Enable next to Dark mode status
Step 5: Set Up Review Requests (Optional)
Automatically request reviews from customers after purchase.
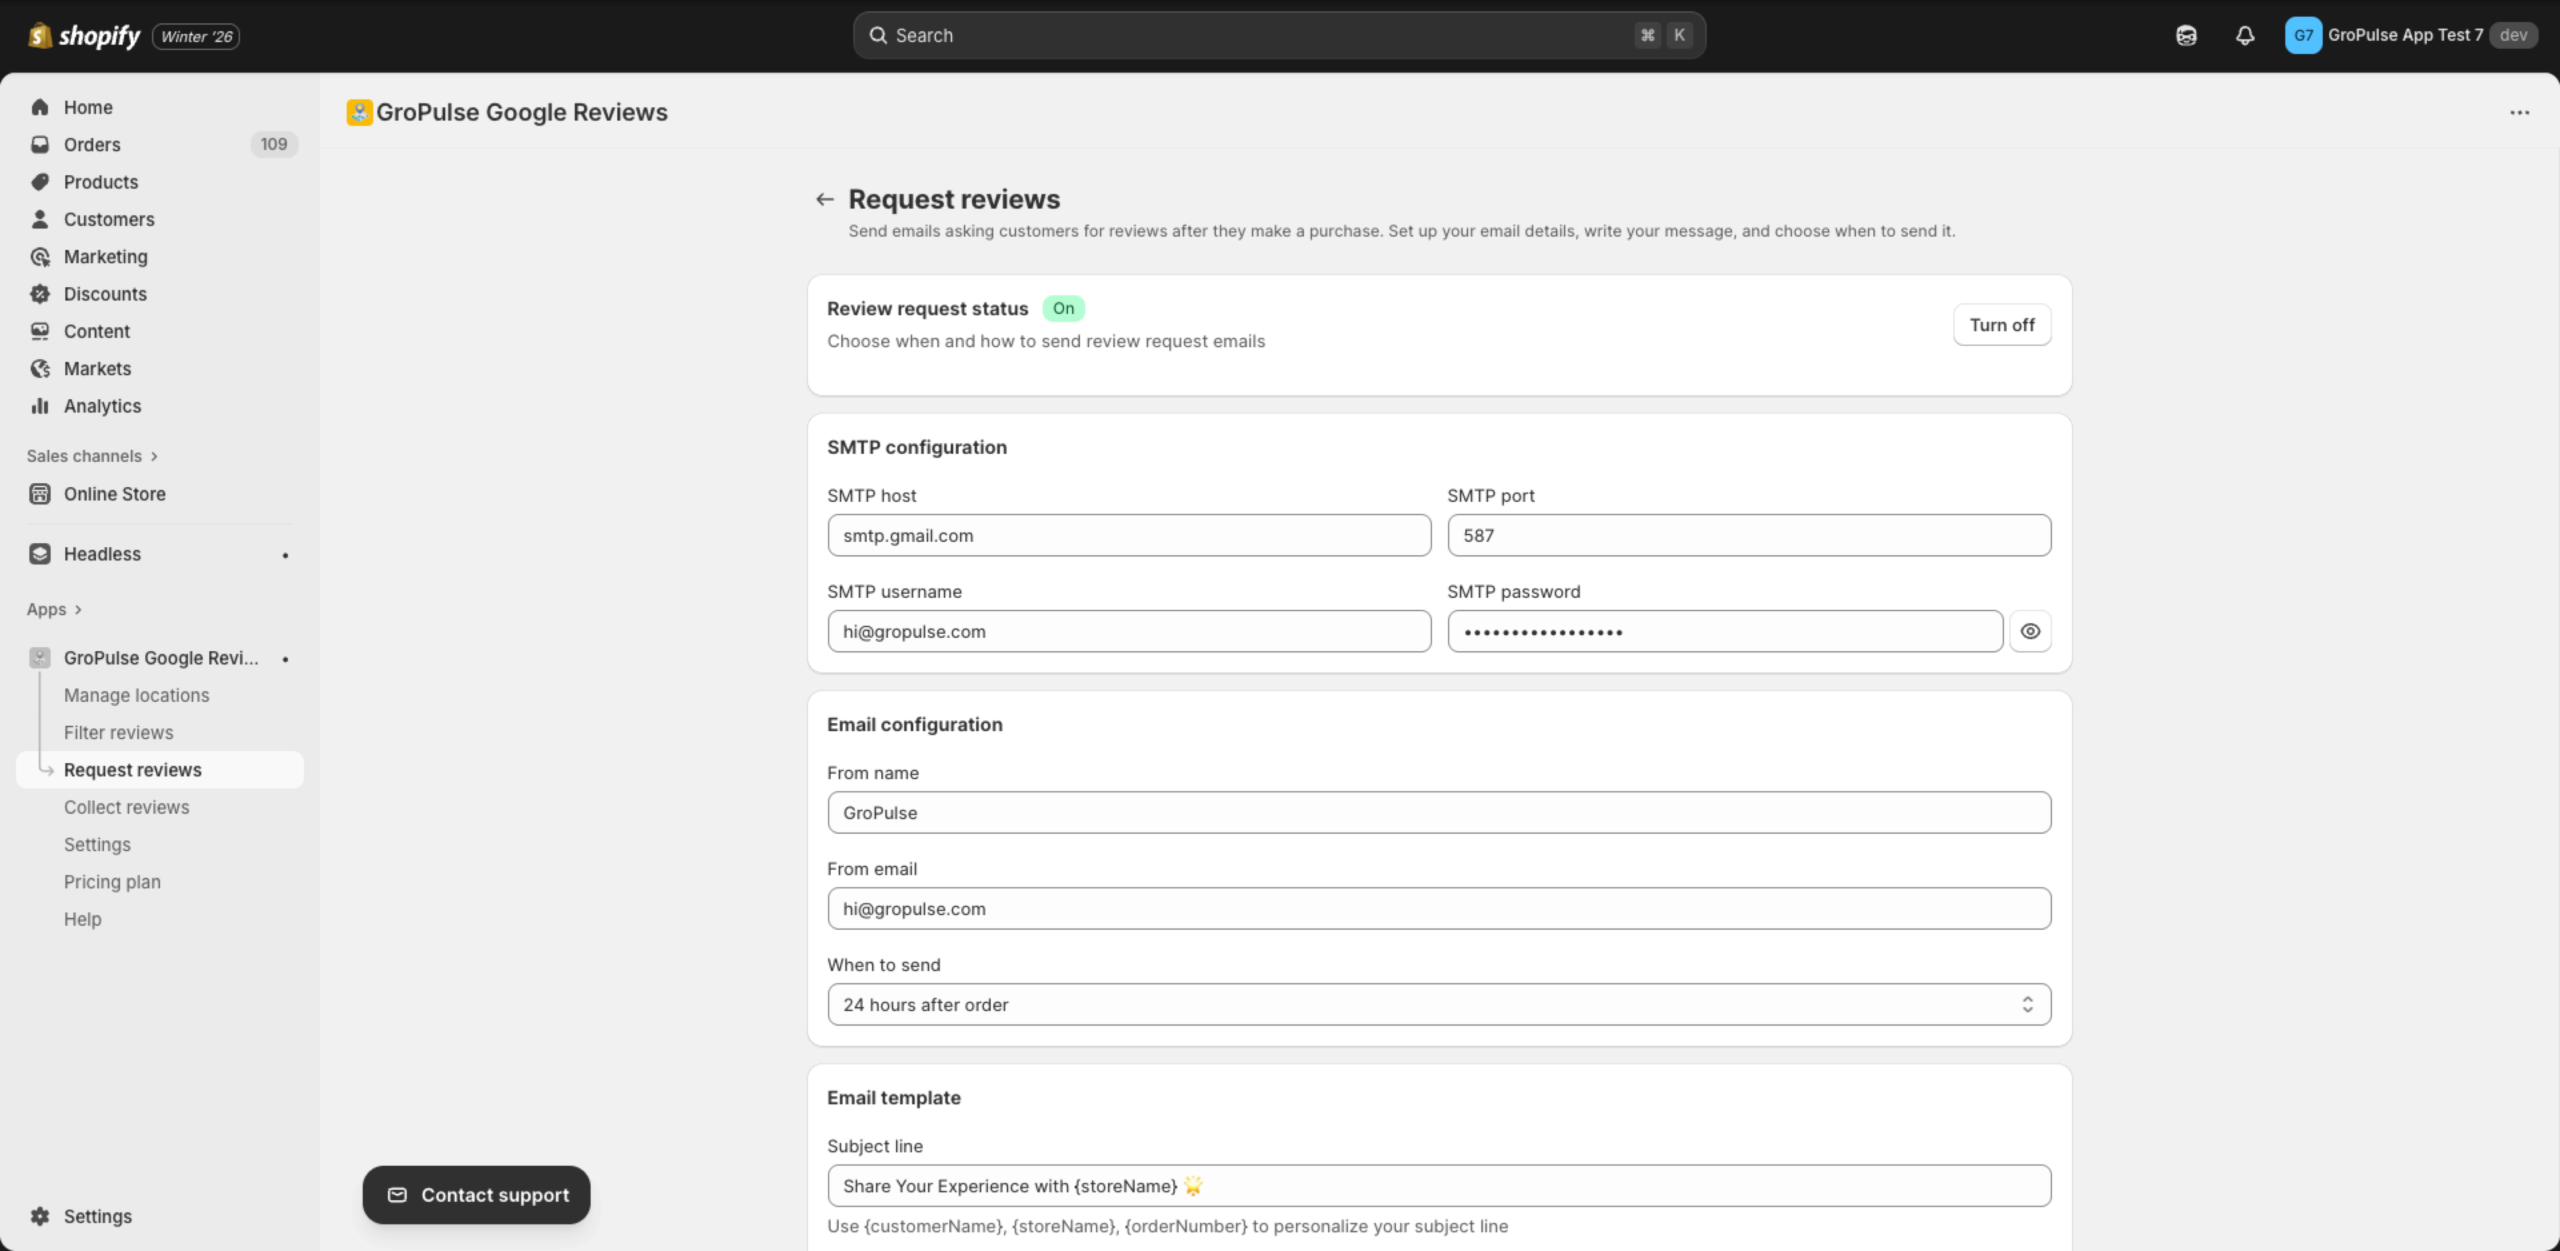
Configure SMTP Settings
- Go to Request reviews from the sidebar
- Enter your email server details:
| Field | Example Value |
|---|---|
| SMTP host | smtp.gmail.com |
| SMTP port | 587 |
| SMTP username | your-email@gmail.com |
| SMTP password | Your app password |
Configure Email Settings
| Field | Description |
|---|---|
| From name | Your store or brand name |
| From email | Your email address |
| When to send | Time delay after order (1 hour to 1 week) |
Customize Email Template
Use these variables to personalize your emails:
| Variable | Description |
|---|---|
{customerName} | Customer’s name |
{storeName} | Your store name |
{orderNumber} | Order number |
{googleReviewLink} | Link to leave a Google review |
{orderDate} | Date of the order |
Test and Enable
- Click Send test email to verify your configuration
- Toggle Review request status to On
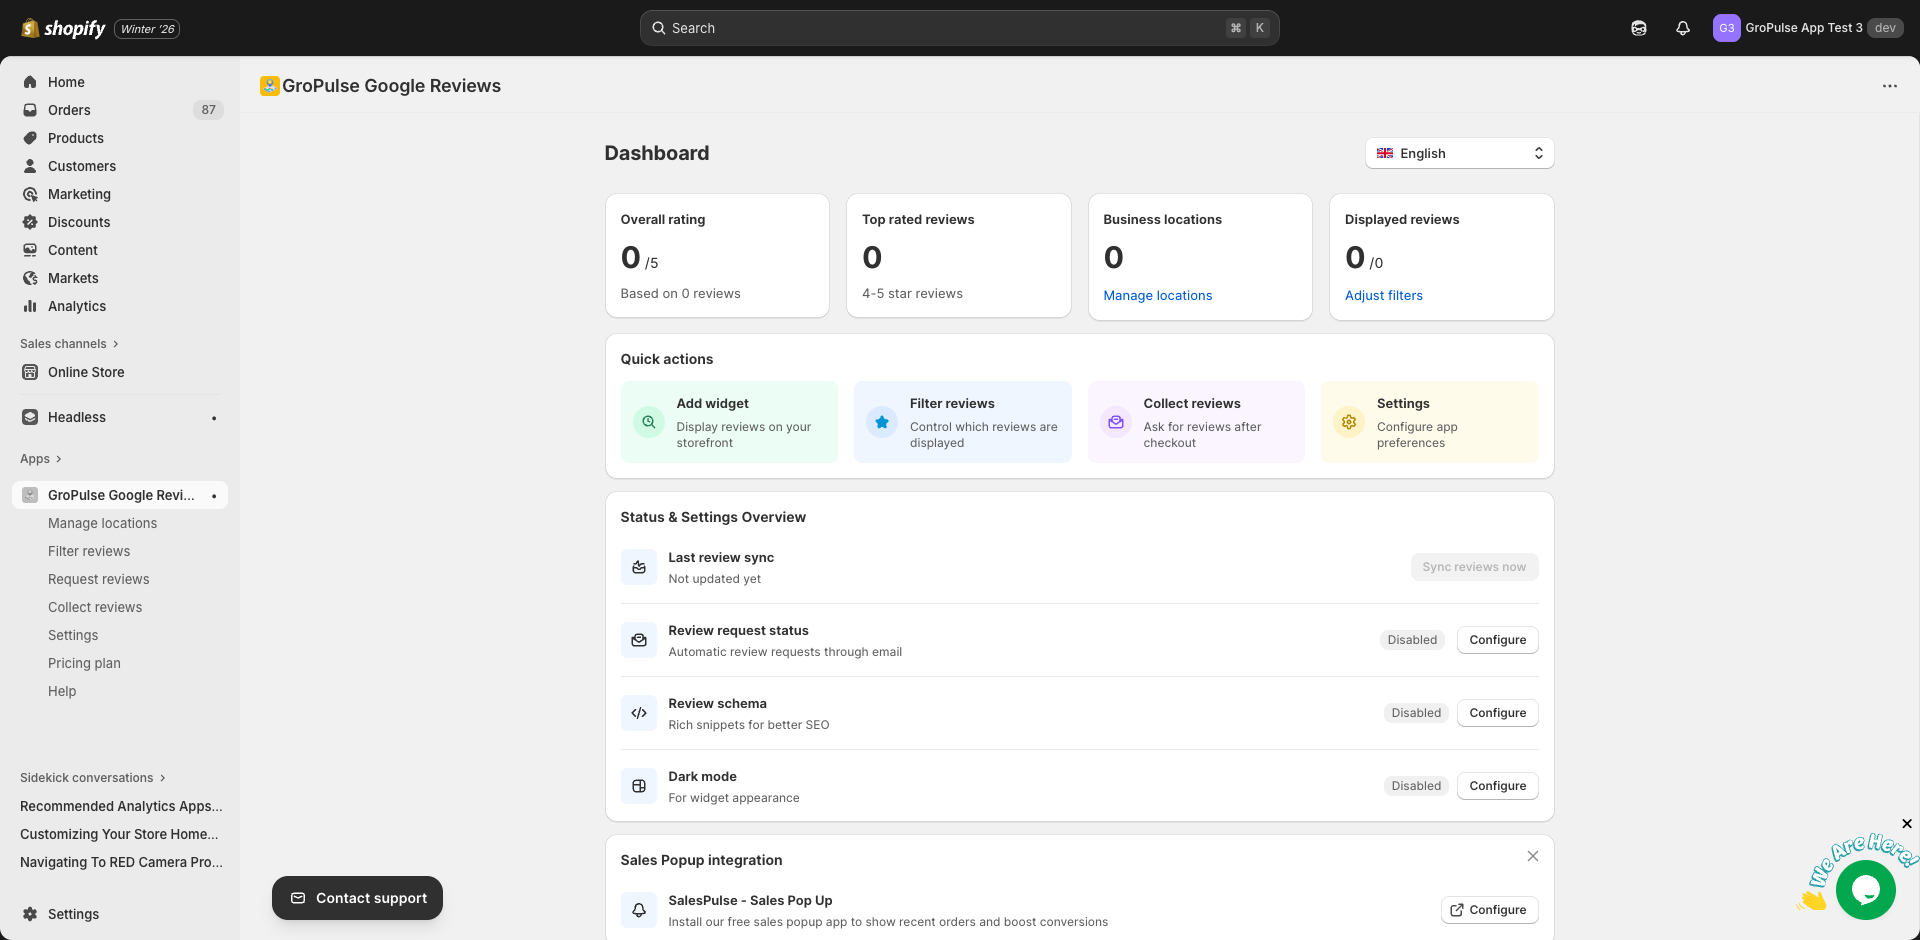
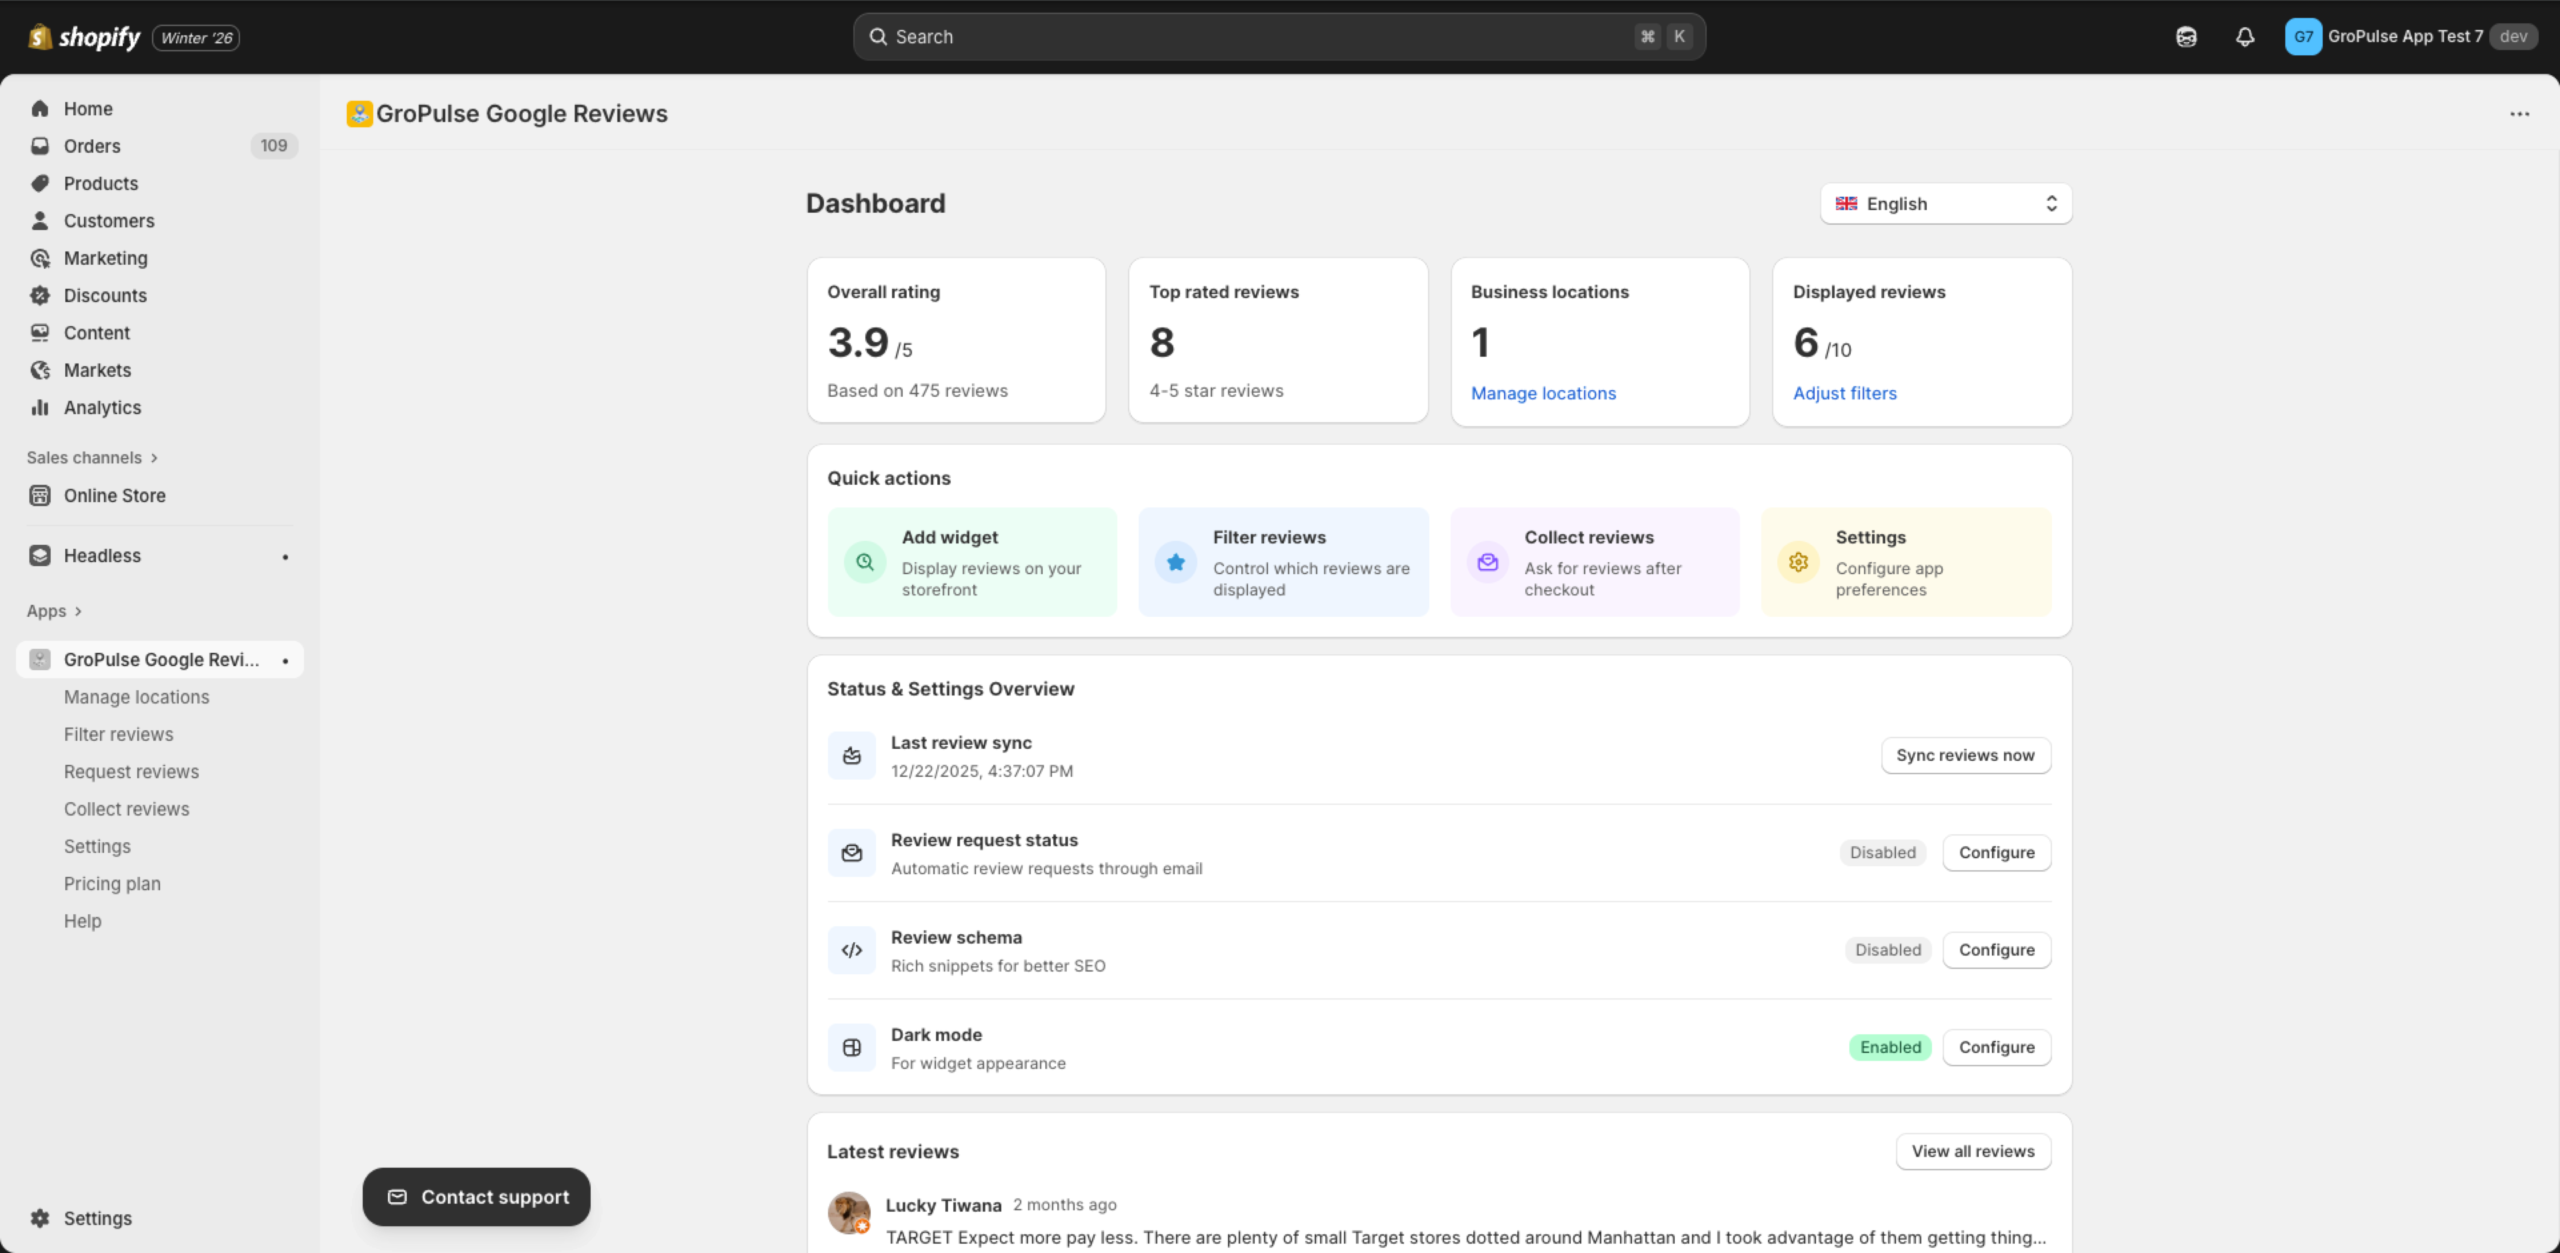
Dashboard Overview
Your Dashboard displays key metrics at a glance:
| Metric | Description |
|---|---|
| Overall rating | Average rating across all locations |
| Top rated reviews | Count of 4-5 star reviews |
| Business locations | Number of connected locations |
| Displayed reviews | Reviews shown vs. total available |
What’s Next?
Now that you’re set up, explore these features:
- Adding Business Location — Add more business locations
- Filtering Reviews — Show only your best reviews
- Email Review Requests — Get more Google reviews
- Pricing Plans — Explore premium features
- Troubleshooting — Find solutions to problems
Need Help?
Troubleshooting
Reviews not appearing?
- Ensure your location has reviews on Google
- Click Update reviews now to sync latest reviews
- Check that your widget is enabled in Manage widgets
Can’t find your business?
Try using the Enter Place ID method instead of search. See Finding Your Place ID.
Widget not showing on store?
- Verify the widget is saved in the theme editor
- Check that the app block is positioned correctly
- Ensure the widget status is enabled