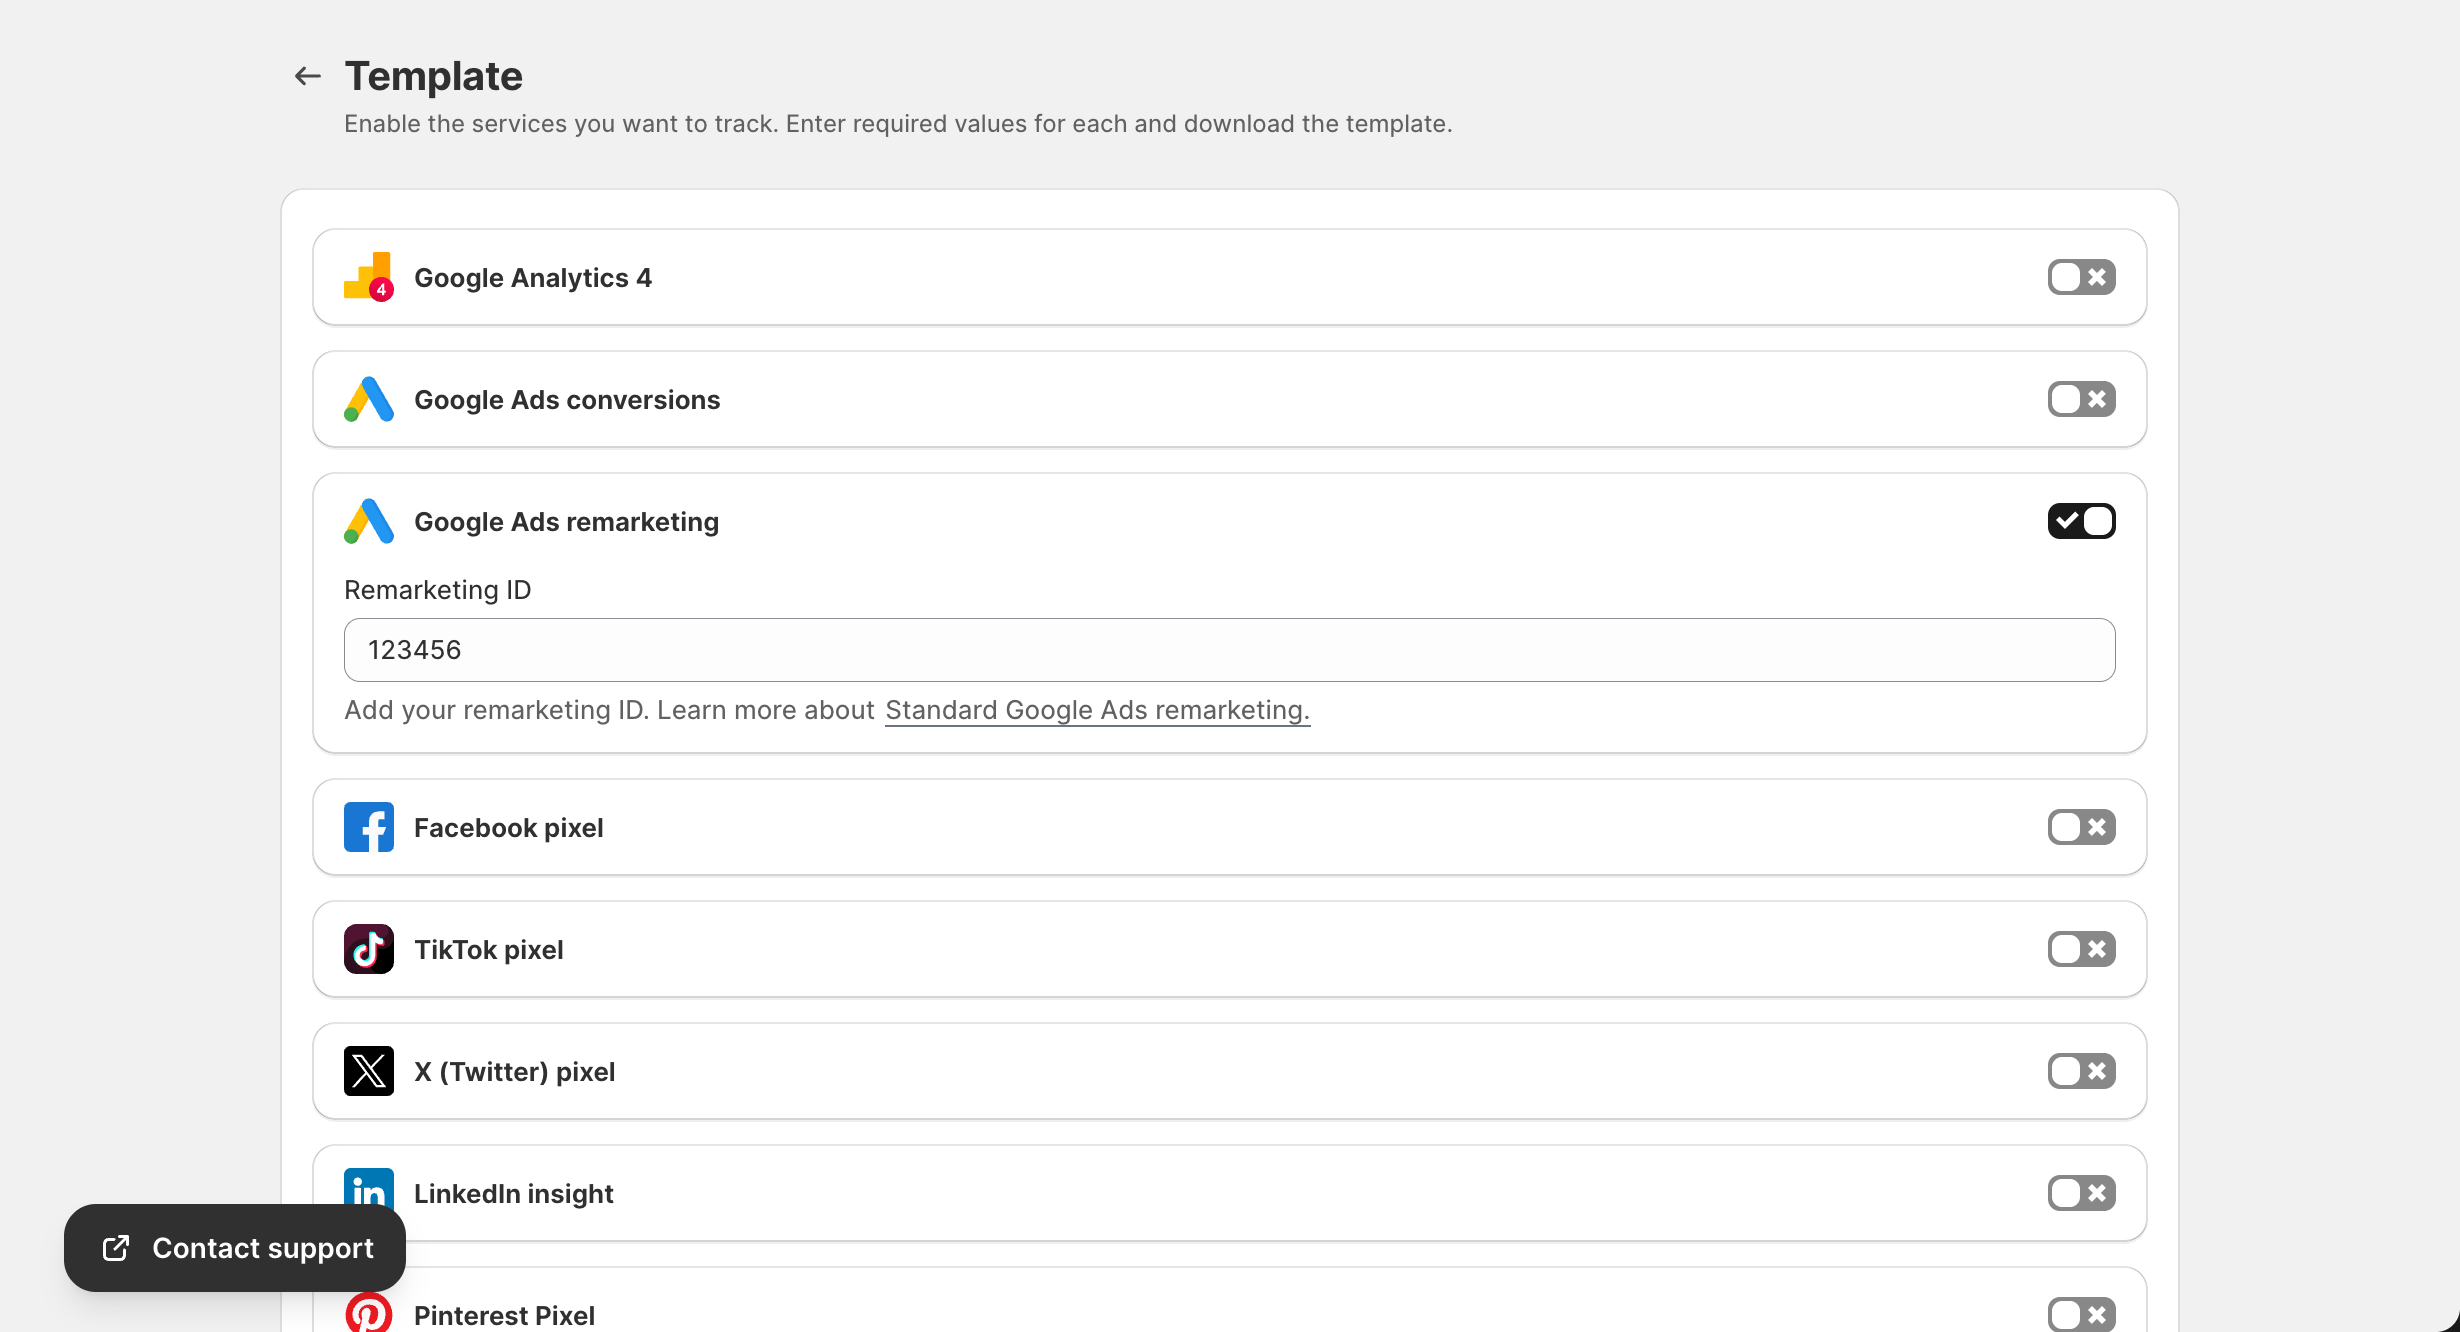
The Template page is where you configure all your tracking platforms and generate the GTM template file for import. This guide covers setting up each supported platform.
Accessing the Template Page
- Open the GroPulse GTM & Data Layer app
- Click Template from the sidebar
- Or click Configure template from the Dashboard
Google Analytics 4 (GA4)
What You Need
- Measurement ID (format:
G-XXXXXXXXXX) - Measurement Protocol API Secret (for server-side events)
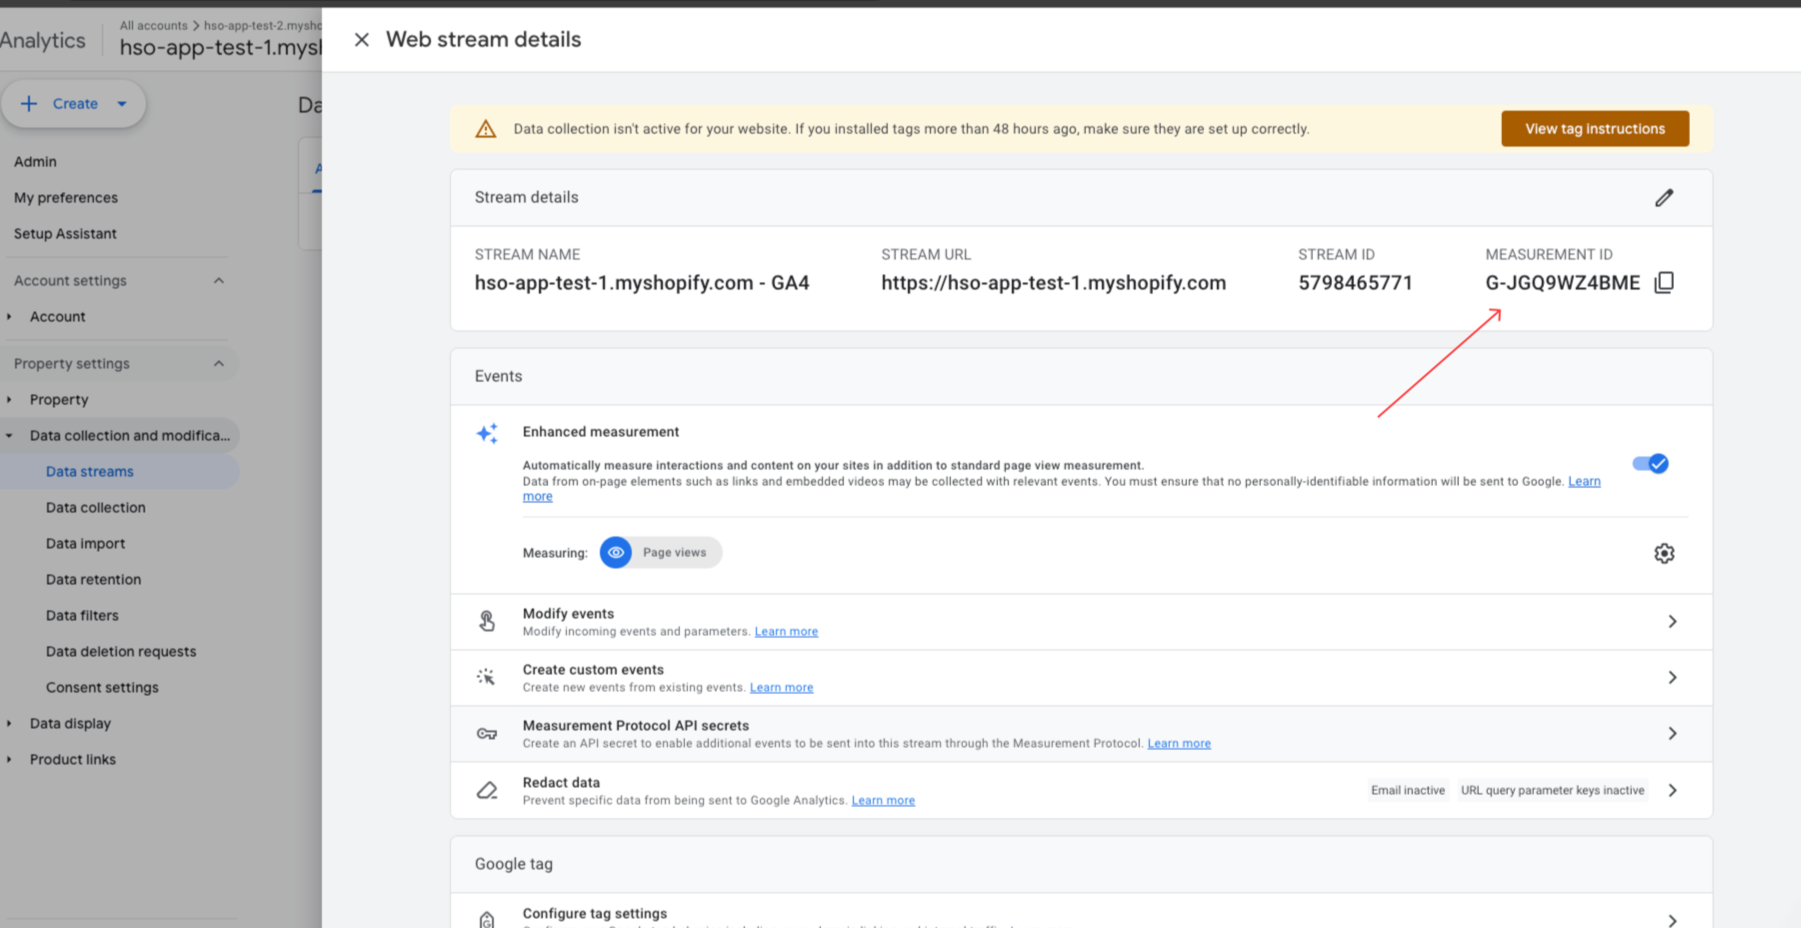
Finding Your Measurement ID
- Go to analytics.google.com
- Click Admin (gear icon)
- Select your property
- Click Data Streams
- Select your web stream
- Copy the Measurement ID
Finding Your API Secret
- In the same Data Stream settings
- Click Measurement Protocol API secrets
- Click Create to generate a new secret
- Copy the secret value

Configuration
- Toggle Google Analytics 4 ON
- Enter your Measurement ID
- Enter your Measurement Protocol API Secret
- Click Save (or it auto-saves)
Events Tracked
page_view– Page viewsview_item– Product page viewsview_item_list– Collection viewsadd_to_cart– Add to cart actionsremove_from_cart– Remove from cartbegin_checkout– Checkout initiatedpurchase– Completed purchases
Google Ads Conversions
What You Need
- Conversion ID (format:
AW-XXXXXXXXX) - Conversion Label (for each conversion action)
Finding Your Conversion Details
- Go to ads.google.com
- Click Tools & Settings → Conversions
- Click on your conversion action
- Click Tag setup → Use Google Tag Manager
- Copy the Conversion ID and Conversion Label
Configuration
- Toggle Google Ads conversions ON
- Enter your Conversion ID
- Enter your Conversion Label
- Optionally set Conversion Value settings
Google Ads Remarketing
What You Need
- Conversion ID (same as above)
Configuration
- Toggle Google Ads remarketing ON
- Enter your Conversion ID
How It Works
The remarketing tag enables:
- Dynamic remarketing for product views
- Cart abandonment audiences
- Purchase exclusion audiences
Facebook Pixel
What You Need
- Pixel ID (15-16 digit number)
- Conversion API Access Token (for server-side events)
- Test Event Code (optional, for testing)
Finding Your Pixel ID
- Go to Facebook Events Manager
- Select your pixel
- Click Settings
- Copy your Pixel ID
Generating Conversion API Token
- In Events Manager, click Settings
- Scroll to Conversions API
- Click Generate access token
- Copy the token (it’s shown only once!)
Getting Test Event Code
- In Events Manager, click Test Events
- Copy the Test event code (e.g.,
TEST12345) - Use this for testing, then remove before going live
Configuration
- Toggle Facebook pixel ON
- Enter your Pixel ID
- Enter your Conversion API Access Token
- (Optional) Enter Test Code for testing
- Click Save
Events Tracked
| Shopify Event | Facebook Event |
|---|---|
| Page View | PageView |
| Product View | ViewContent |
| Add to Cart | AddToCart |
| Checkout Start | InitiateCheckout |
| Purchase | Purchase |
TikTok Pixel
What You Need
- Pixel ID (19-character alphanumeric)
- Access Token (for Events API)
Finding Your Pixel ID
- Go to TikTok Ads Manager
- Click Assets → Events
- Select your pixel
- Copy the Pixel ID
Generating Access Token
- In the same Events section
- Click Settings → Events API
- Generate and copy your access token
Configuration
- Toggle TikTok pixel ON
- Enter your Pixel ID
- Enter your Access Token
Events Tracked
| Shopify Event | TikTok Event |
|---|---|
| Page View | PageView |
| Product View | ViewContent |
| Add to Cart | AddToCart |
| Checkout Start | InitiateCheckout |
| Purchase | CompletePayment |
X (Twitter) Pixel
What You Need
- Pixel ID
- CAPI Token (for Events API)
Configuration
- Toggle X (Twitter) pixel ON
- Enter your Pixel ID
- Enter your CAPI Token for server-side events
LinkedIn Insight Tag
What You Need
- Partner ID (7-digit number)
Finding Your Partner ID
- Go to LinkedIn Campaign Manager
- Click Analyze → Insight Tag
- Copy your Partner ID
Configuration
- Toggle LinkedIn insight ON
- Enter your Partner ID
Pinterest Tag
What You Need
- Tag ID (13-digit number)
- Conversion API Token (for server-side events)
Configuration
- Toggle Pinterest Pixel ON
- Enter your Tag ID
- Enter your CAPI Token
Snapchat Pixel
What You Need
- Pixel ID
- CAPI Token
Configuration
- Toggle Snapchat Pixel ON
- Enter your Pixel ID
- Enter your CAPI Token
Reddit Pixel
What You Need
- Pixel ID
- CAPI Token
Configuration
- Toggle Reddit Pixel ON
- Enter your Pixel ID
- Enter your CAPI Token
Downloading and Importing the Template
Download the Template
- Configure all your platforms
- Click Download GTM Template
- A JSON file will be downloaded
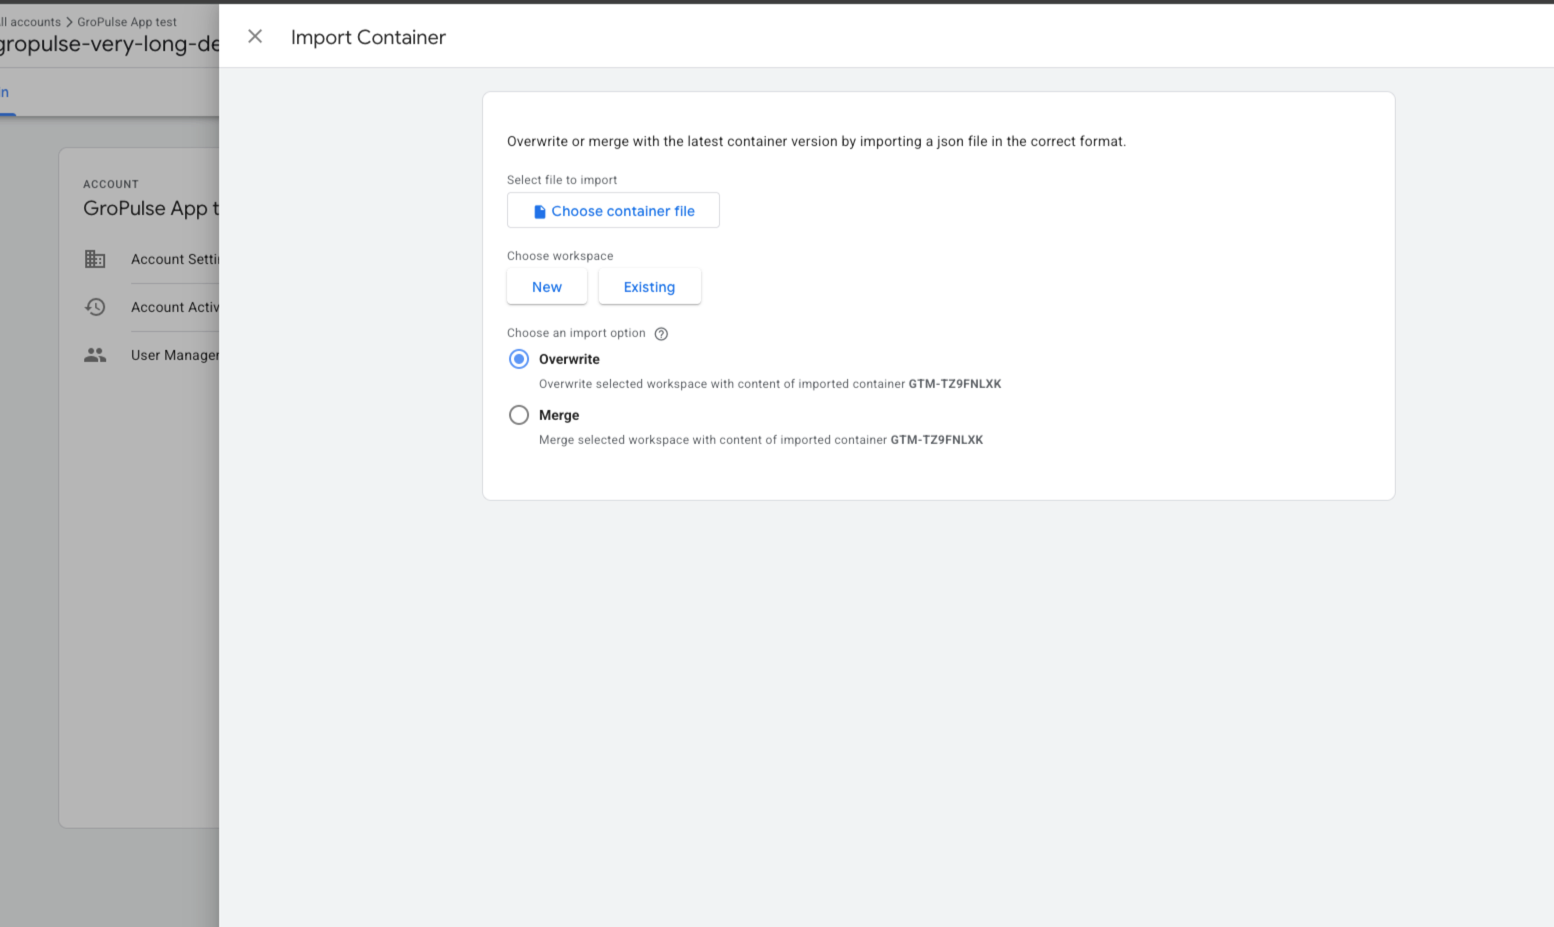
Import to Google Tag Manager
- Go to tagmanager.google.com
- Select your container
- Click Admin
- Click Import Container
- Choose the downloaded file
- Select import options:
- New workspace: Creates a new workspace with the template
- Existing workspace: Merges with your current workspace
- Select Merge (recommended) or Overwrite
- Click Confirm
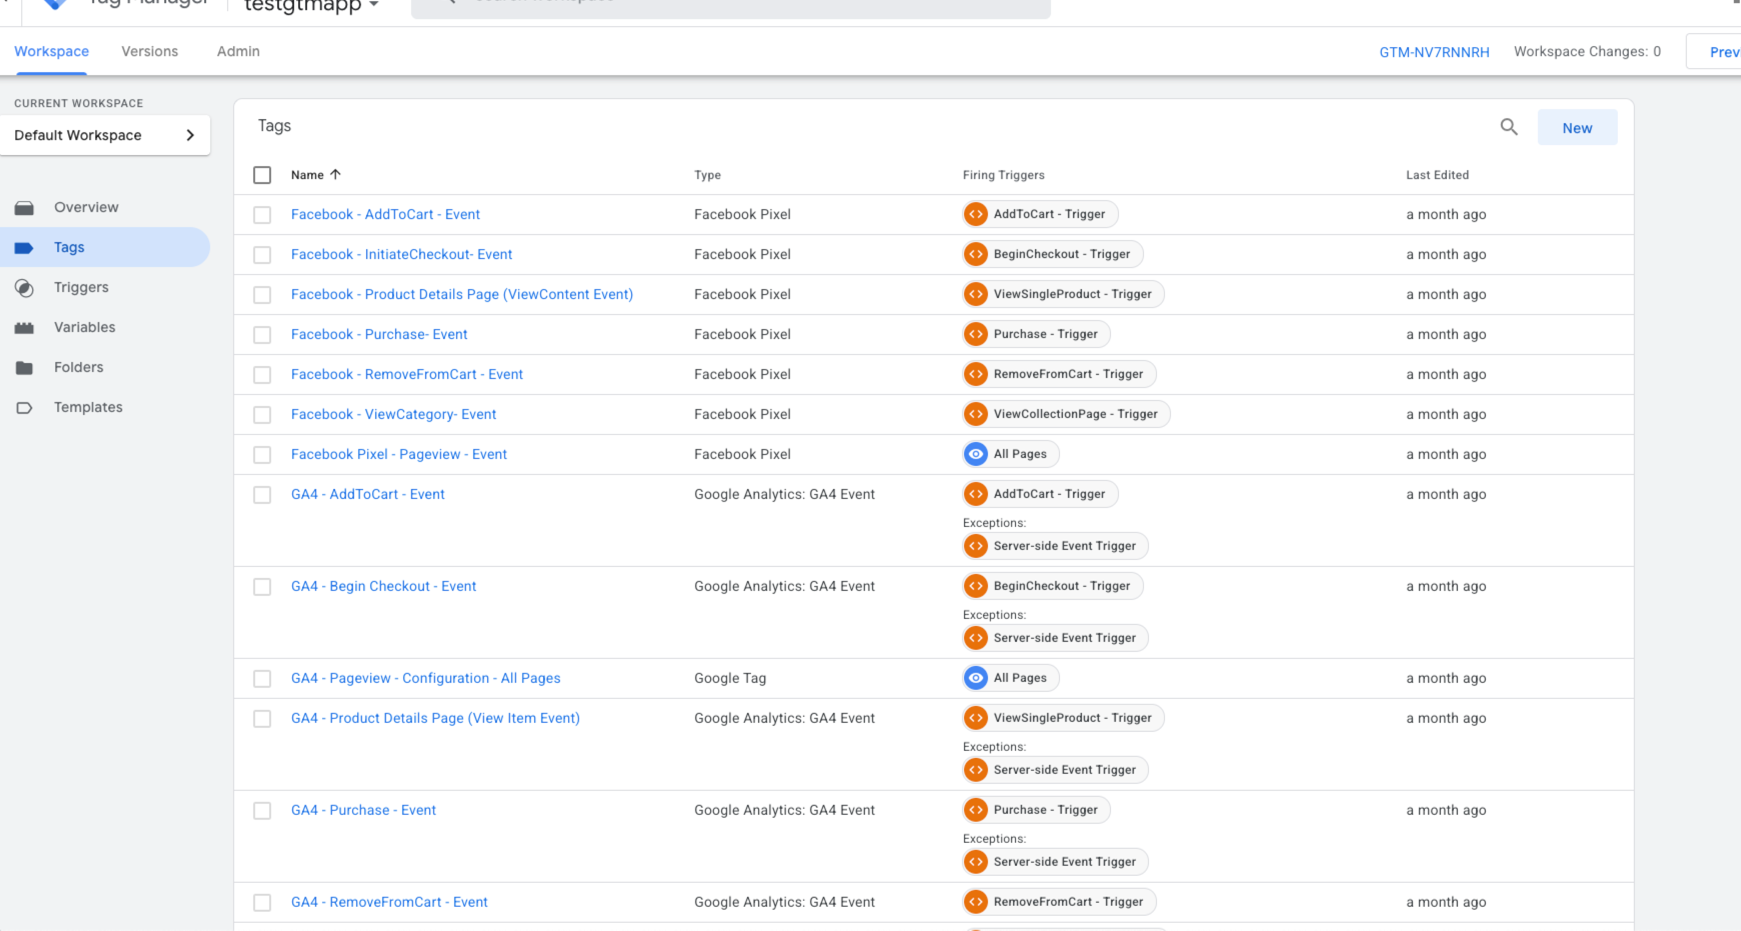
After Import
- Review the imported tags, triggers, and variables
- Click Preview to test
- Verify events are firing correctly
- Click Submit to publish
Updating Your Template
When you add new platforms or change settings:
- Make changes in the app
- Download a new template
- Import to GTM (merge with existing)
- The new tags will be added without affecting existing ones
Troubleshooting
Template Download Fails
- Ensure you have at least one platform enabled
- Check that required fields are filled for enabled platforms
- Try refreshing the page
Import Errors in GTM
- Ensure you’re selecting the correct workspace
- Try creating a new workspace for the import
- Check for duplicate variable names
Tags Not Firing
- Verify platform credentials are correct
- Check that events are enabled in Data Layer Settings
- Use GTM Preview mode to debug
Best Practices
- Test Before Publishing: Always use GTM Preview mode
- Use Test Codes: Facebook and TikTok provide test event codes
- Monitor Regularly: Check platform dashboards for data accuracy
- Keep Credentials Secure: Never share API tokens publicly
- Update Templates: Re-download when adding new platforms
Next Steps
Last updated on February 16, 2026
Was this article helpful?
Powered by Support Genix