The AdTrack Dashboard is your central hub for monitoring tracking status, viewing reports, and accessing all app features.
Overview
The Dashboard provides a quick overview of:
- Your tracking setup status
- Google Ads performance metrics
- Conversion tracking configuration
- Quick access to settings and features
Accessing the Dashboard
- Open AdTrack from your Shopify admin
- The Dashboard loads automatically as the home page
- Click the app name in the navigation to return here anytime

Dashboard Sections
Welcome Card
The Welcome Card appears at the top of the dashboard for new users.
Features:
- Greeting message and app introduction
- Watch Setup Guide button to view tutorial video
- Quick overview of what AdTrack offers
Dismissing the Welcome Card:
- Click the X button in the top-right corner
- The card will not appear again after dismissal
- Reinstalling the app will show it again
Account Setup Section
This section shows your connection status at a glance.
Components:
- Google Account Status
- Shows whether your Google account is connected
- Displays your connected email address
- Badge shows “Connected” (green) or “Not Connected”
- Conversion ID Status
- Shows your Google Ads Conversion ID
- Badge shows “Complete” (green) or “Not Set”
Configure Button:
- Click Configure to go to Conversion Tracking Setup
- Make changes to your connection or settings
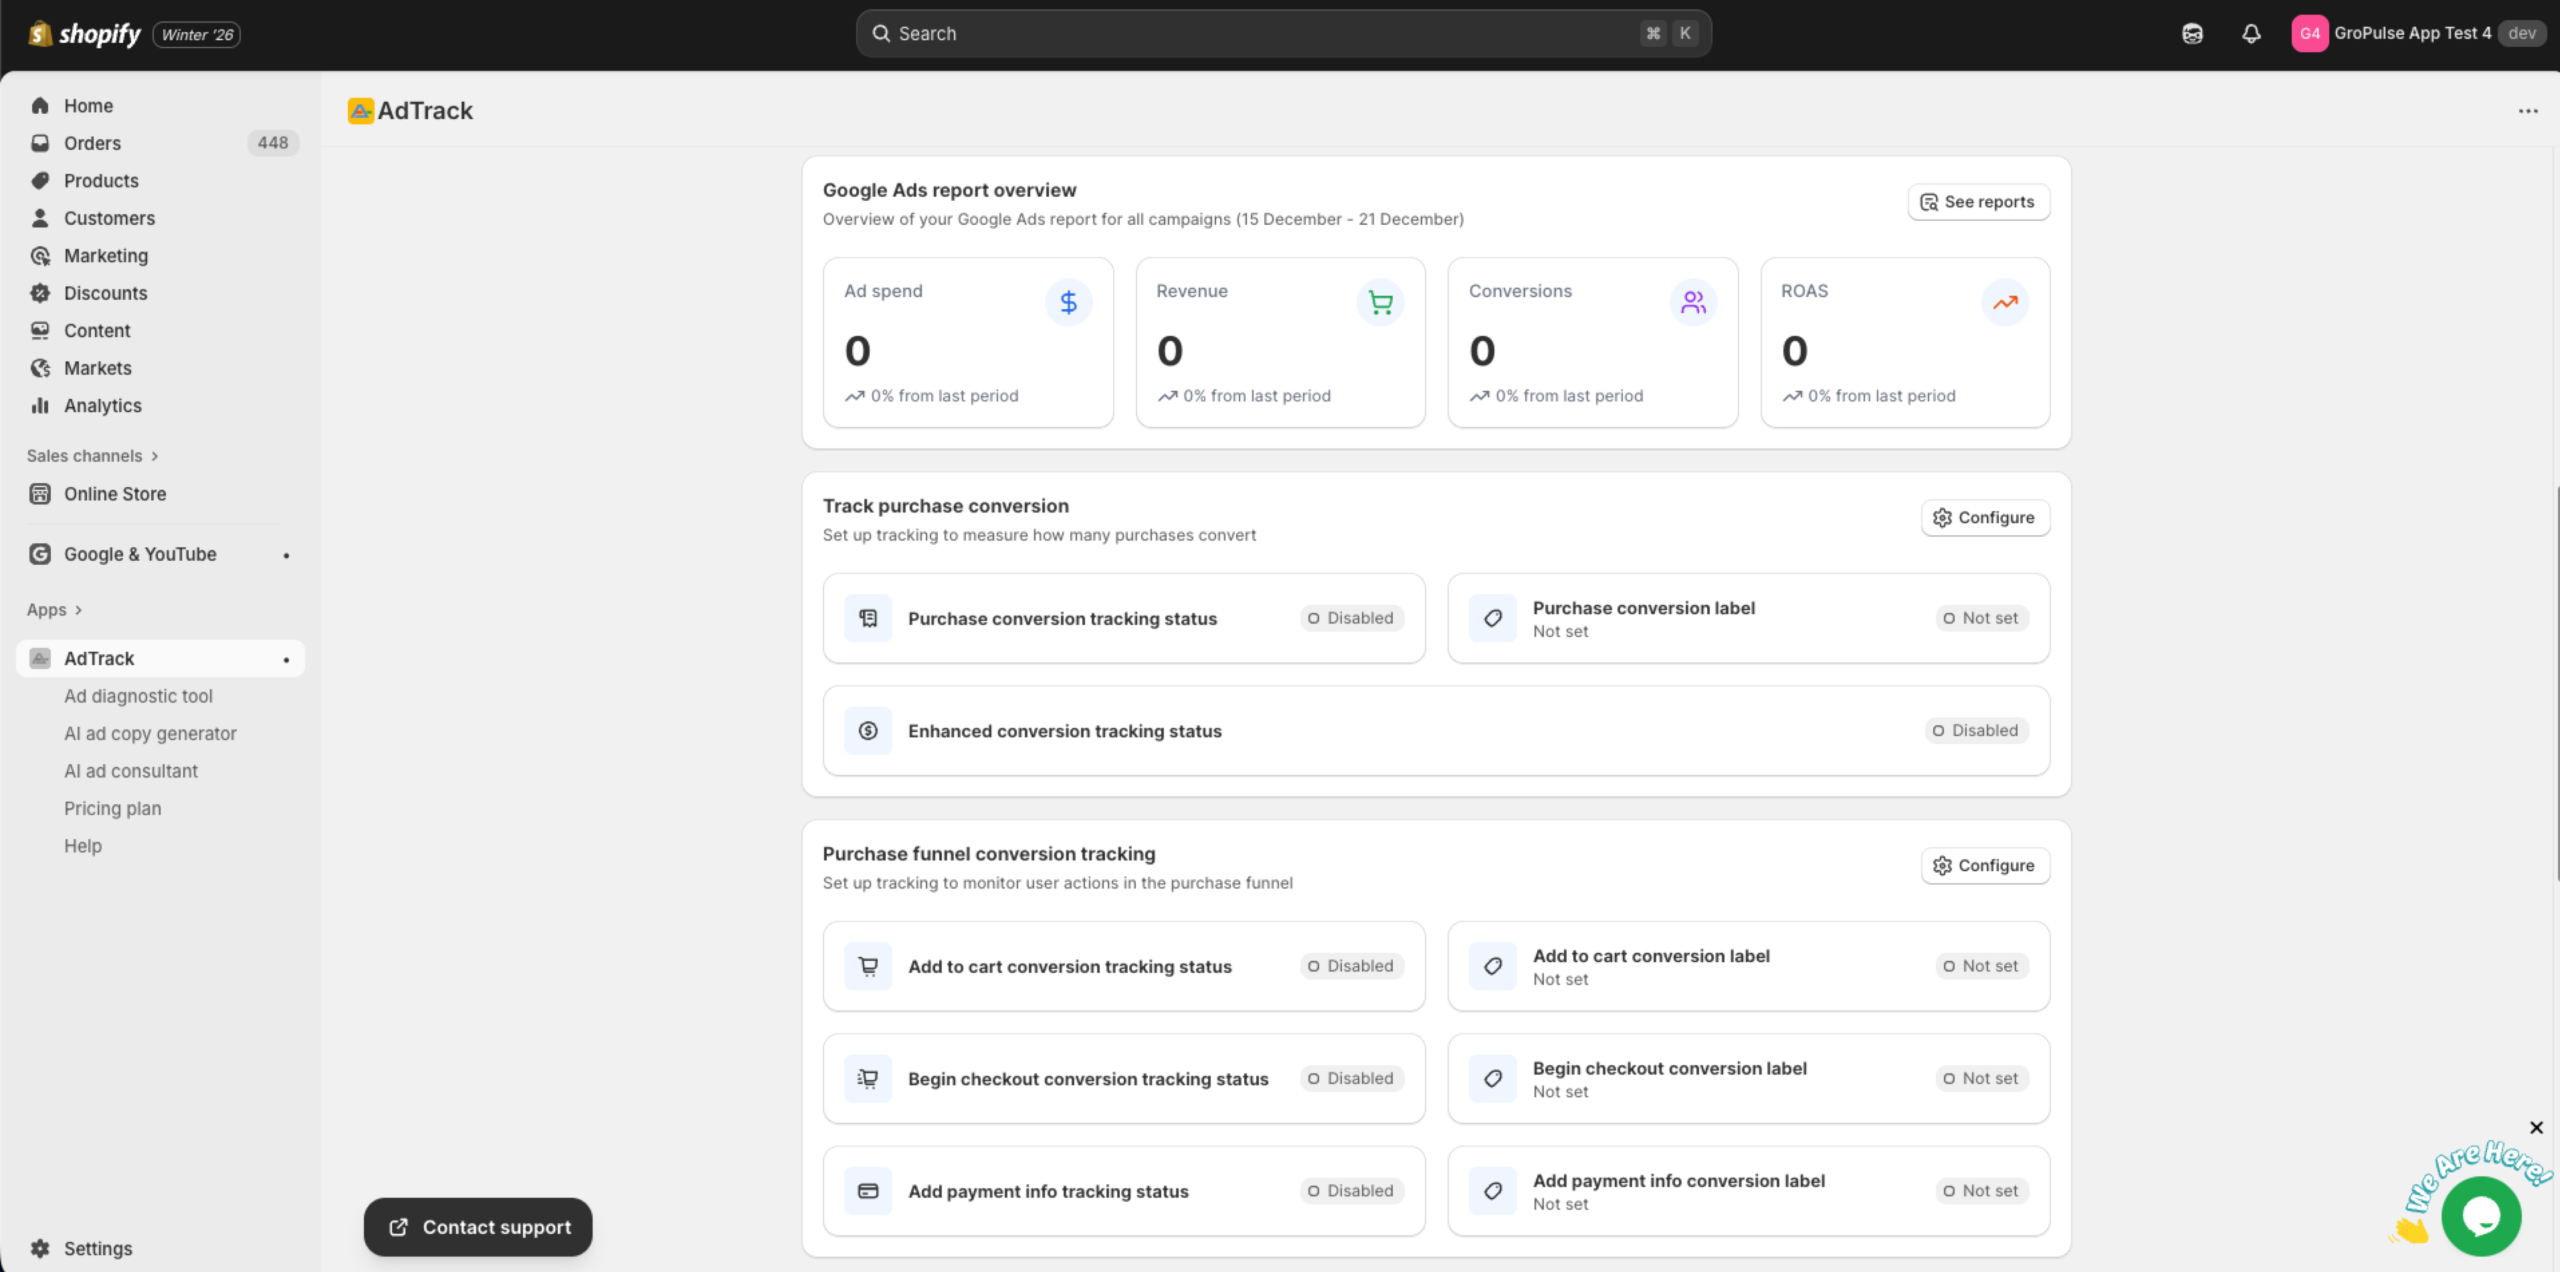
Report Overview Section (Pro Plan)
This section displays key Google Ads performance metrics.
Available Metrics:
- Ad Spend — Total amount spent on ads in the period
- Revenue — Total revenue attributed to ads
- Conversions — Number of conversion events tracked
- ROAS — Return on Ad Spend (Revenue / Ad Spend)
For Free Plan Users:
- Metrics are visible but blurred
- An “Upgrade to Pro” link appears
- Click to view pricing and upgrade options
See Reports Button:
- Click to access the full Ad Reports page
- Available only for Pro plan subscribers
Purchase Conversion Tracking Section
This section shows the status of your main purchase tracking.
Status Indicators:
- Tracking Status – Whether purchase tracking is enabled
- Conversion Label (or Conversion Action) – The selected label for tracking
- Enhanced Conversions Status – Whether enhanced conversions are active
Configure Button:
- Click to jump directly to the Purchase Conversion settings
- The page will scroll to the relevant section
Purchase Funnel Section
Track events leading up to a purchase.
Tracked Events:
- Add to Cart — Customer adds product to cart
- Begin Checkout — Customer starts the checkout process
- Add Payment Info — Customer enters payment details
Each event shows:
- Event name with icon
- Enabled/Disabled status badge
- Associated conversion label (if configured)
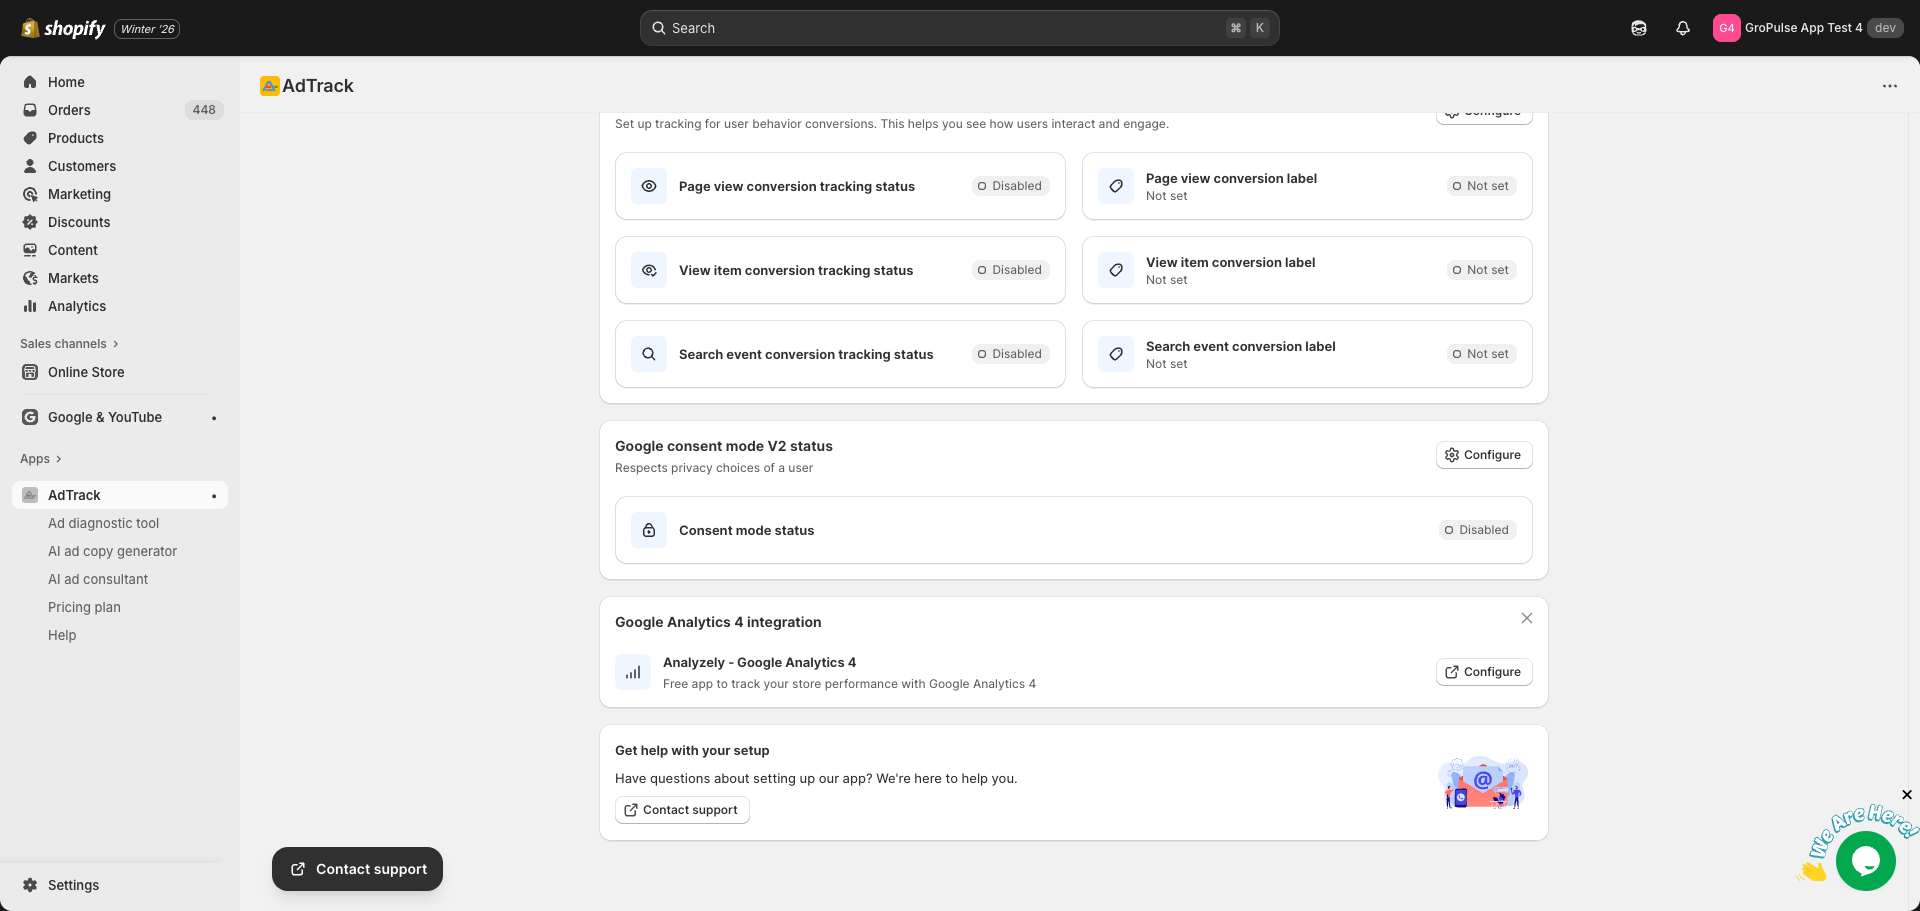
User Behavior Section
Track how customers interact with your store.
Tracked Events:
- Page View — Any page visited on your store
- View Item — Product detail pages viewed
- Search — Store search queries
Google Consent Mode V2 Section
Shows the status of privacy-compliant tracking.
Status Indicator:
- Shows whether Consent Mode is enabled or disabled
- Important for GDPR and privacy compliance
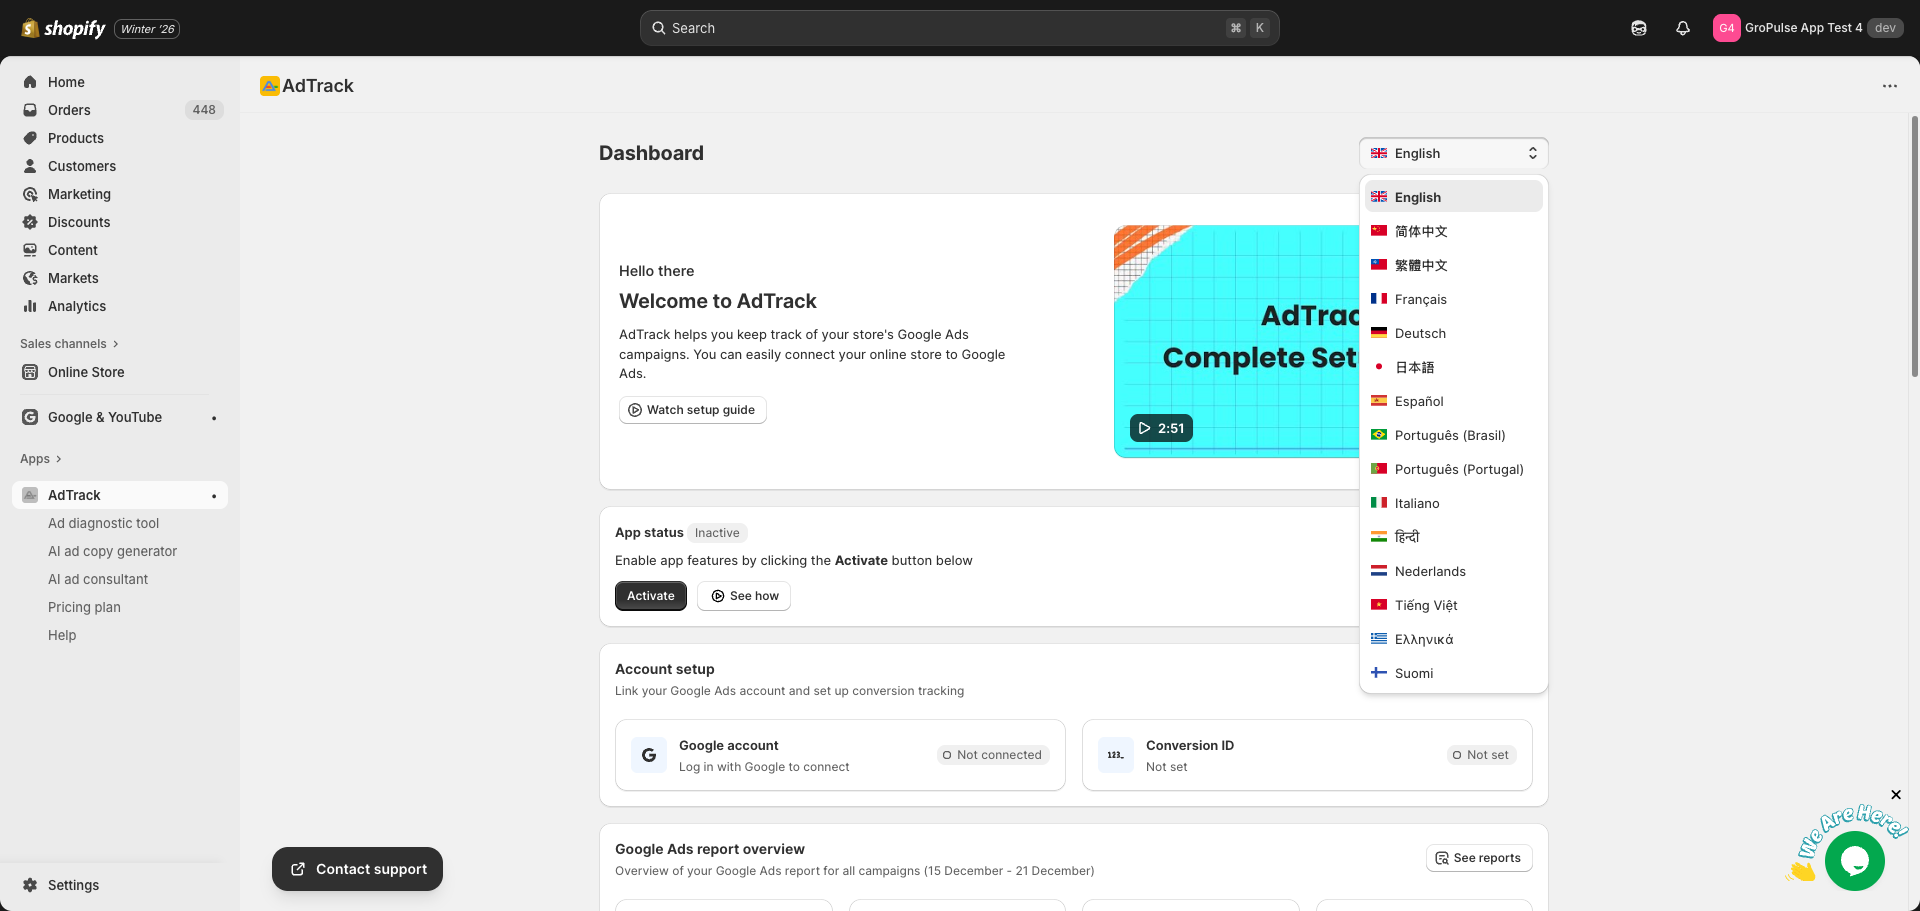
Language Switcher
Change the app language from the dashboard.
Location:
- Top-right corner of the dashboard
- Next to the page title
How to Use:
- Click the language dropdown
- Select your preferred language
- The app will immediately switch to that language
Quick Actions
From the dashboard, you can:
- Configure settings — Click “Configure” on any section
- View full reports — Click “See Reports” (Pro plan)
- Access help — Scroll to Contact Support section
- Change language — Use the language switcher
- Watch tutorial — Click “Watch Setup Guide” on Welcome Card
Dashboard Tips
- Check regularly – Review the dashboard periodically to ensure everything is working
- Look for badges – Green badges indicate proper configuration
- Use Configure buttons – They jump directly to the relevant settings
- Monitor metrics – Pro users should check performance metrics regularly