This guide explains how to set up and configure purchase conversion tracking in AdTrack. Purchase tracking is the most important conversion type as it directly measures sales from your ads.
Overview
Purchase conversion tracking records when a customer completes a purchase on your store after clicking a Google ad. This data allows you to:
- Measure actual revenue from your ads
- Calculate Return on Ad Spend (ROAS)
- Optimize campaigns for conversions
- Use Smart Bidding strategies in Google Ads
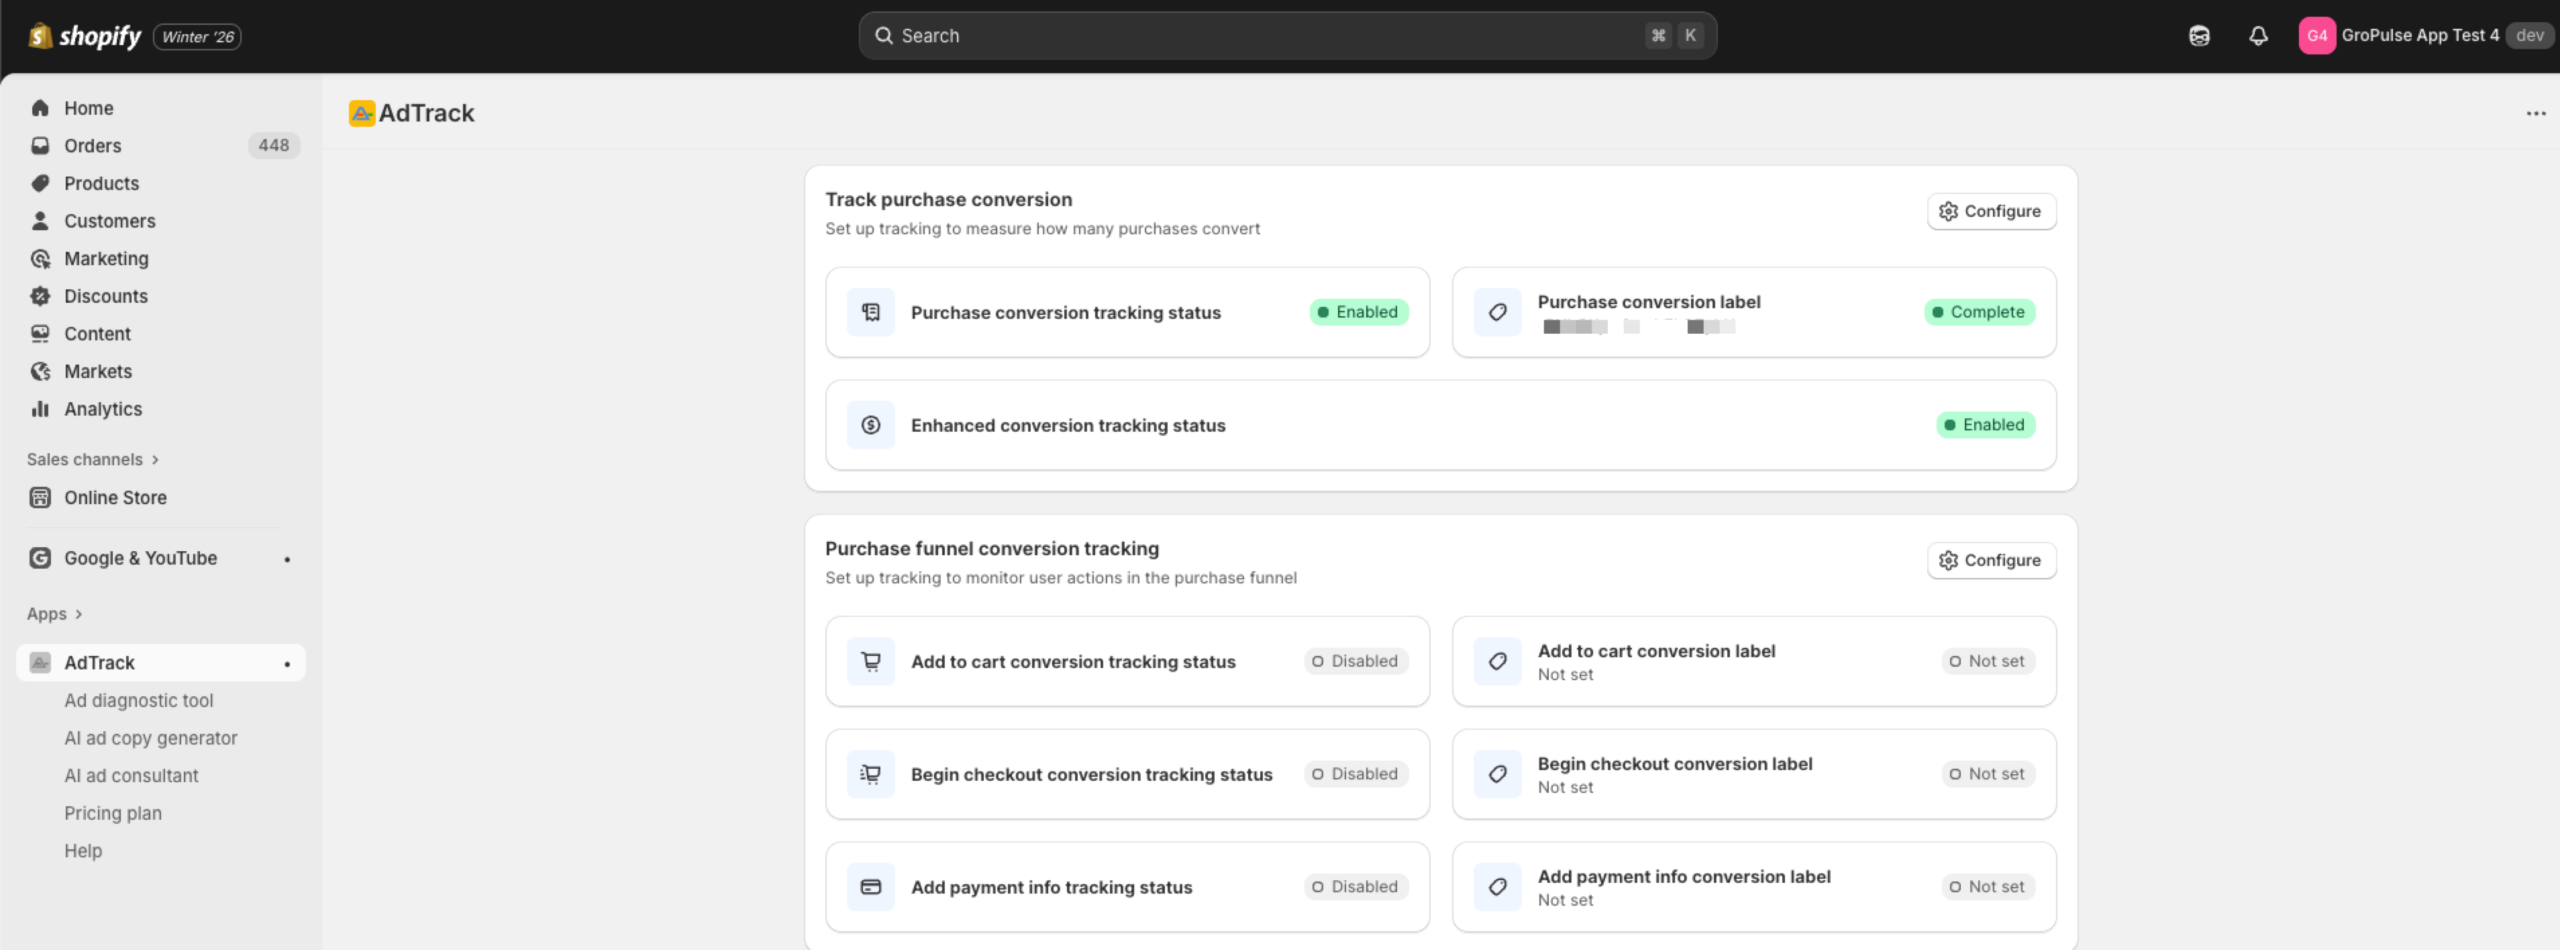
Accessing Purchase Tracking Settings
- Open AdTrack from your Shopify admin
- Scroll to the Track Purchase Conversion section
- Click on Configure button
Enabling Purchase Tracking
Step 1: Set Tracking Status
- Find the Tracking Status option
- Select Enable to activate purchase tracking
- The label selection options will become available
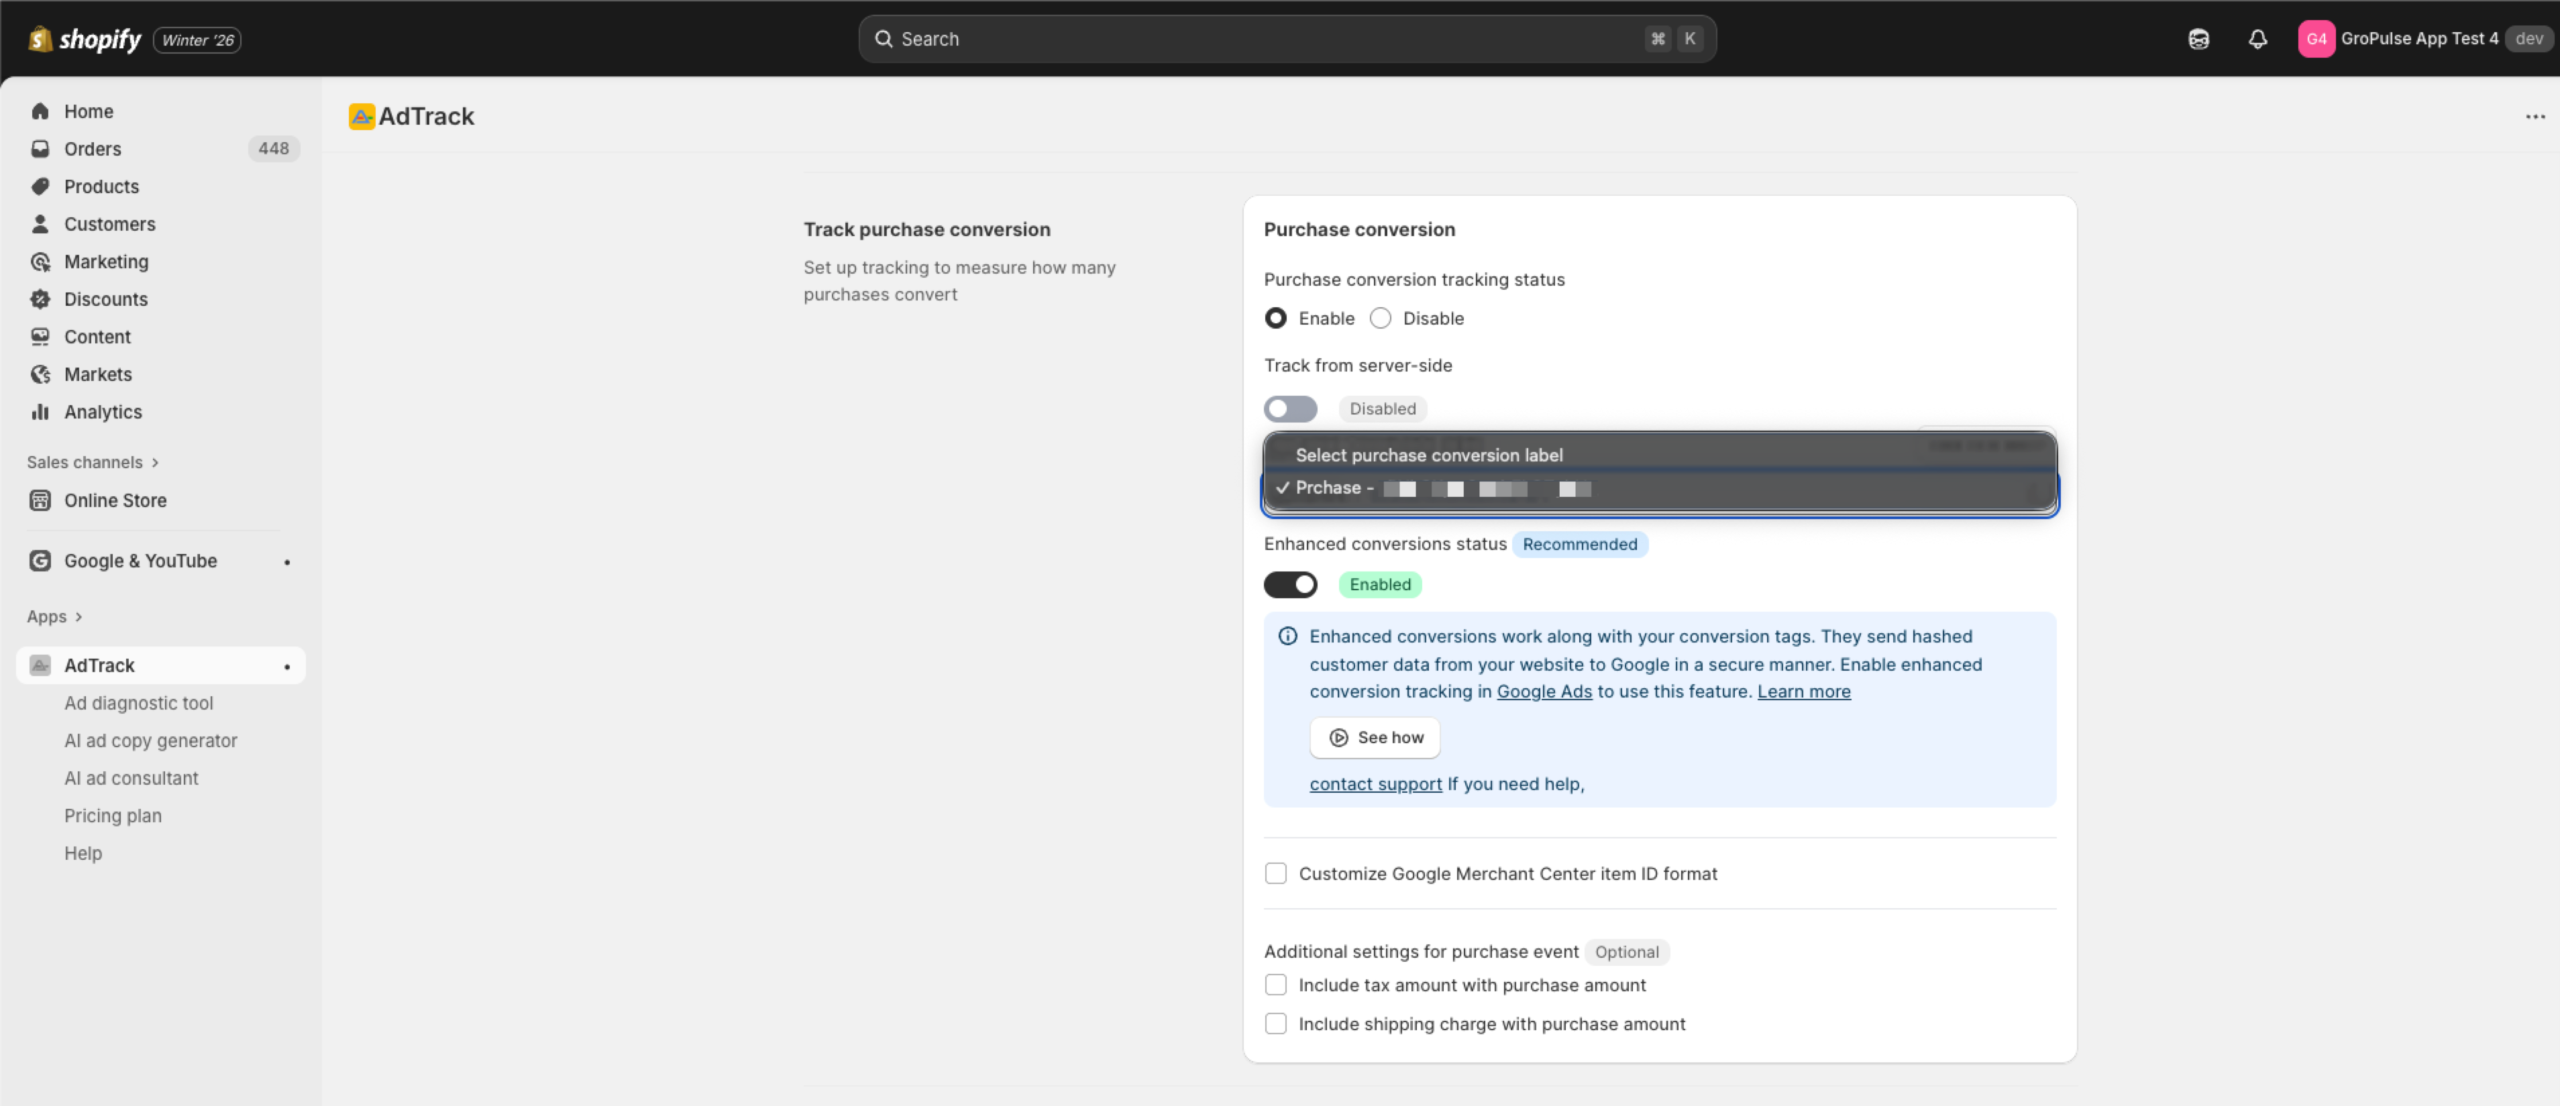
Step 2: Select Conversion Label (Auto Mode)
If using Auto integration mode:
- Click the Purchase Conversion Label dropdown
- Select a label from your Google Ads account
- Only “Purchase” type conversion actions appear here
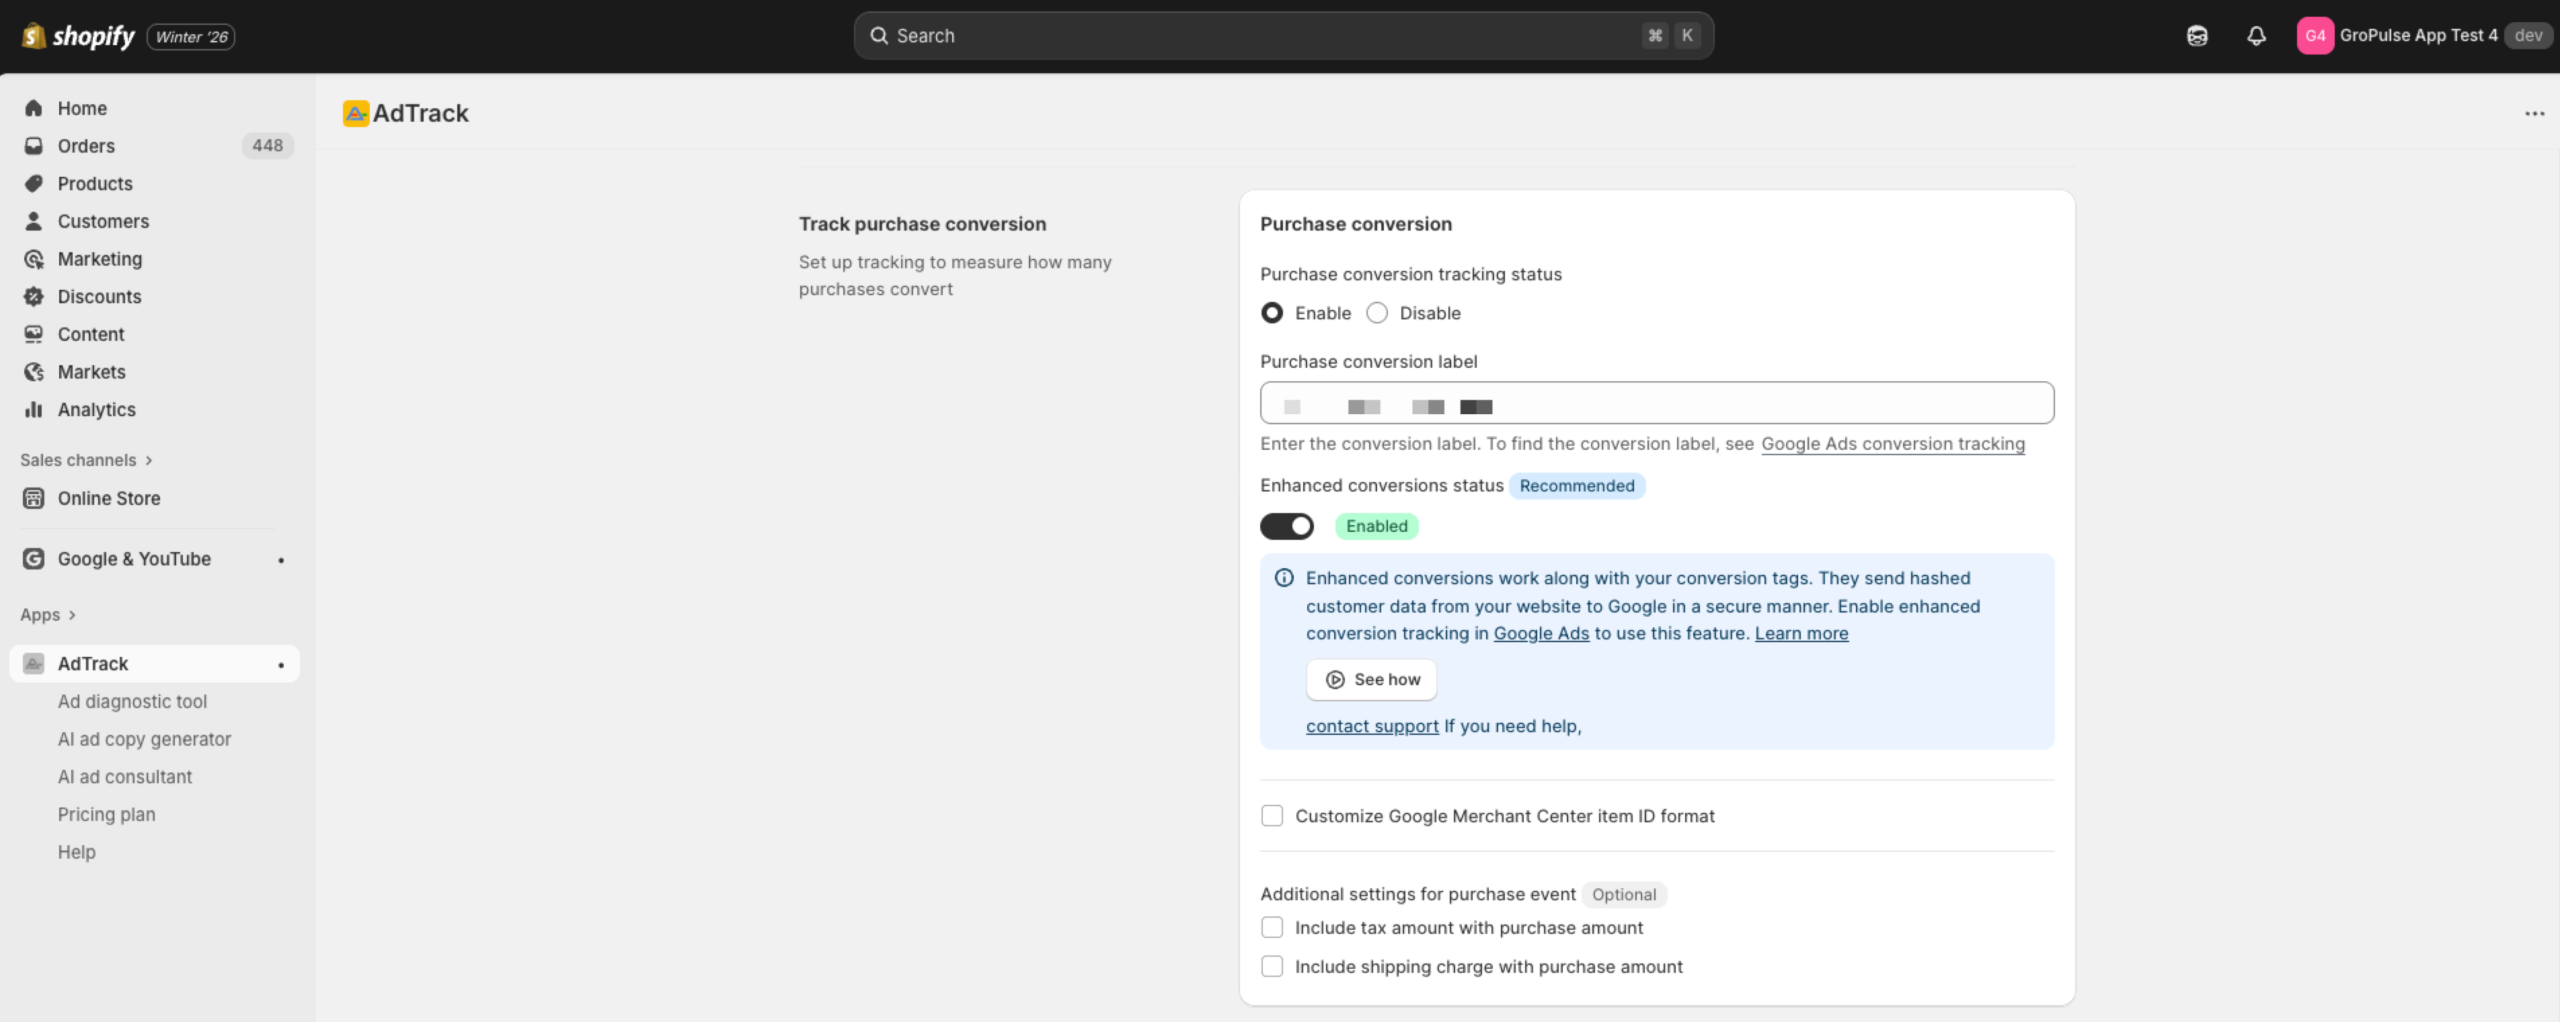
Enter Conversion Label (Manual Mode)
If using Manual integration mode:
- Find the Purchase Conversion Label text field
- Enter your conversion label from Google Ads
- Format example:
AbC-123_xyz
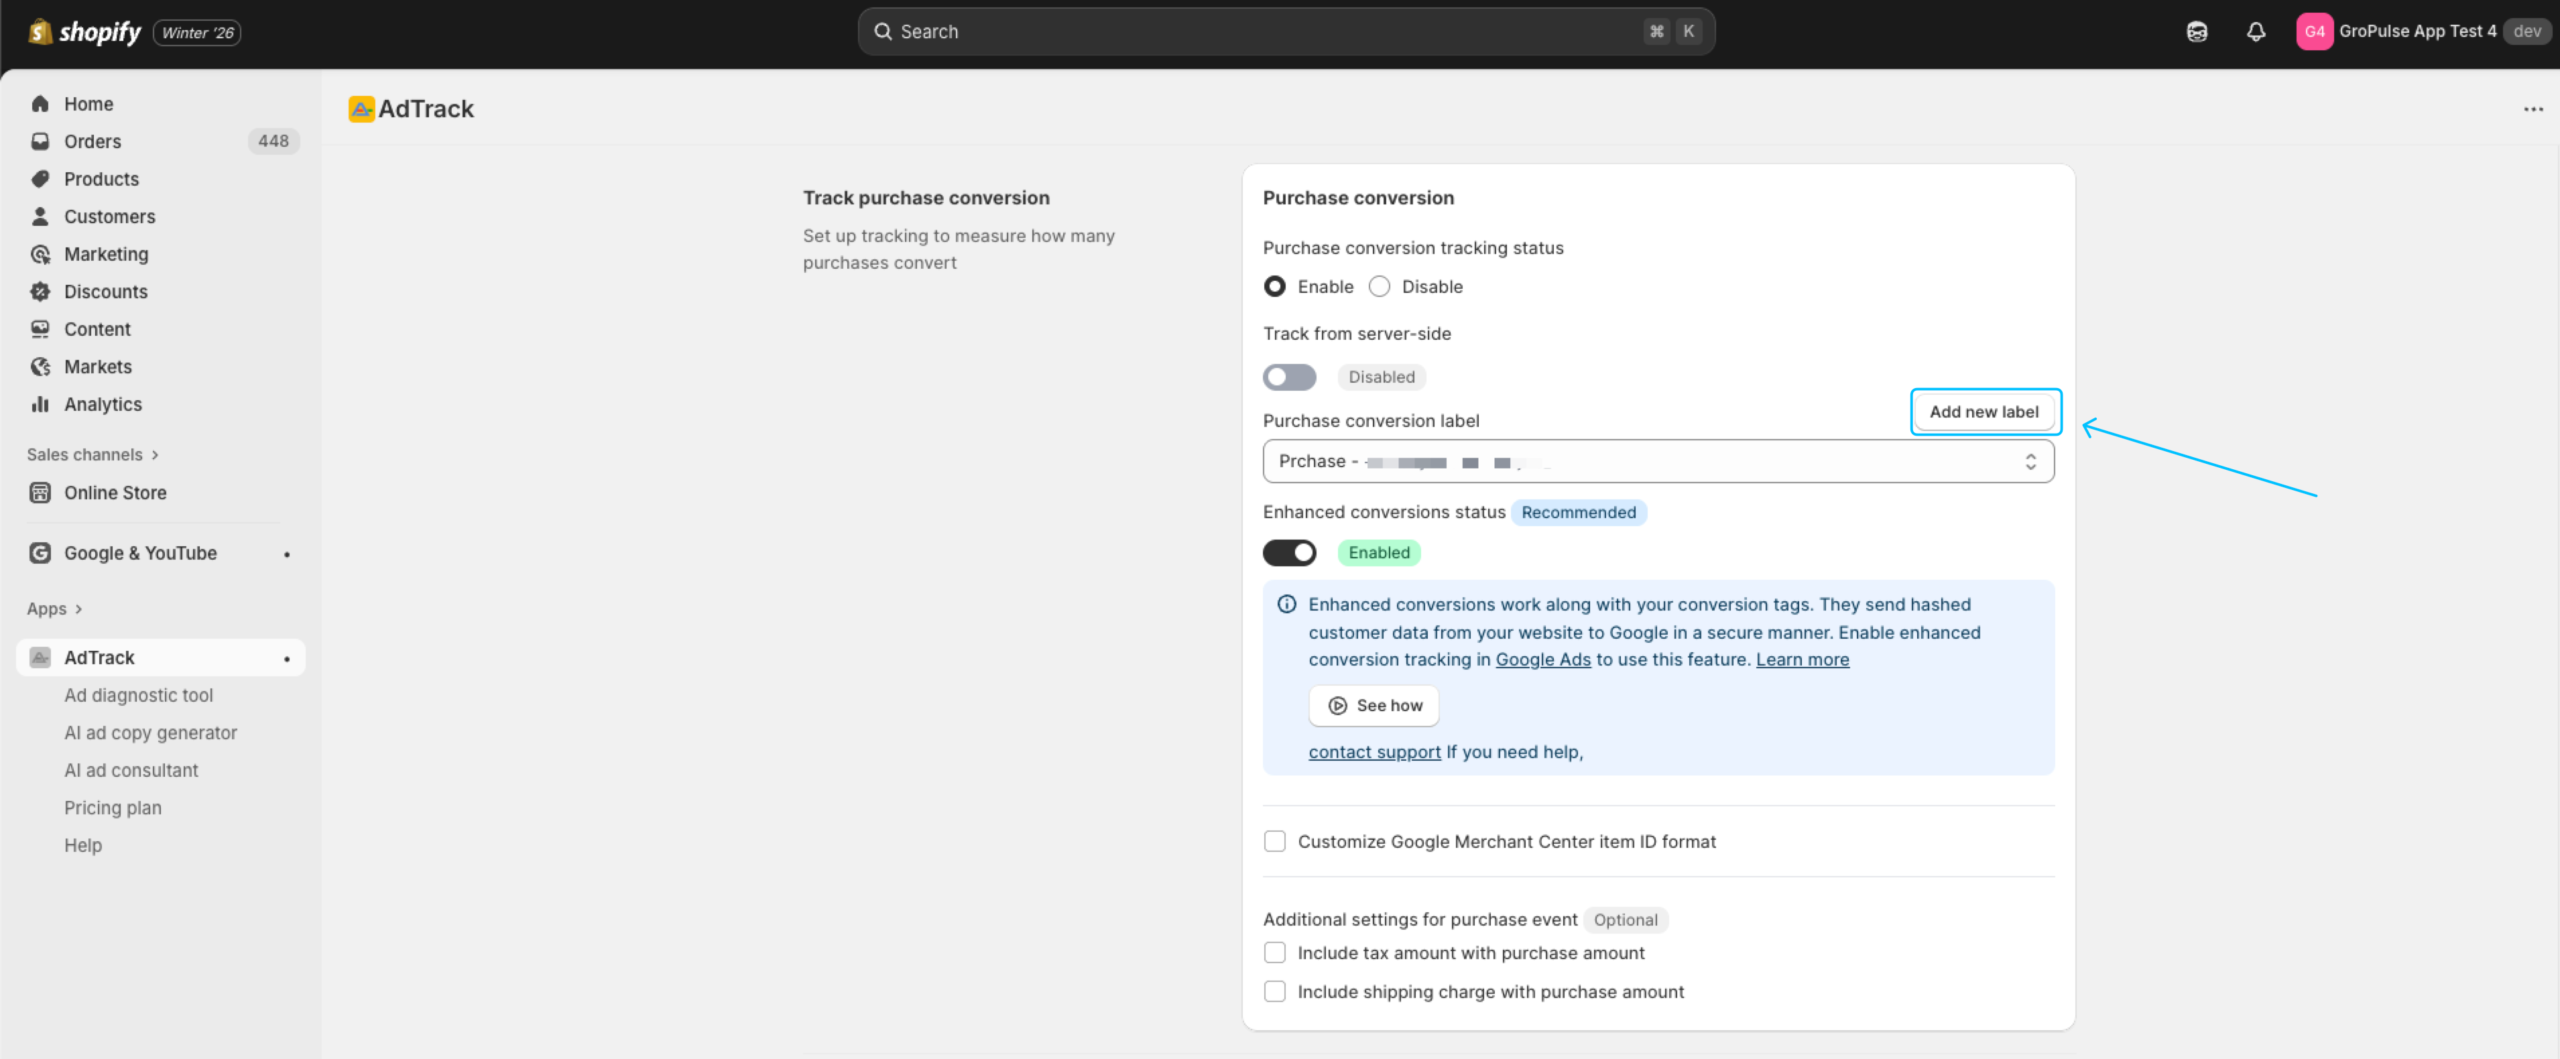
Creating a New Conversion Label
If you do not have a purchase conversion action yet:
- Click the Add new label button
- A modal will open for creating the action
- Click Create to add it to your Google Ads account
- The new action will appear in the dropdown
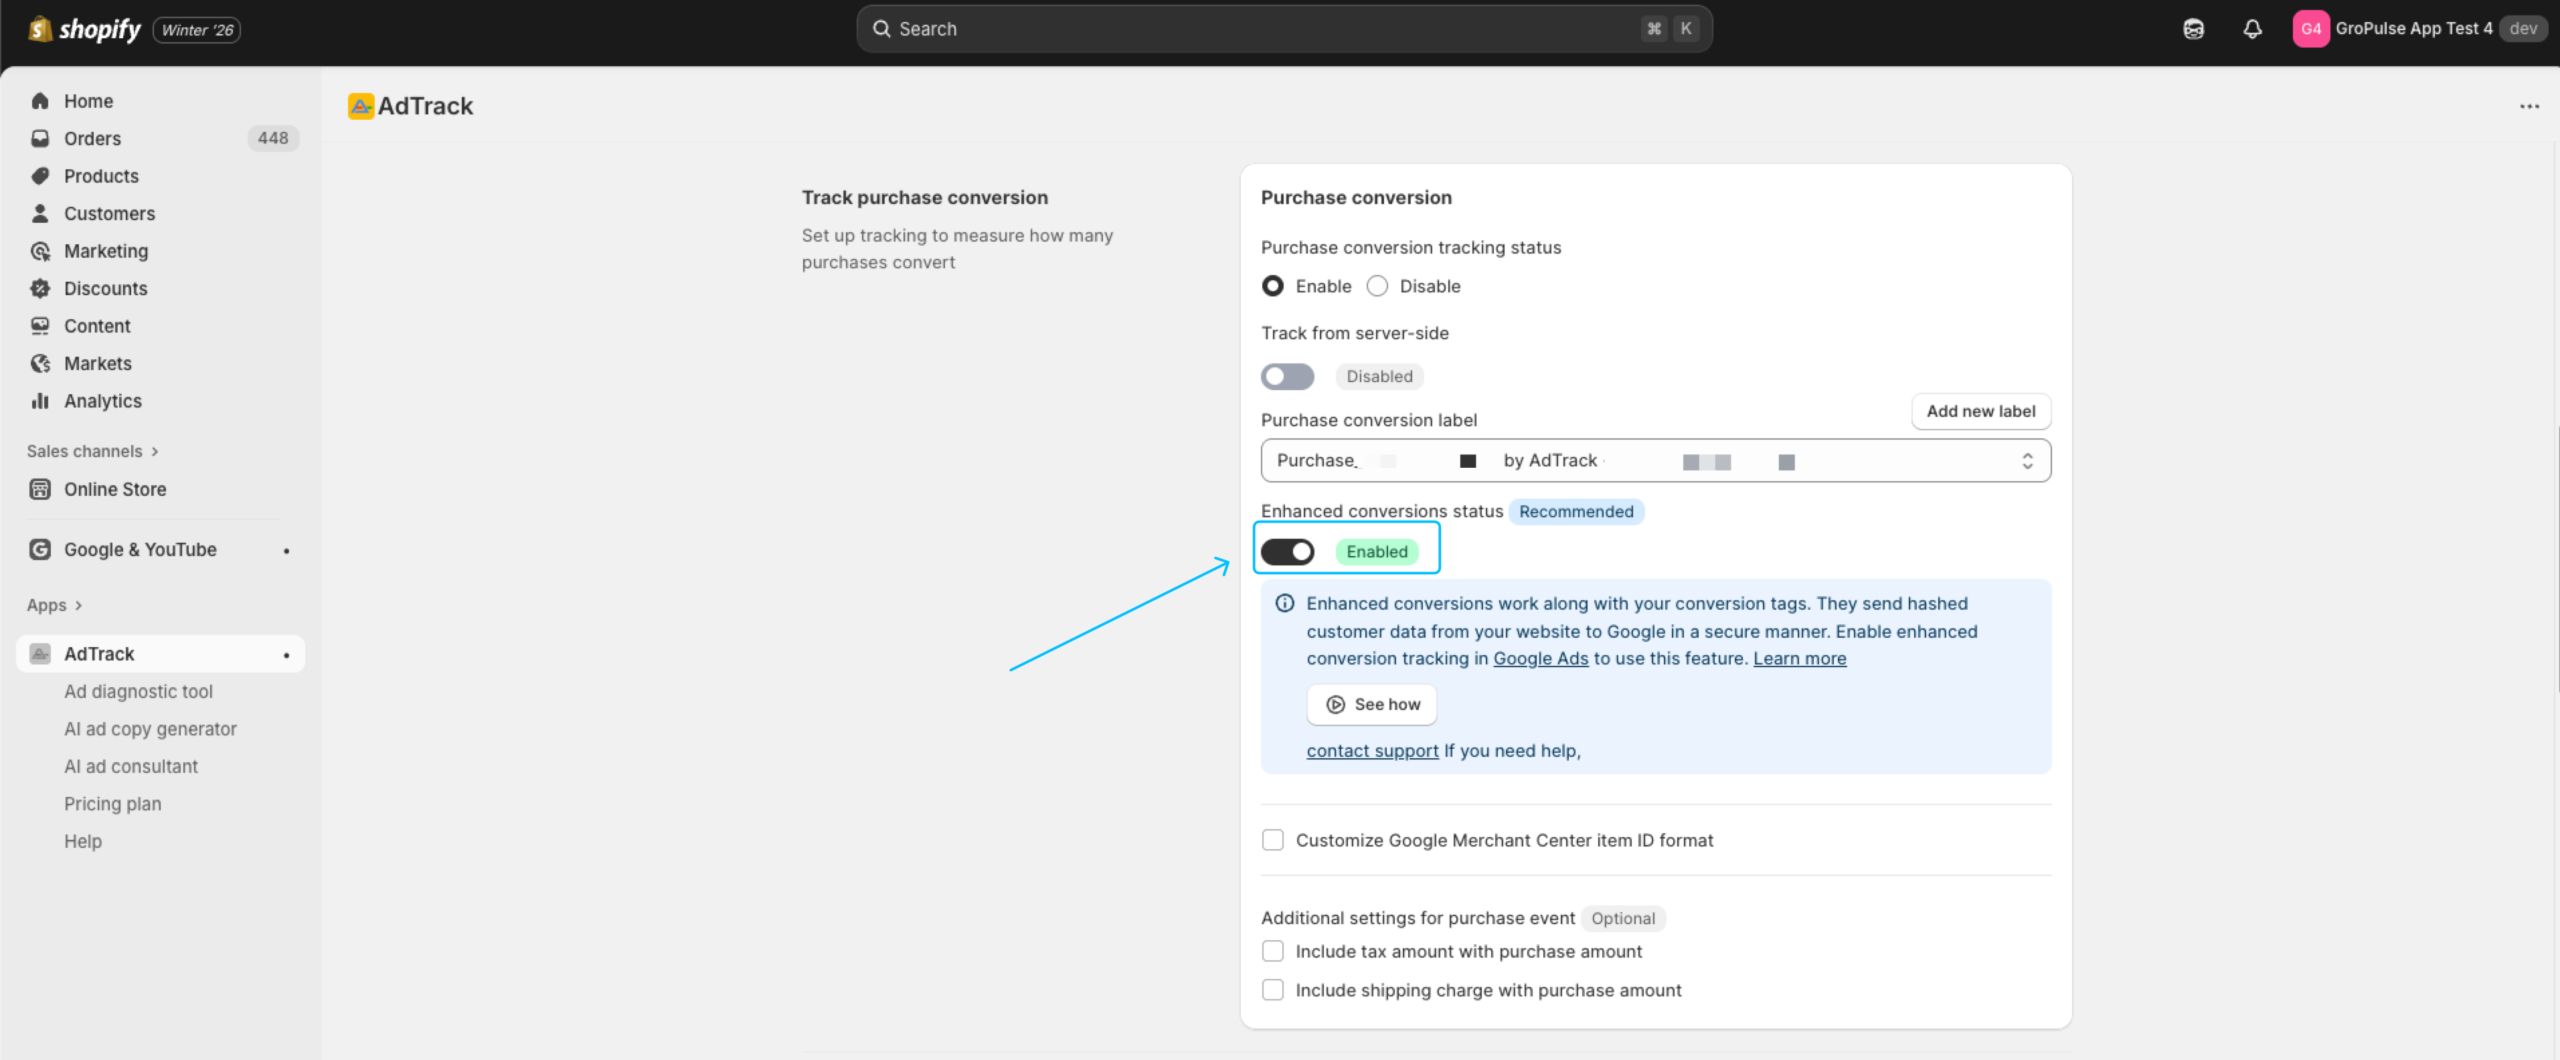
Enhanced Conversions
Enhanced conversions improve the accuracy of your conversion measurement by sending hashed customer data to Google Ads.
Enabling Enhanced Conversions
- Find the Enhanced Conversions Status toggle
- Click to enable (the Recommended badge indicates this is suggested)
- A confirmation banner will appear with setup instructions
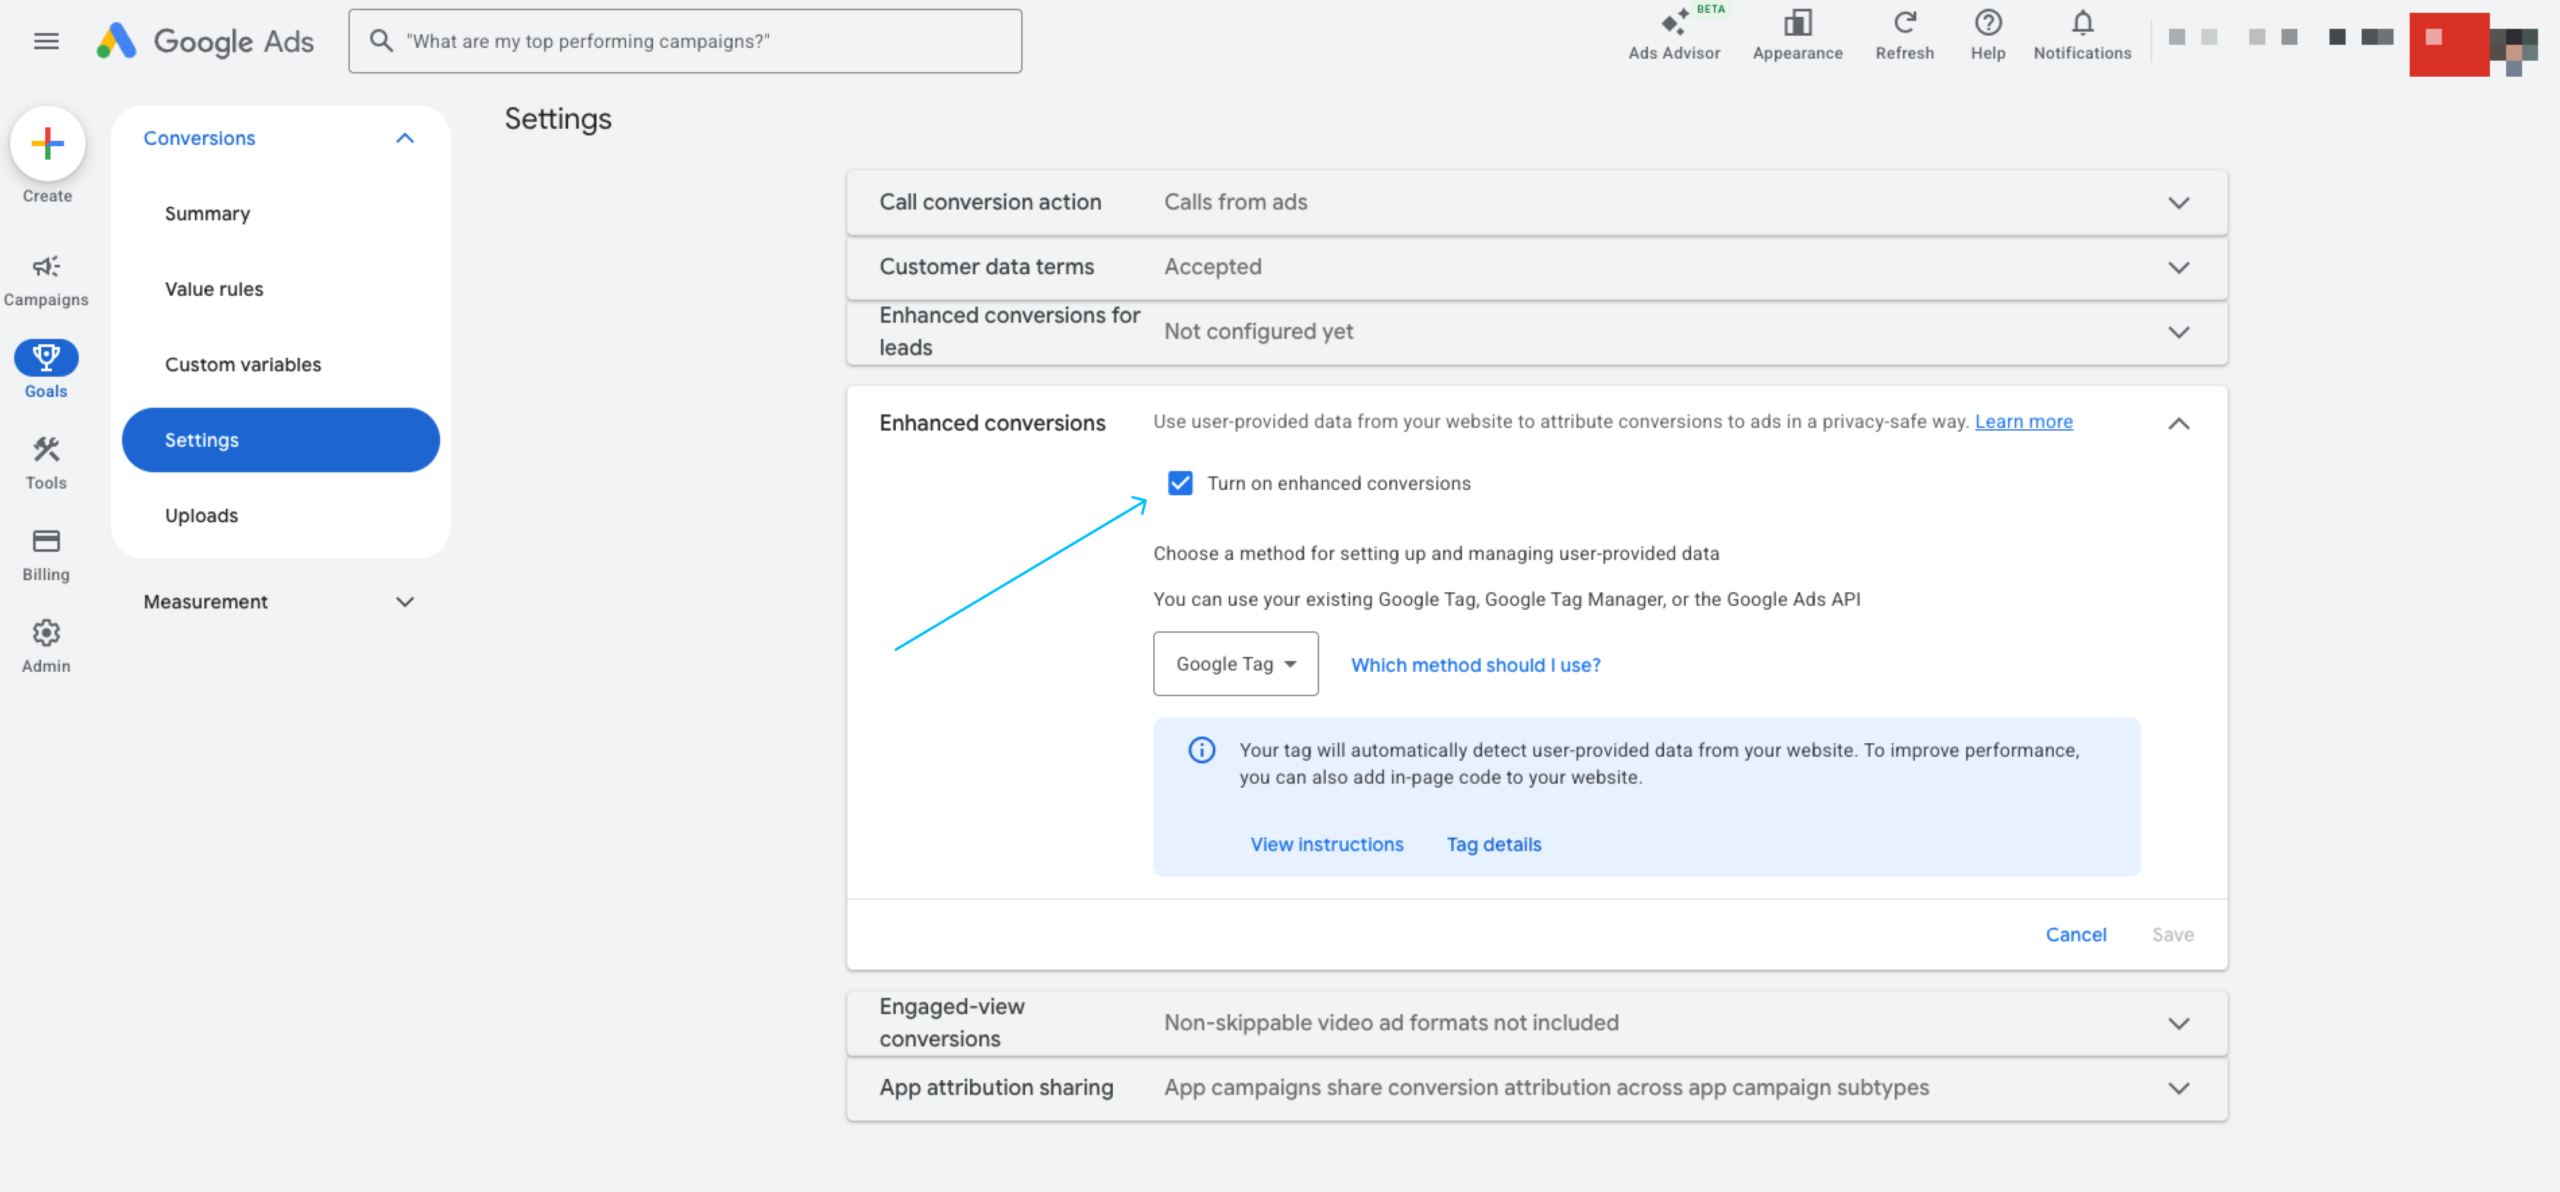
Required Google Ads Setup
After enabling in AdTrack, you must also enable in Google Ads:
- The app shows a banner with instructions
- Go to your Google Ads account
- Navigate to the conversion action settings
- Enable Enhanced Conversions there as well
- Click the provided link for detailed instructions
Data Sent with Enhanced Conversions
- Hashed email address
- Hashed phone number
- All data is securely hashed before transmission
Server-Side Tracking (Auto Mode Only)
Server-side tracking sends conversion data directly from your server to Google Ads, improving accuracy and reliability.
Enabling Server-Side Tracking
- Find the Track from server side toggle
- Click to enable (toggle turns on)
- The conversion action dropdown will change to show server-side compatible actions
Selecting Server-Side Conversion Action
When server-side tracking is enabled:
- The dropdown shows Server-side Conversion Actions instead of labels
- Select an action that supports server-side tracking
- If none exist, create one using the Add new action button
Benefits of Server-Side Tracking
- More reliable – Not affected by browser restrictions
- Better accuracy – Captures conversions even if tracking script is blocked
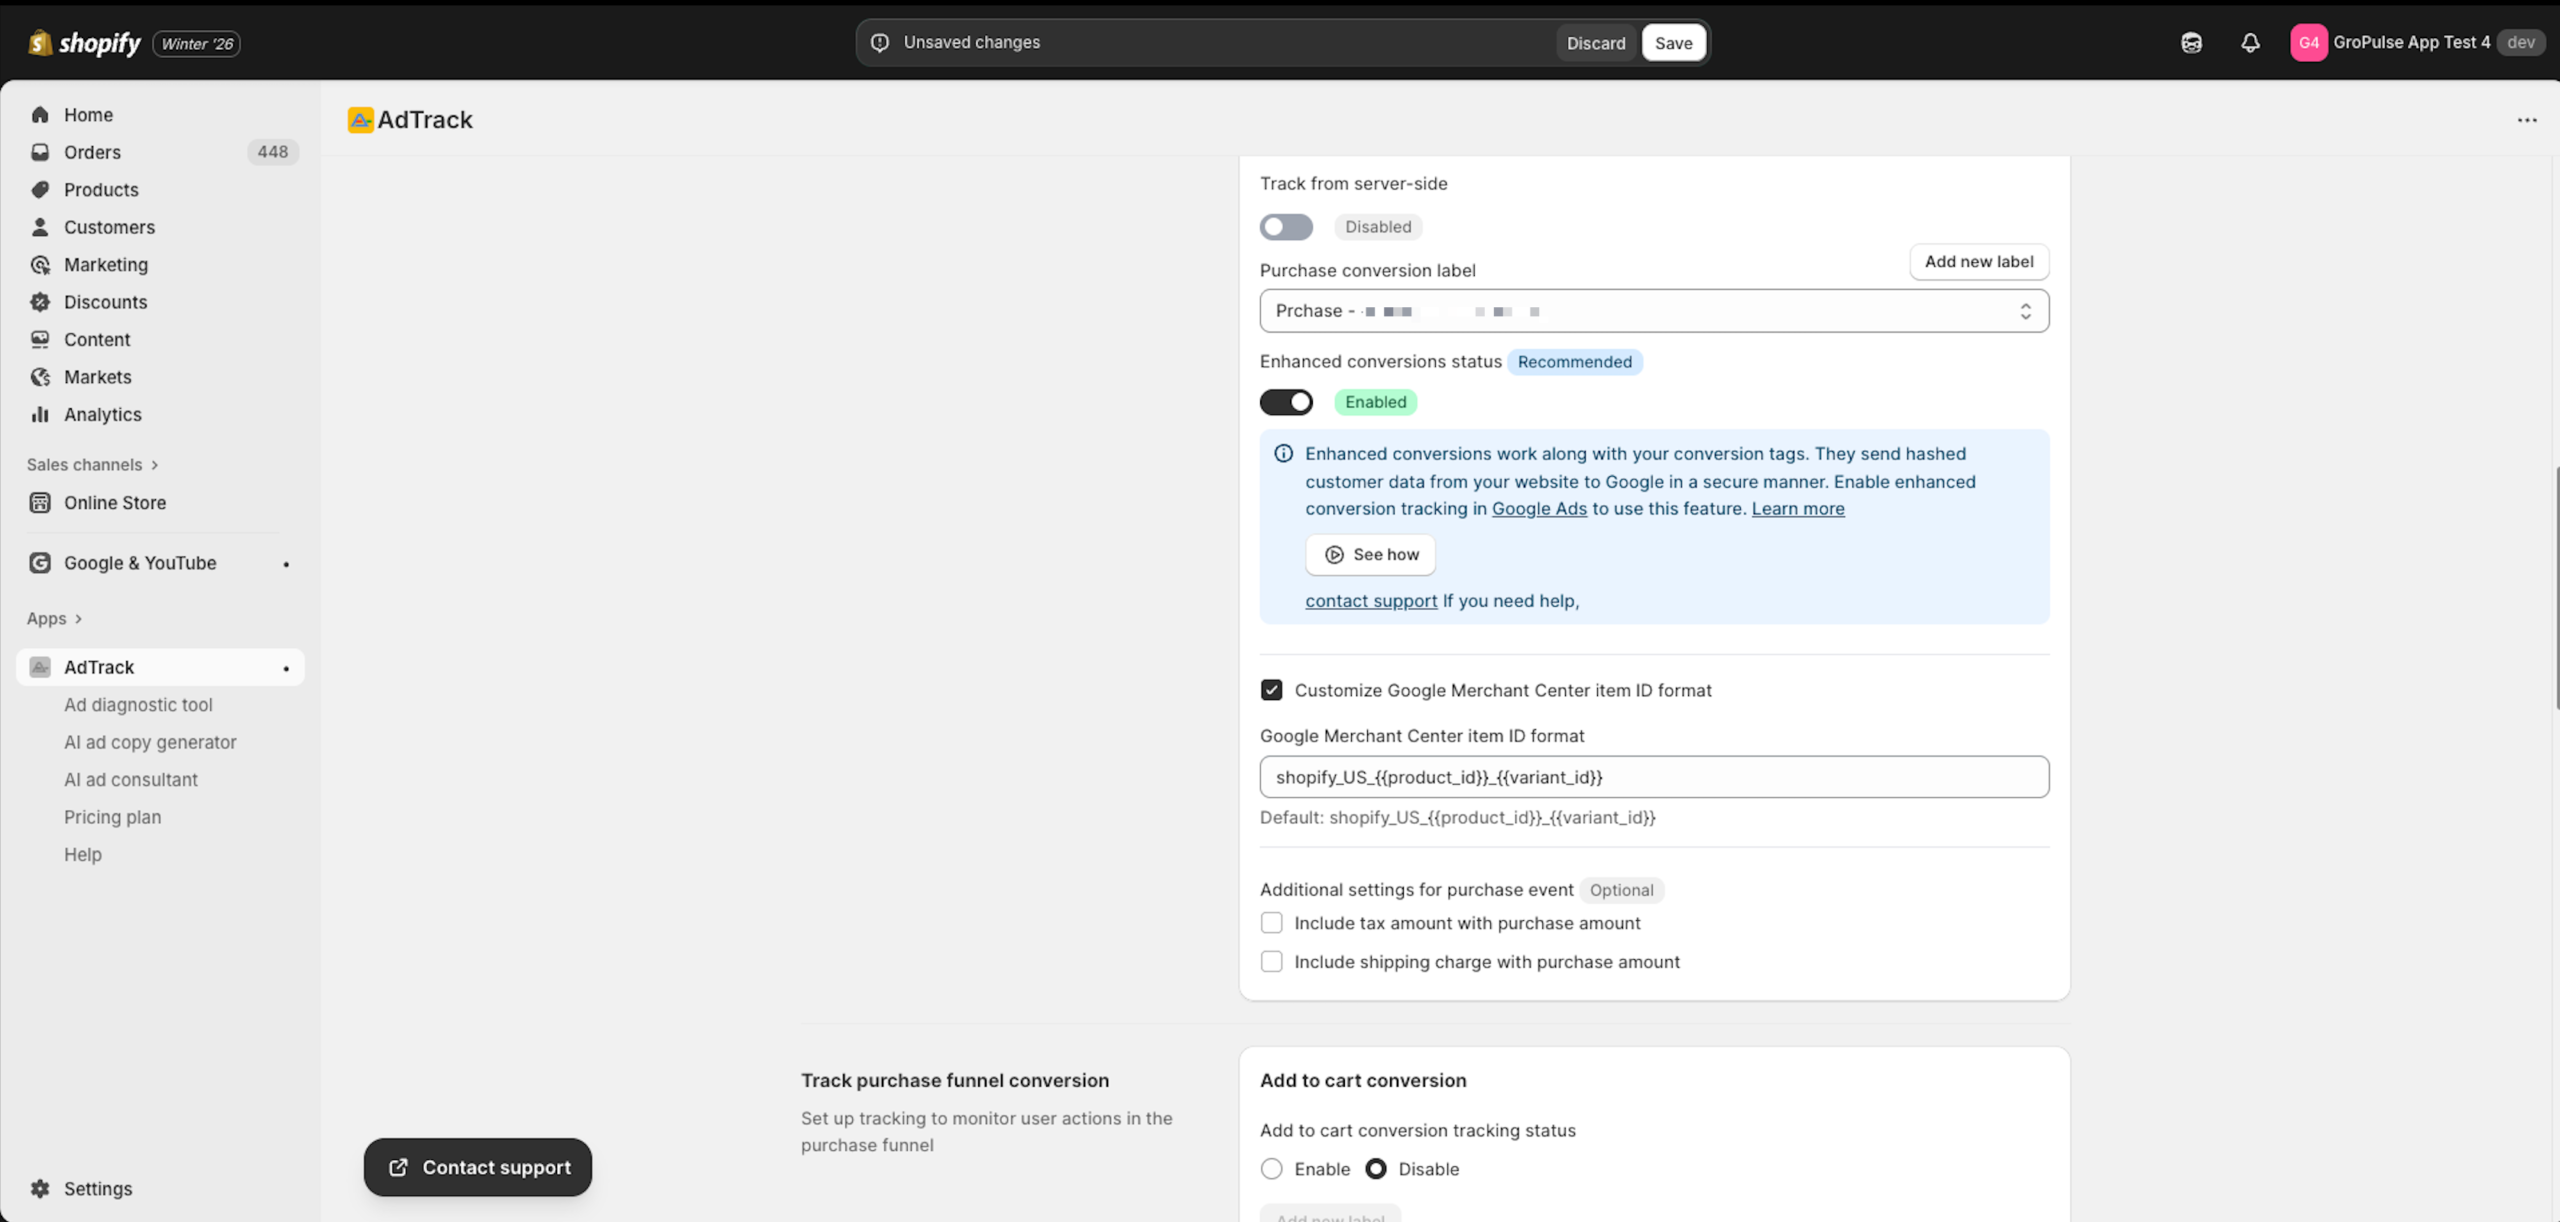
Merchant Center Item ID Format
Configure how product IDs are sent to Google for conversion tracking.
Default Format
The default format follows Google Merchant Center conventions:
shopify_US_{{product_id}}_{{variant_id}}Customizing the Format
- Check the Customize Merchant Center Item ID format checkbox
- The format field becomes editable
- Modify the format as needed
Available Variables
| Variable | Description |
|---|---|
{{product_id}} | Shopify product ID |
{{variant_id}} | Shopify variant ID |
Additional Settings
Include Tax Amount
- Find the Include tax amount in conversion value checkbox
- Check to include taxes in the reported revenue
- Leave unchecked to report net revenue only
Include Shipping Charges
- Find the Include shipping charges in conversion value checkbox
- Check to include shipping in the reported revenue
- Leave unchecked to report product revenue only
Saving Your Settings
- After making all changes, a save bar appears at the top
- Click Save to apply your settings
- A success message confirms the changes are saved
Verifying Purchase Tracking
After configuration, verify your setup:
On the Dashboard
- Go to the AdTrack Dashboard
- Find the Purchase Conversion Tracking section
- Verify:
- Tracking Status shows Enabled
- Conversion Label shows Complete
With a Test Order
- Place a test order on your store
- Wait 24-48 hours for data to appear in Google Ads
- Check your Google Ads Conversions report
Best Practices
- Always enable Enhanced Conversions – Significantly improves accuracy
- Include or exclude tax consistently – Match your reporting preferences
- Test after setup – Place a test order to verify tracking