Help categories are the core of HelpMate. They organize your FAQs and help content into logical groups that customers can easily navigate. This guide covers creating, editing, and managing your help categories.
Overview
Each help category contains:
- Category name – Displayed in the help widget navigation
- Type – Either a regular “Category” or a “Feature”
- Questions and answers – The FAQ content within the category
Categories appear in the help widget on your storefront, allowing customers to find answers to common questions without contacting support.
Viewing Your Categories
All your help categories are displayed on the dashboard in the Help categories section:
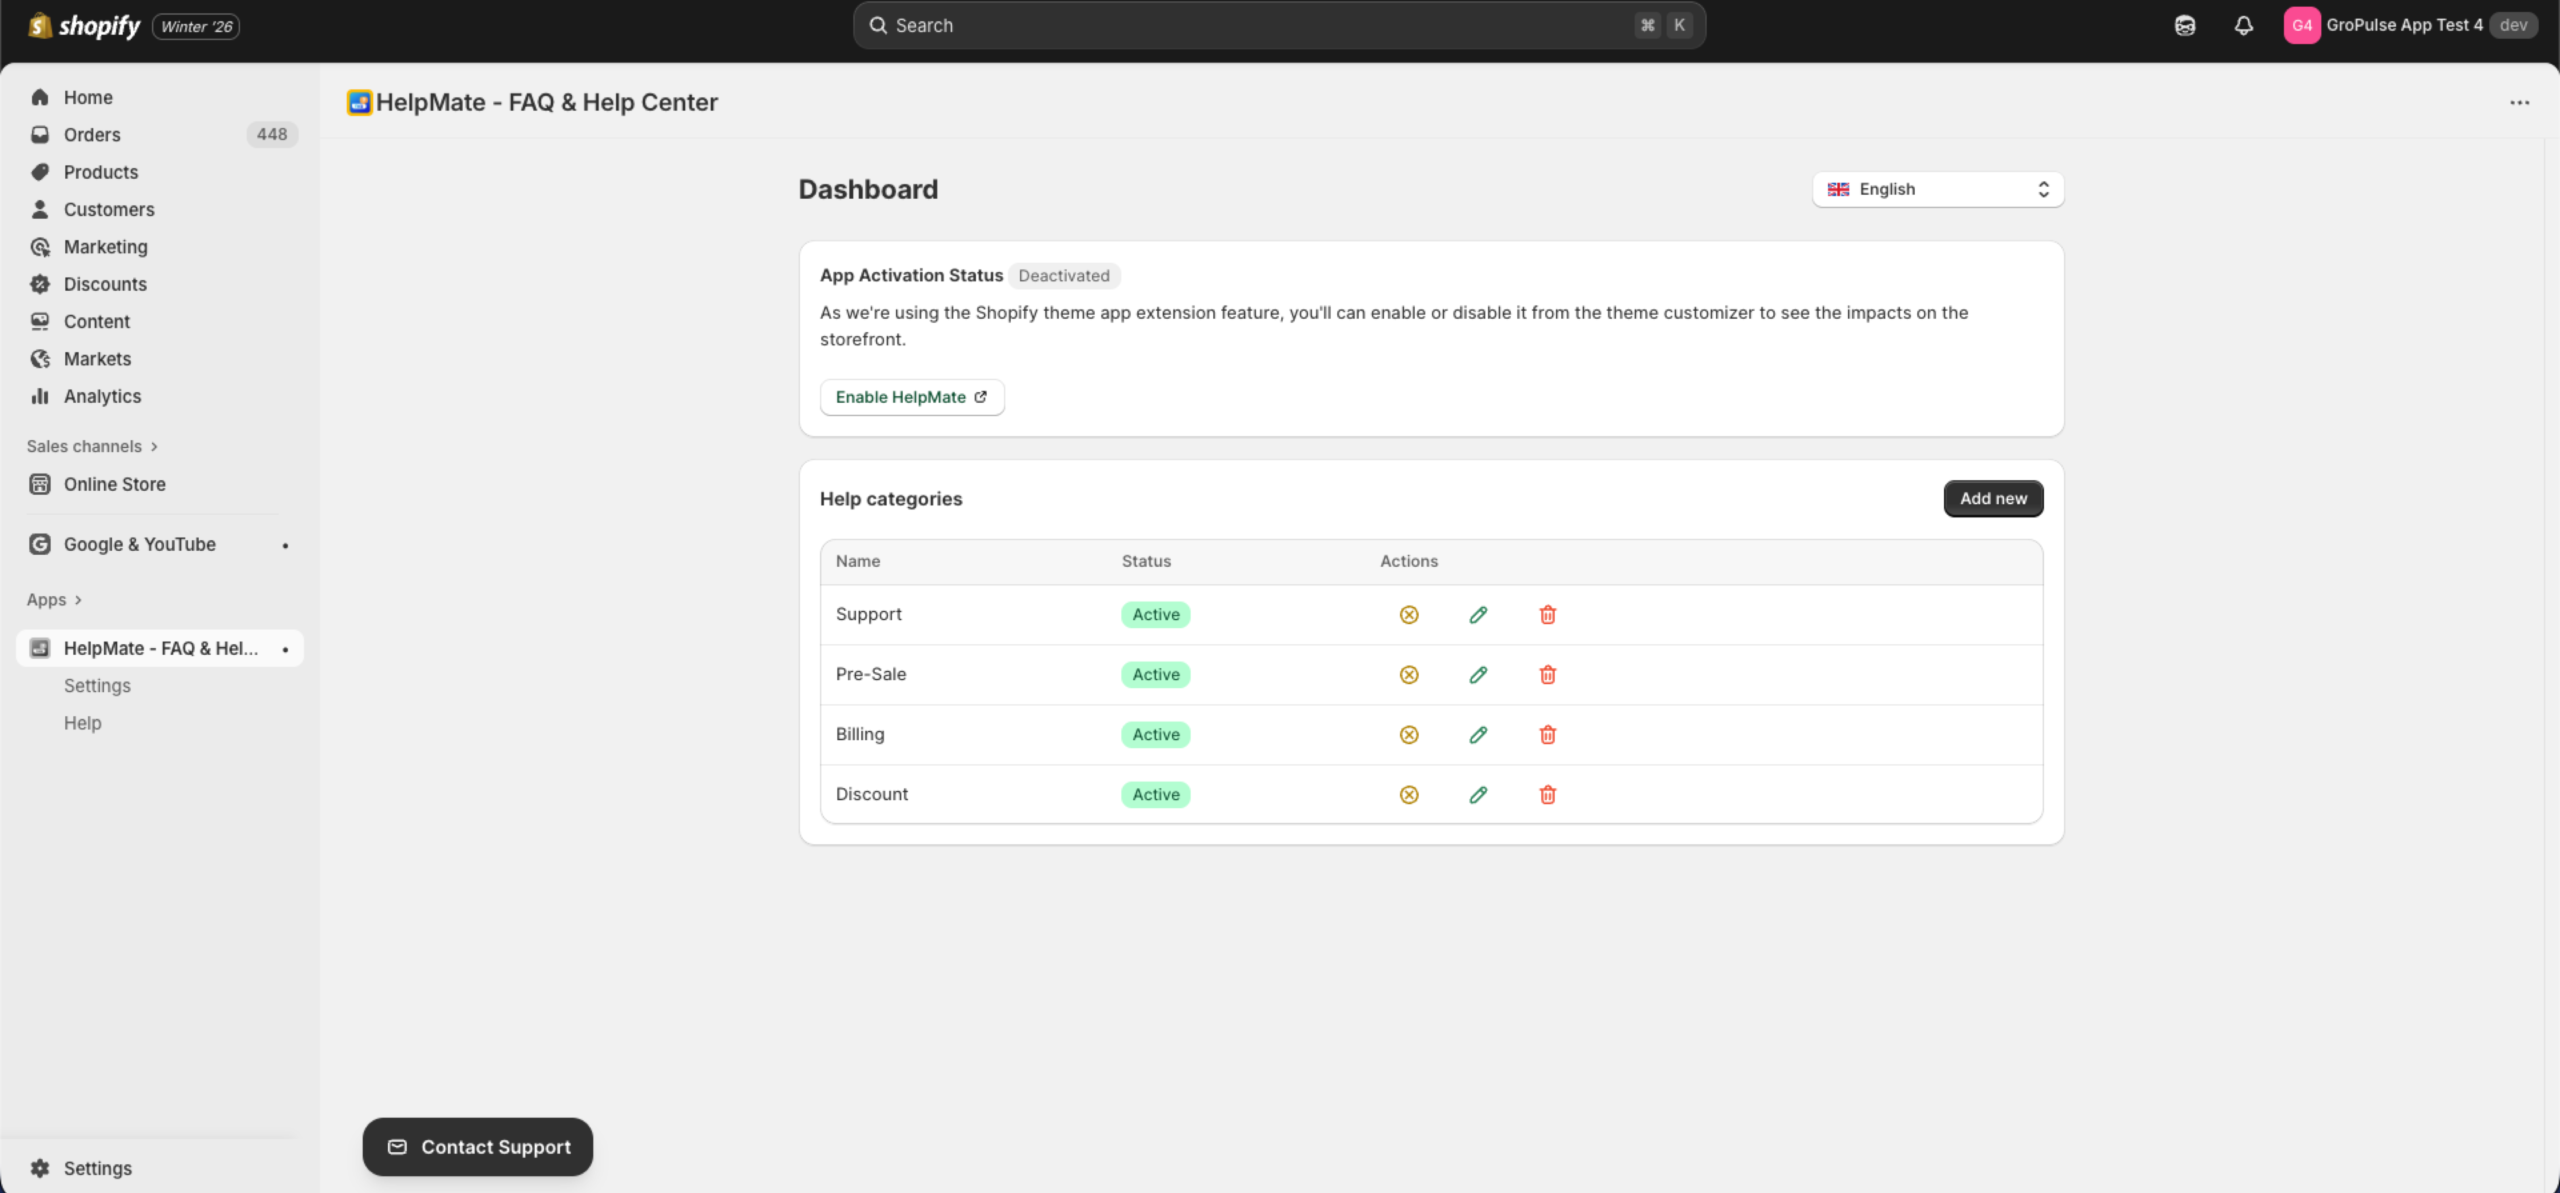
Each row shows:
- Name – The category title
- Status – “Active” (green badge) or inactive
- Actions – Toggle, Edit, and Delete buttons
Creating a New Category
Step 1: Open the Create Form
- Go to the HelpMate dashboard
- Click the Add new button in the Help categories section

Step 2: Enter Category Details
You will see the Create New Category form:
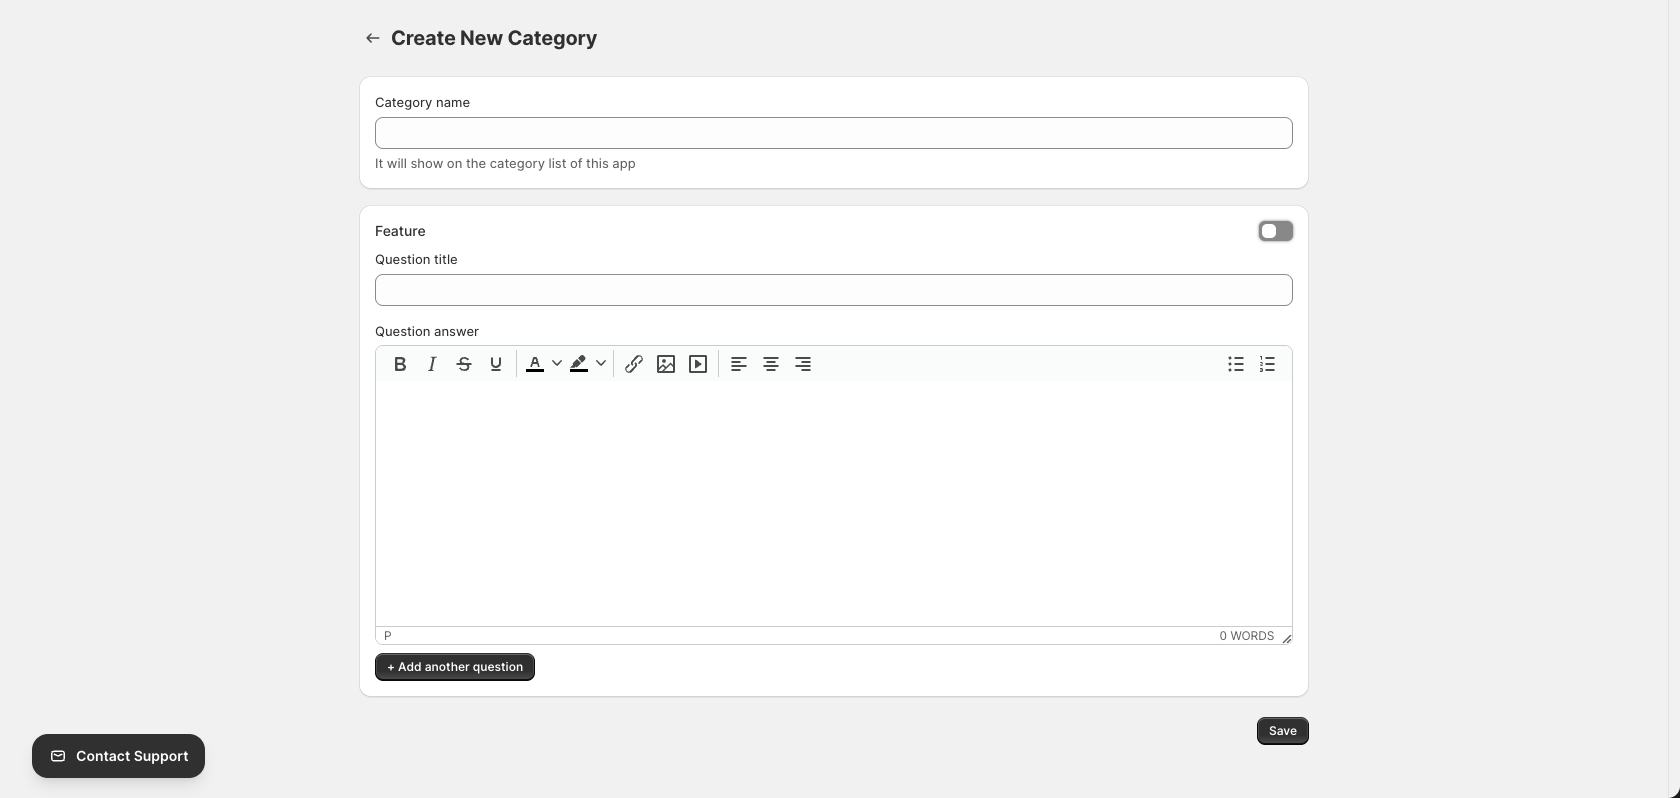
Category Name
Enter a descriptive name for your category. This will be displayed in the help widget.
- Examples: “Shipping & Delivery”, “Returns & Refunds”, “Payment Options”, “Account Help”
- Keep names concise but descriptive
Feature Toggle
The Feature toggle determines how the category is classified:
| Setting | Description |
|---|---|
| Off (default) | Regular help category – displayed in the main category list |
| On | Feature category – displayed in a separate “Features” section |
Use the Feature toggle to highlight special content or separate product features from general FAQs.
Step 3: Add Questions and Answers
Each category should contain at least one question and answer:
Question Title
Enter the question exactly as a customer might ask it:
- “How long does shipping take?”
- “What is your return policy?”
- “How do I reset my password?”
Question Answer
Use the rich text editor to format your answer:
Rich Text Editor Features:
| Button | Function |
|---|---|
| B | Bold text |
| I | Italic text |
| S | Strikethrough |
| U | Underline |
| A (with color) | Text color |
| Highlight | Background color |
| Link | Insert/edit hyperlink |
| Image | Insert image |
| Media | Embed video or media |
| Align | Left, center, or right alignment |
| Lists | Bullet or numbered lists |
Tip: Use formatting to make answers easy to scan. Bold important terms, use lists for steps, and include links to relevant pages.
Step 4: Add More Questions (Optional)
Click + Add another question to add multiple Q&As to the same category:

You can add as many questions as needed to each category.
Step 5: Save the Category
Click the Save button to create your category:

After saving, you will be redirected to the dashboard where your new category will appear in the list.
Editing a Category
Step 1: Access the Edit Form
From the dashboard, find the category you want to edit and click the Edit button (pencil icon) in the Actions column:

Step 2: Modify the Category
The Update Category form works the same as the Create form:
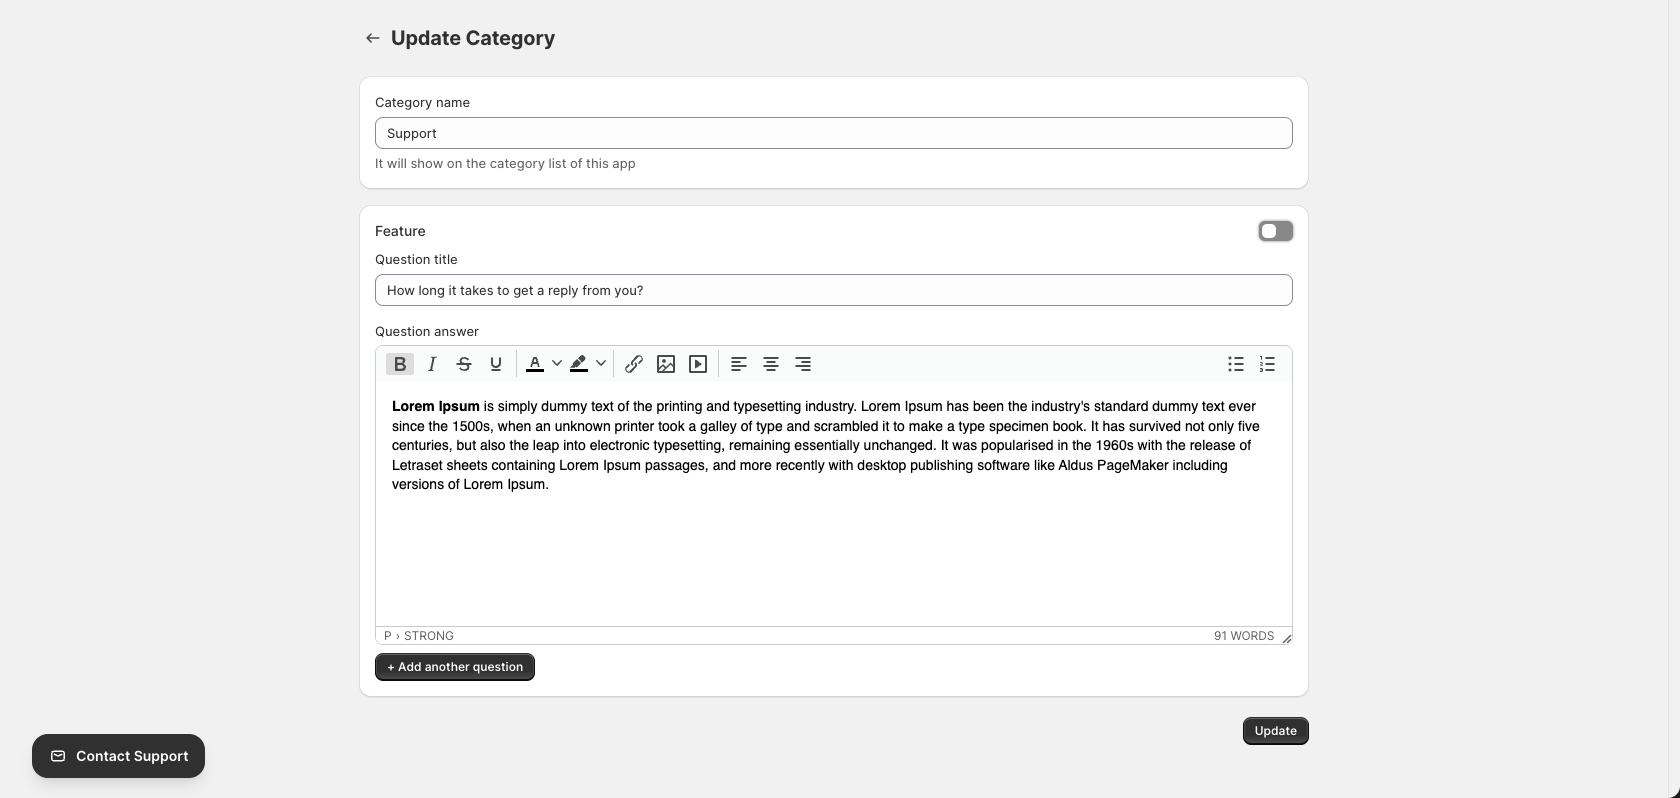
- Change the category name
- Toggle the Feature setting
- Edit existing questions and answers
- Add new questions
- Remove questions (if applicable)
Step 3: Save Changes
Click the Update button to save your changes:

Activating and Deactivating Categories
You can control which categories appear on your storefront by activating or deactivating them:
Activate a Category
Click the Activate button (toggle icon) on an inactive category:

The status will change to “Active” (green badge), and the category will appear in the help widget.
Deactivate a Category
Click the Deactivate button (toggle icon) on an active category:

The category will be hidden from the help widget but not deleted. You can reactivate it at any time.
Tip: Use deactivation to temporarily hide categories for seasonal content or while updating information.
Deleting a Category
To permanently remove a category:
- Find the category on the dashboard
- Click the Delete button (trash icon) in the Actions column

Warning: Deleting a category is permanent and cannot be undone. All questions and answers within the category will also be deleted.
Category Status Indicators
Categories can have the following statuses:
| Status | Badge Color | Meaning |
|---|---|---|
| Active | Green | Category is visible in the help widget |
| Inactive | Gray/None | Category is hidden from the help widget |
Best Practices
Organizing Categories
- Keep it simple – Use 3-7 main categories for easy navigation
- Use clear names – Choose names that customers will immediately understand
- Group related topics – Put similar questions in the same category
- Use Features sparingly – Reserve the Feature toggle for truly distinct content
Writing Effective Q&As
- Use customer language – Write questions the way customers ask them
- Be concise – Keep answers short and to the point
- Format for scanning – Use bold, lists, and headers for easy reading
- Include links – Link to relevant pages, policies, or external resources
- Update regularly – Review and update content as your business changes
Category Examples
| Category | Example Questions |
|---|---|
| Shipping | How long does delivery take? Do you ship internationally? |
| Returns | What is your return policy? How do I start a return? |
| Payment | What payment methods do you accept? Is checkout secure? |
| Products | How do I find my size? What materials do you use? |
| Account | How do I create an account? How do I reset my password? |
| Support | How can I contact you? What are your support hours? |